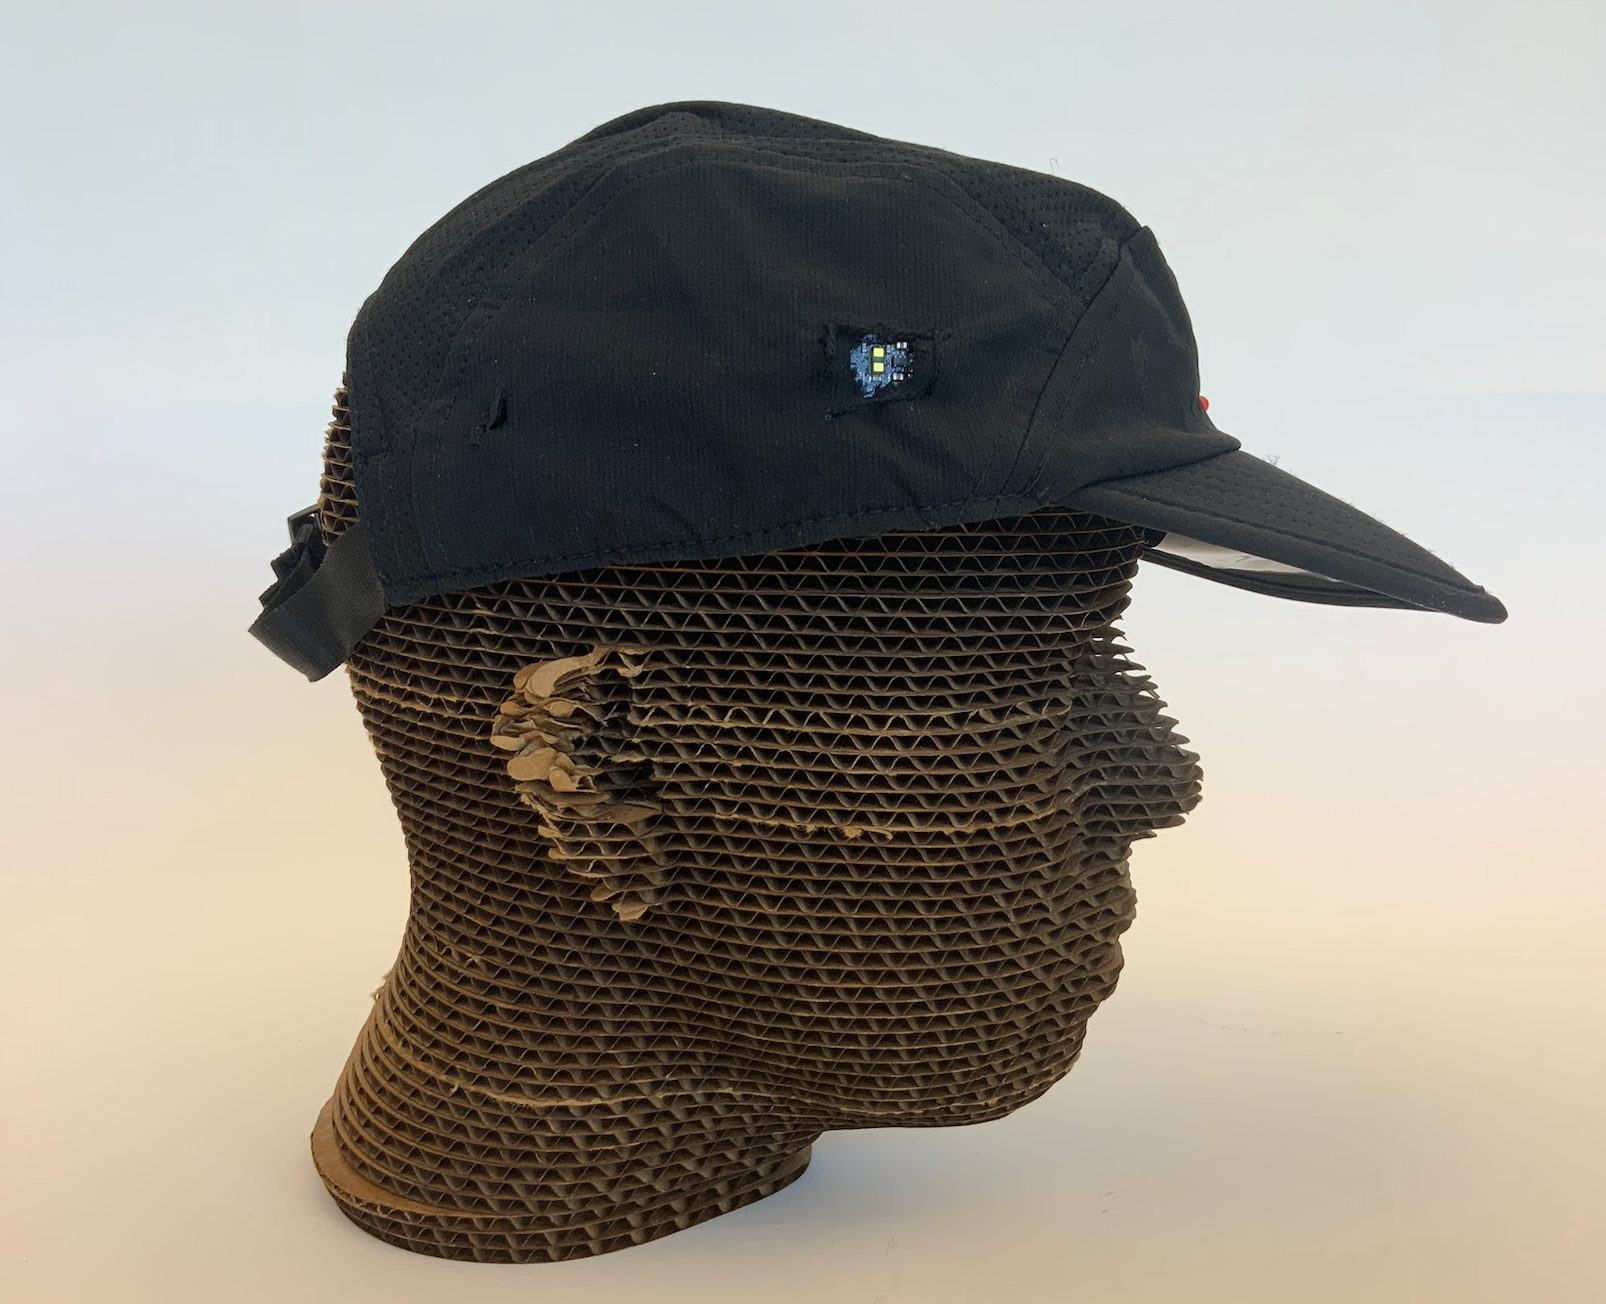
Have you ever been sitting in class with the professor explaining a lesson to you? The Confusion Cap is an interactive wearable that helps express the emotion of feeling confused!

Research and Story Development
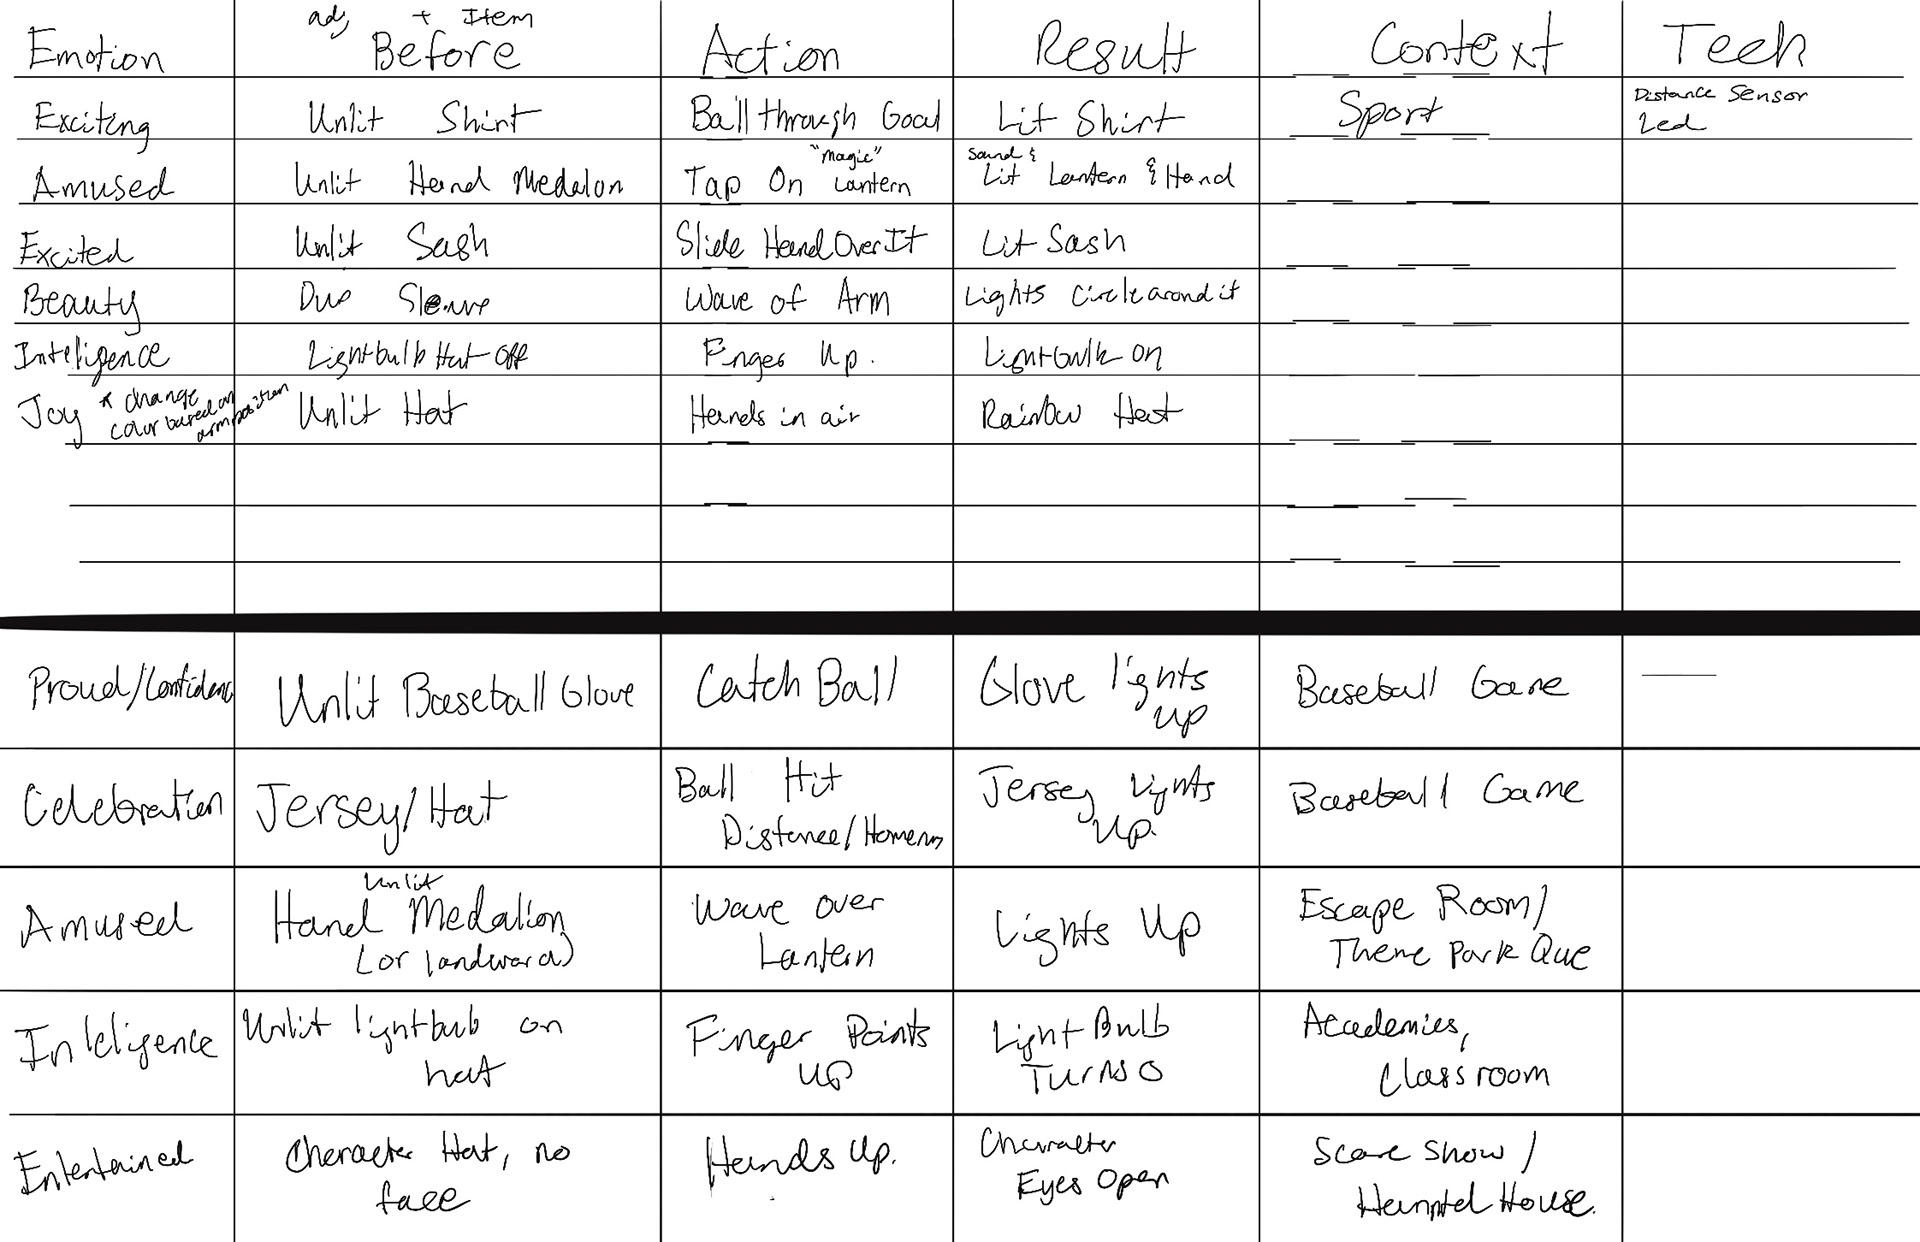
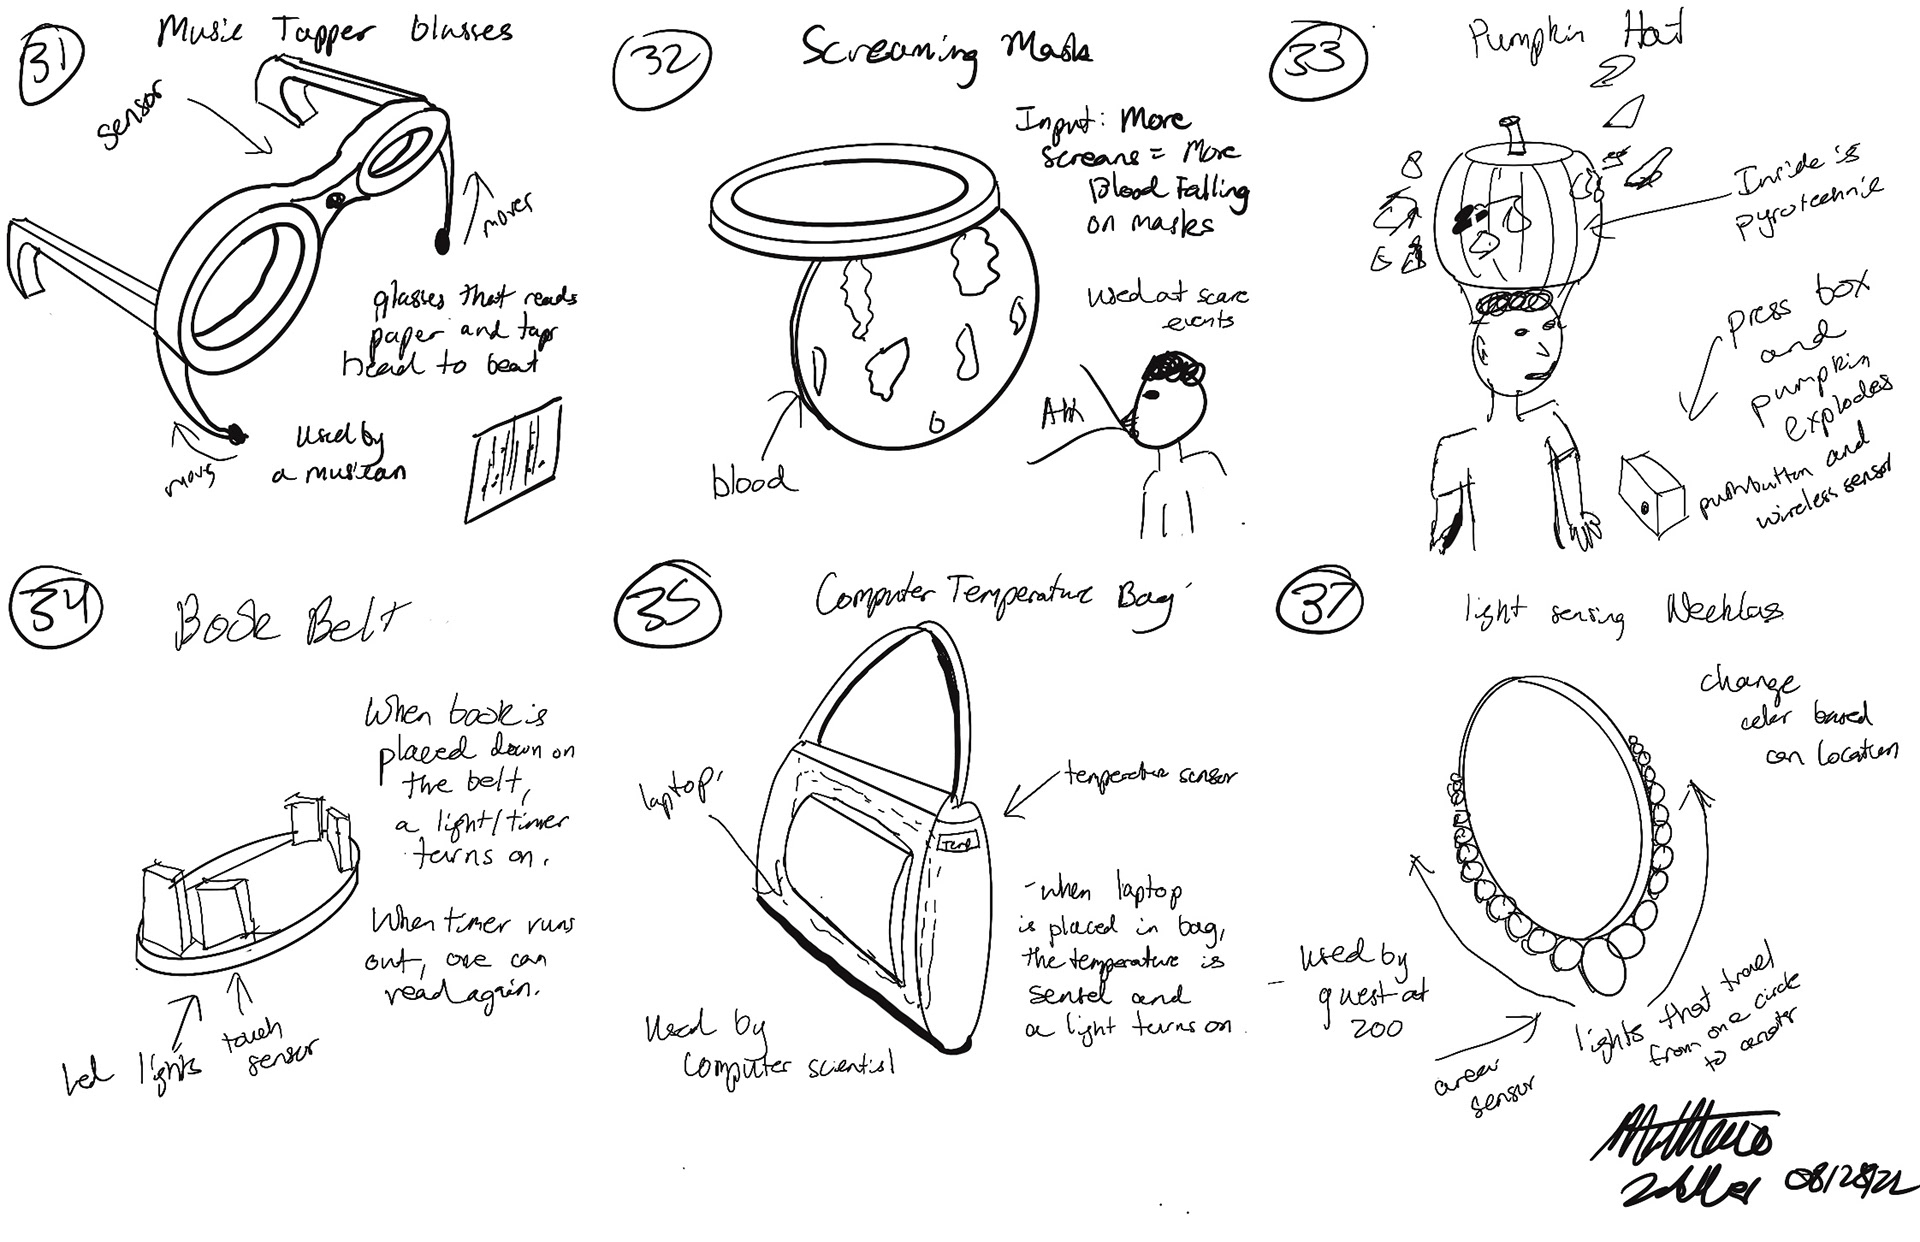
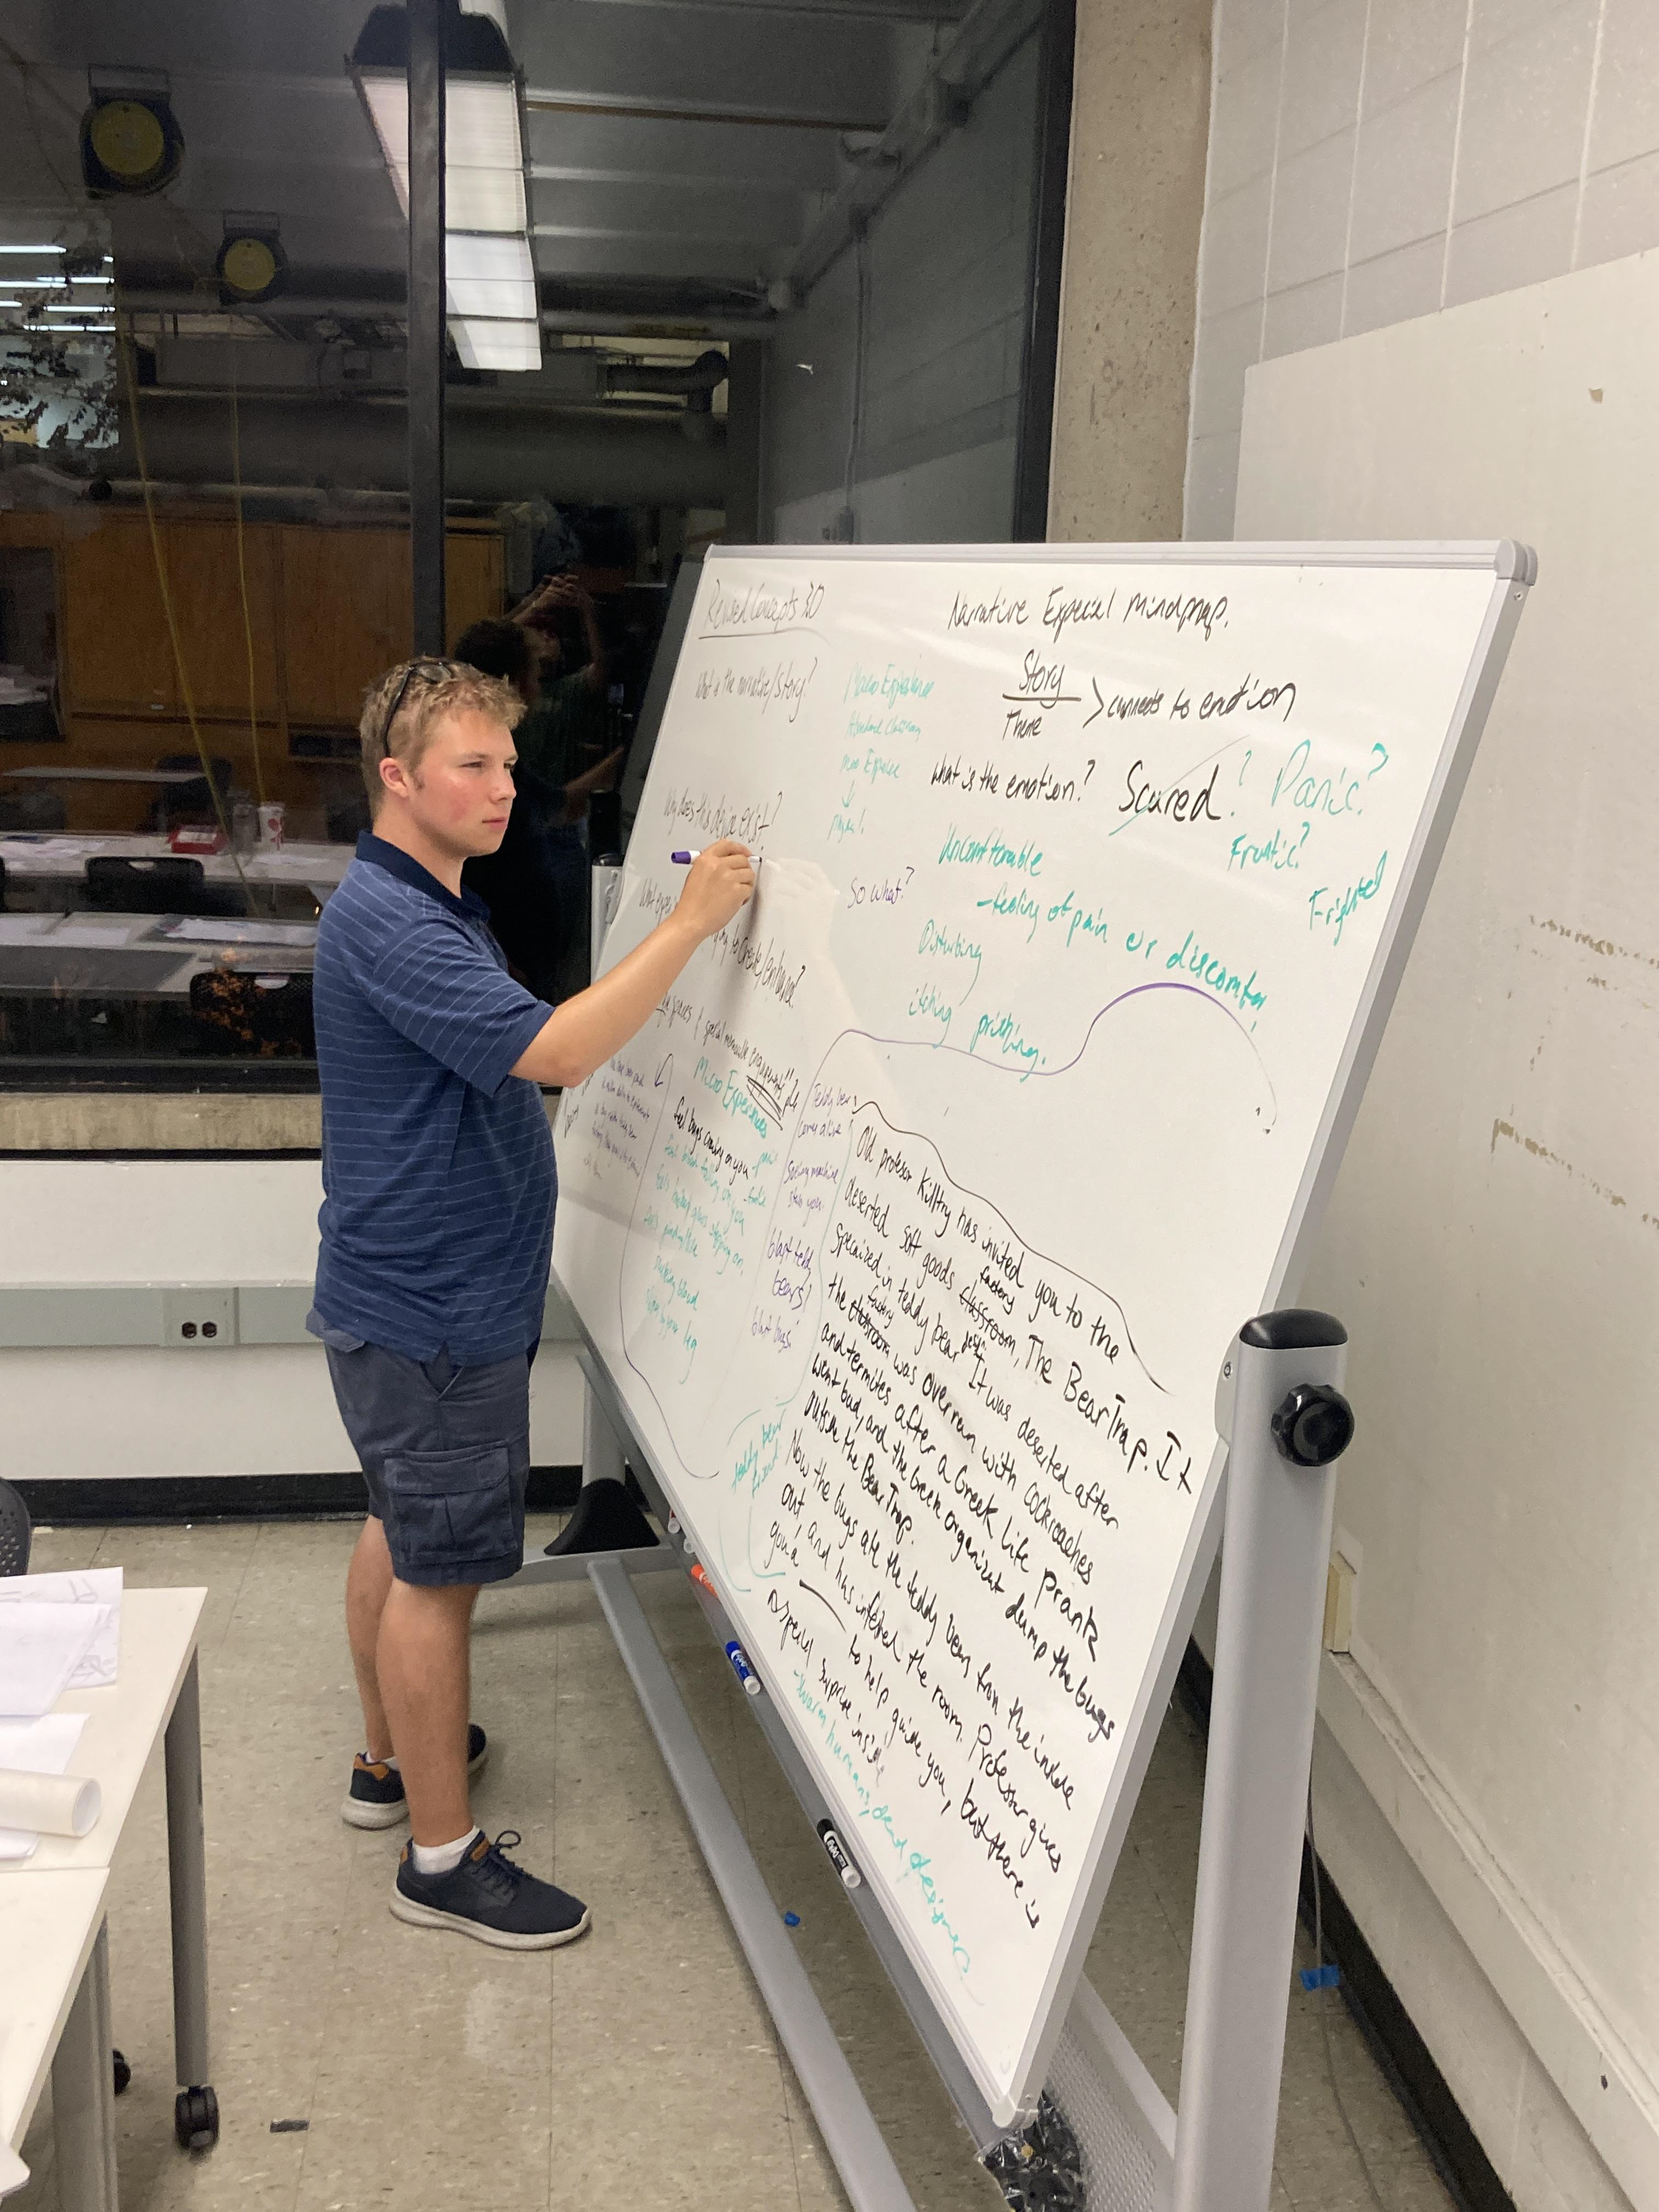
The process began with brainstorming different emotions people might feel at a time, the activity they might do when experiencing that emotion, and developing a short narrative/story surrounding that feeling.
Ideation
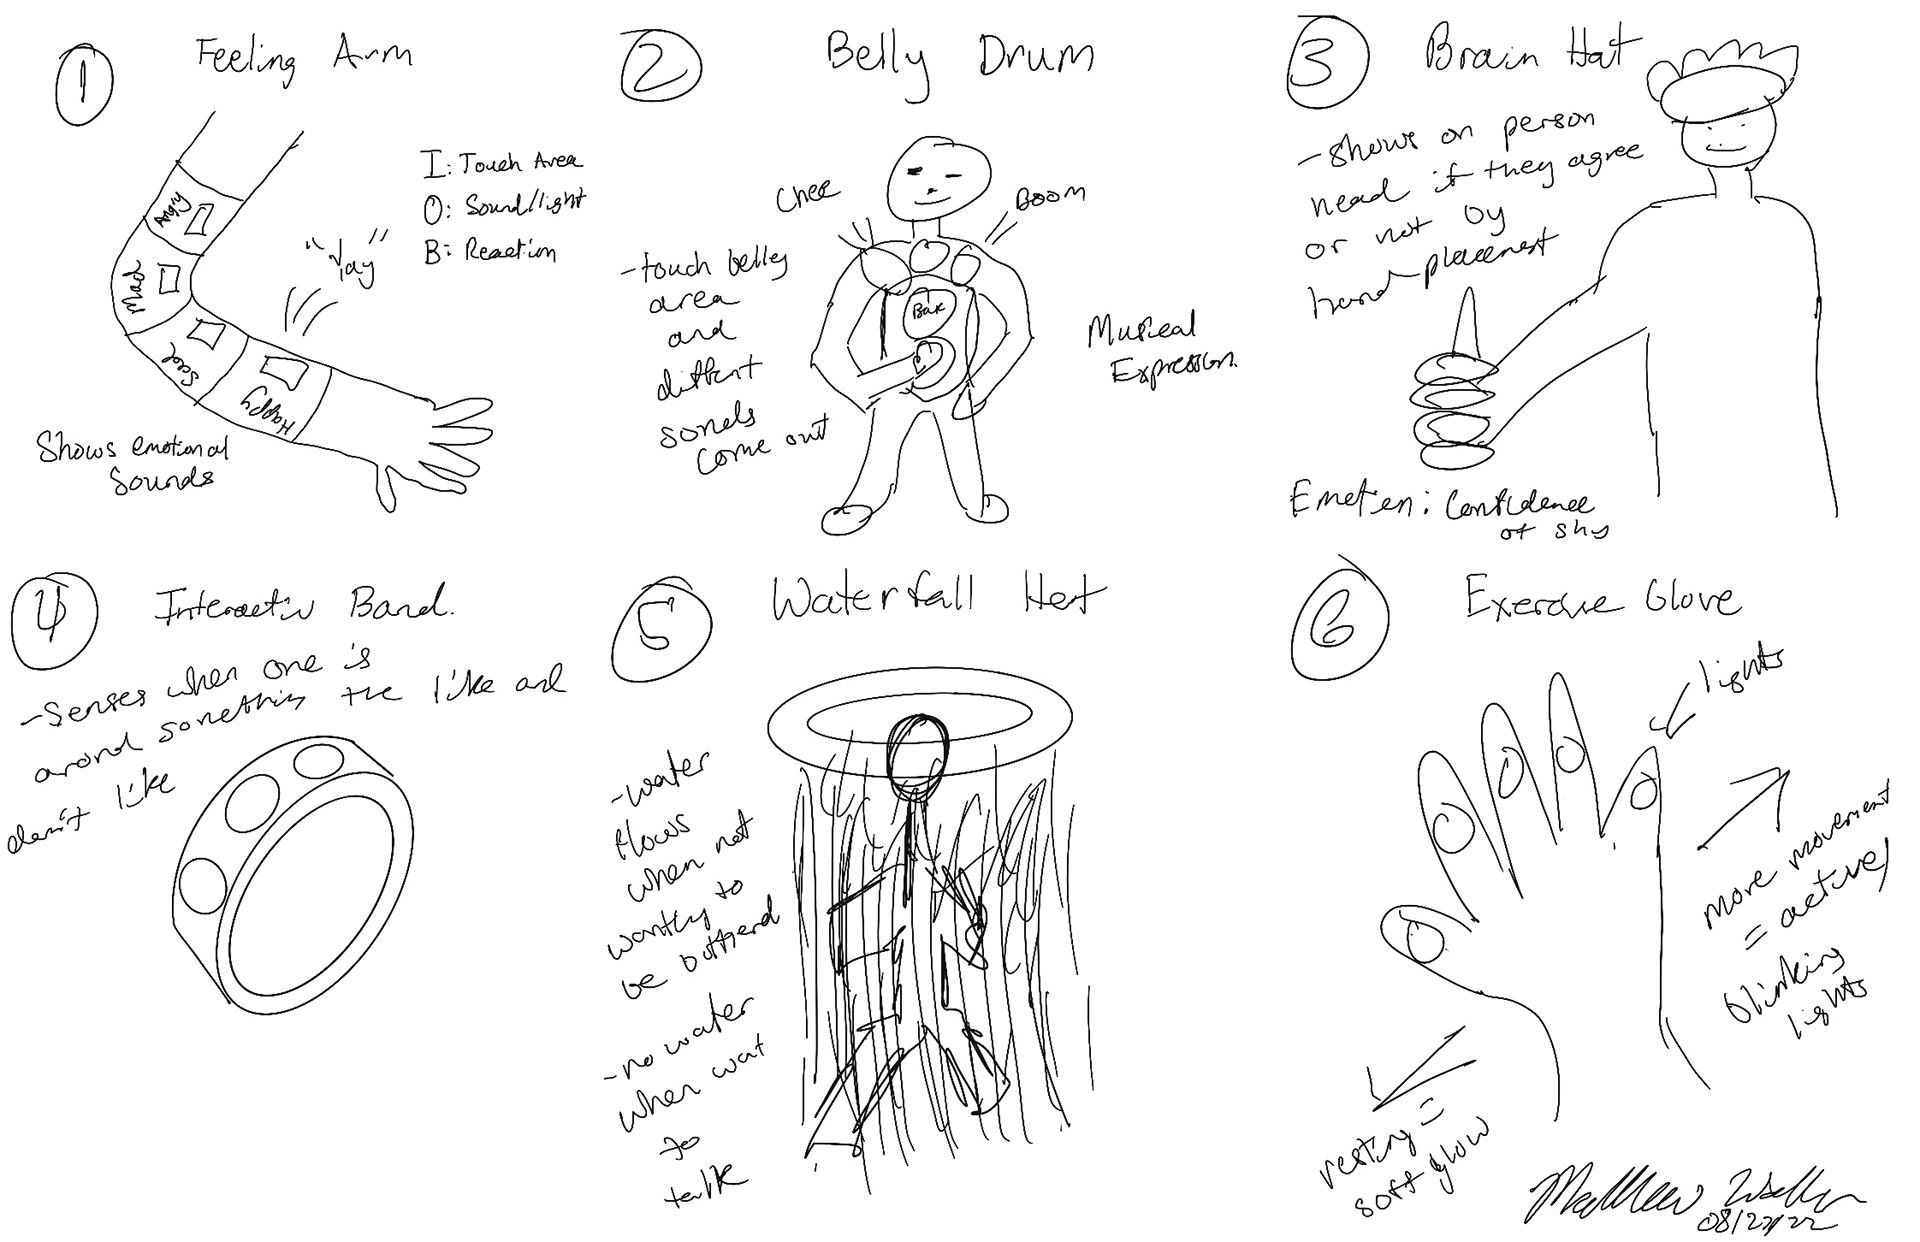
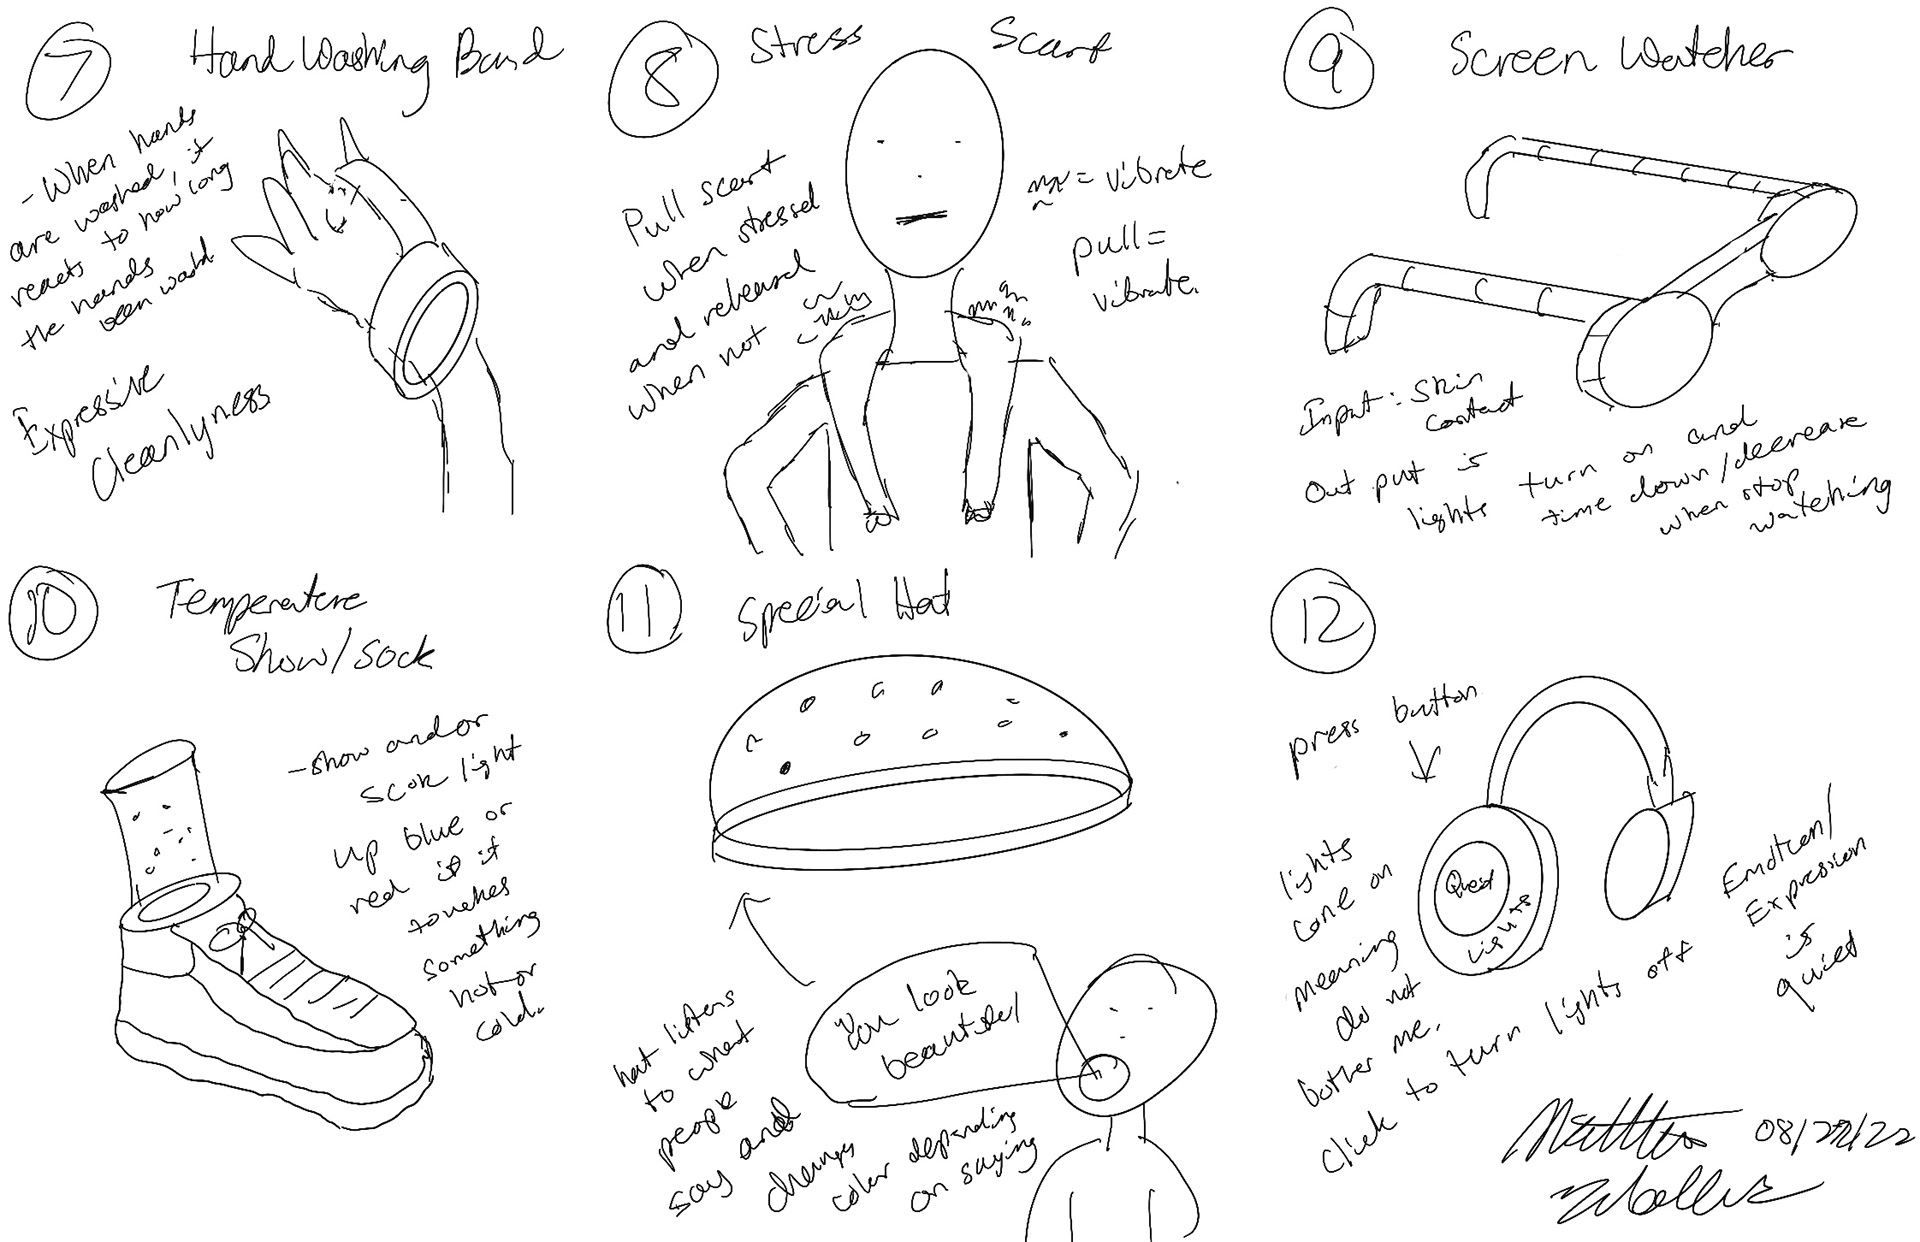
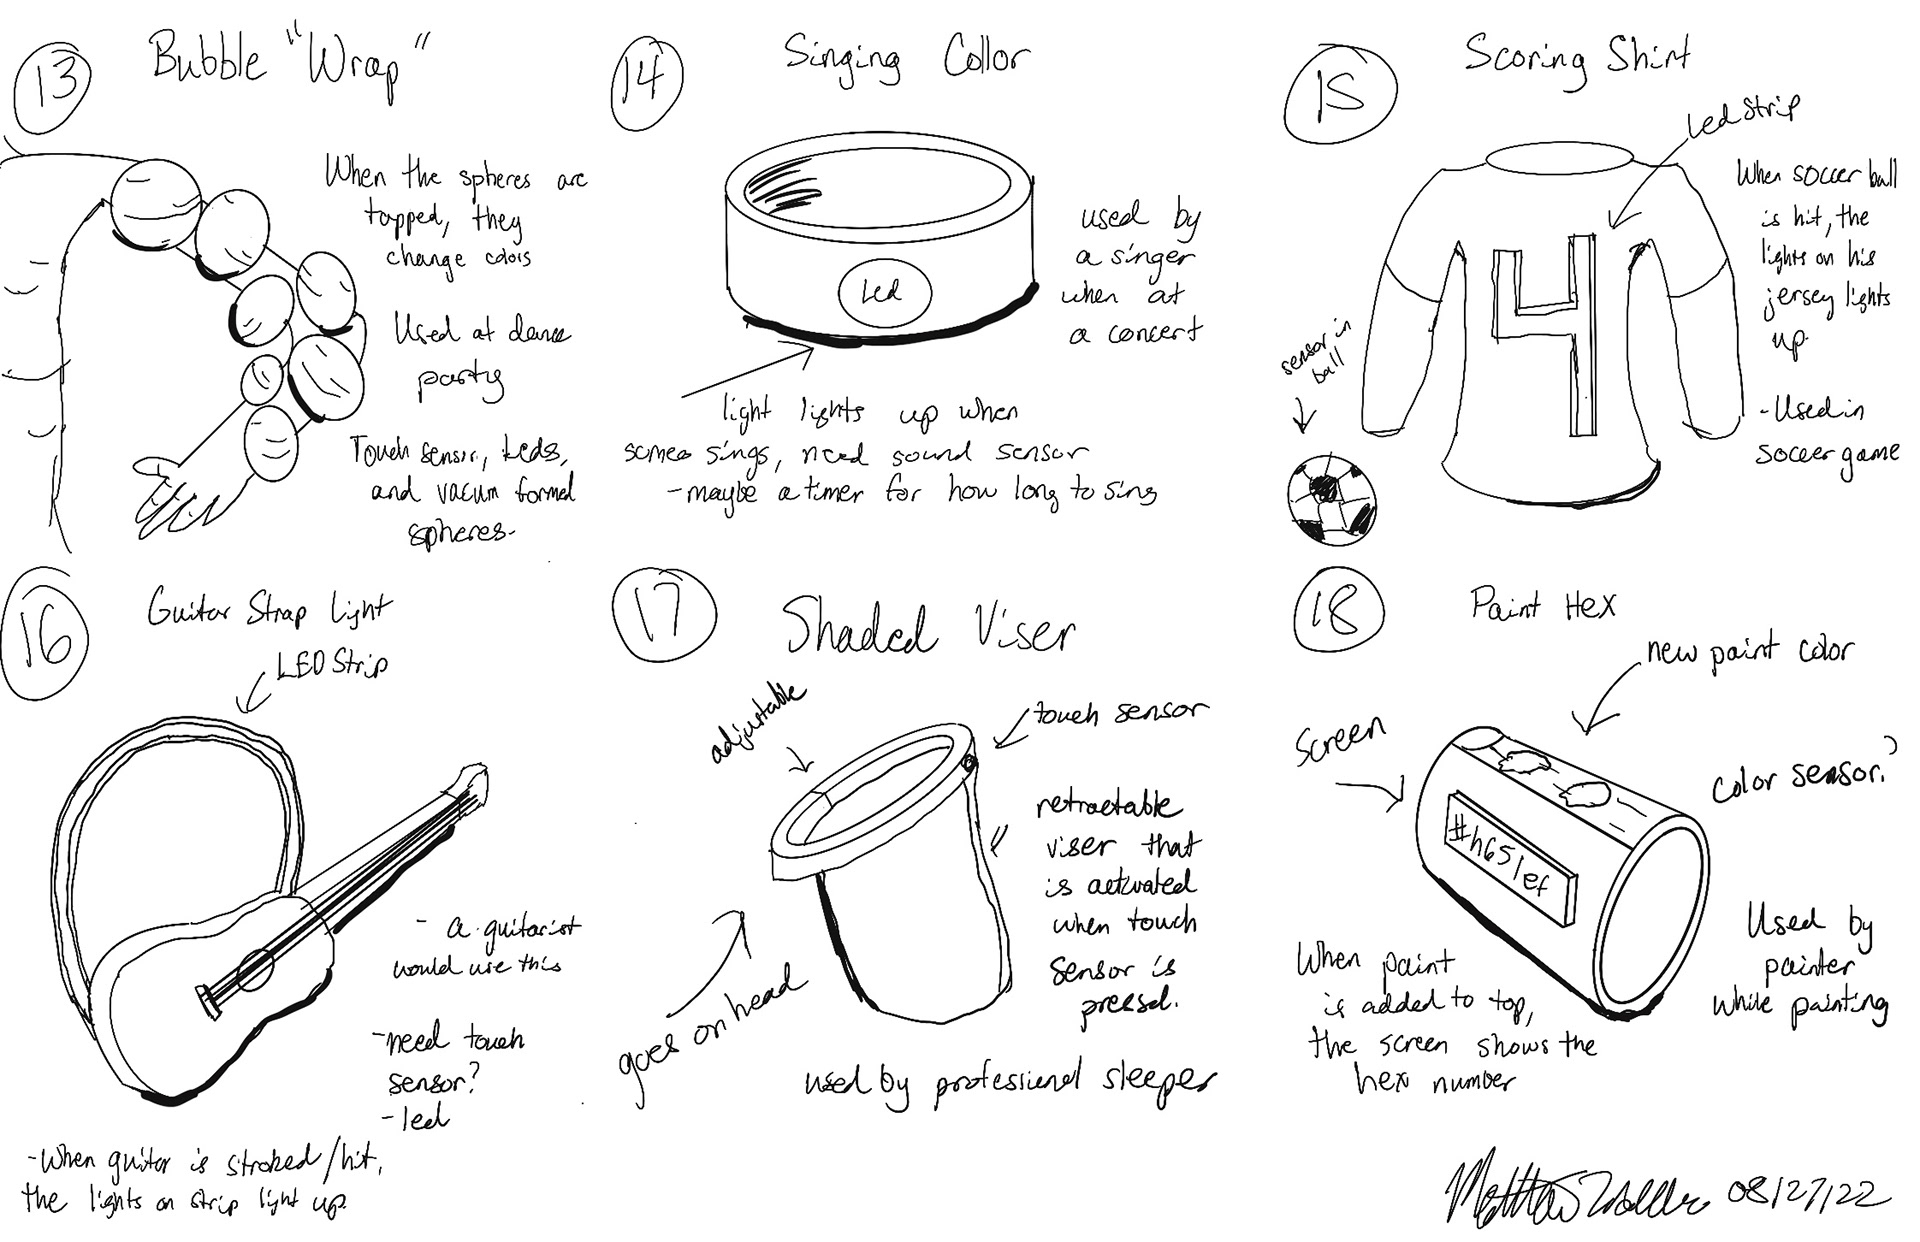
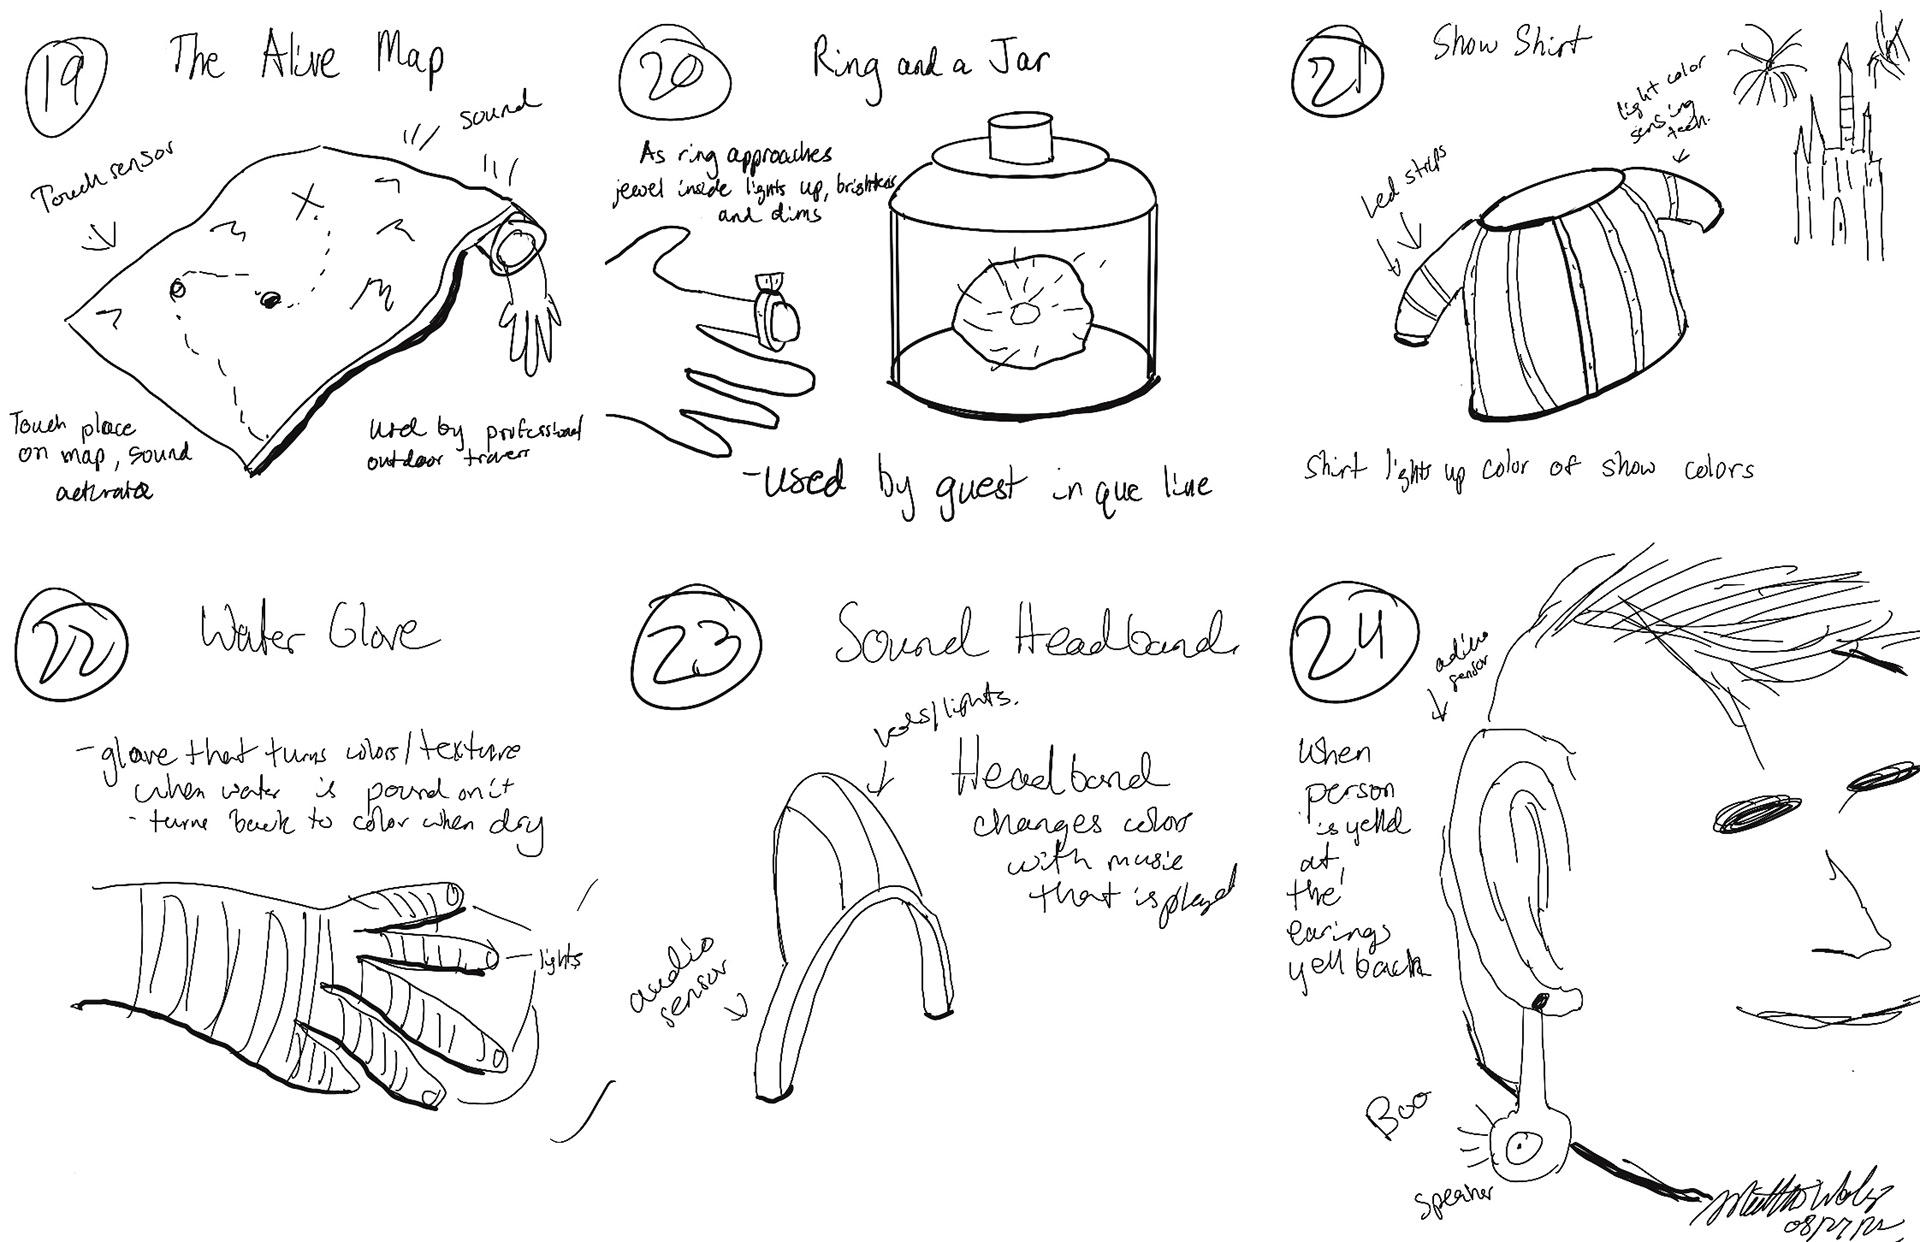
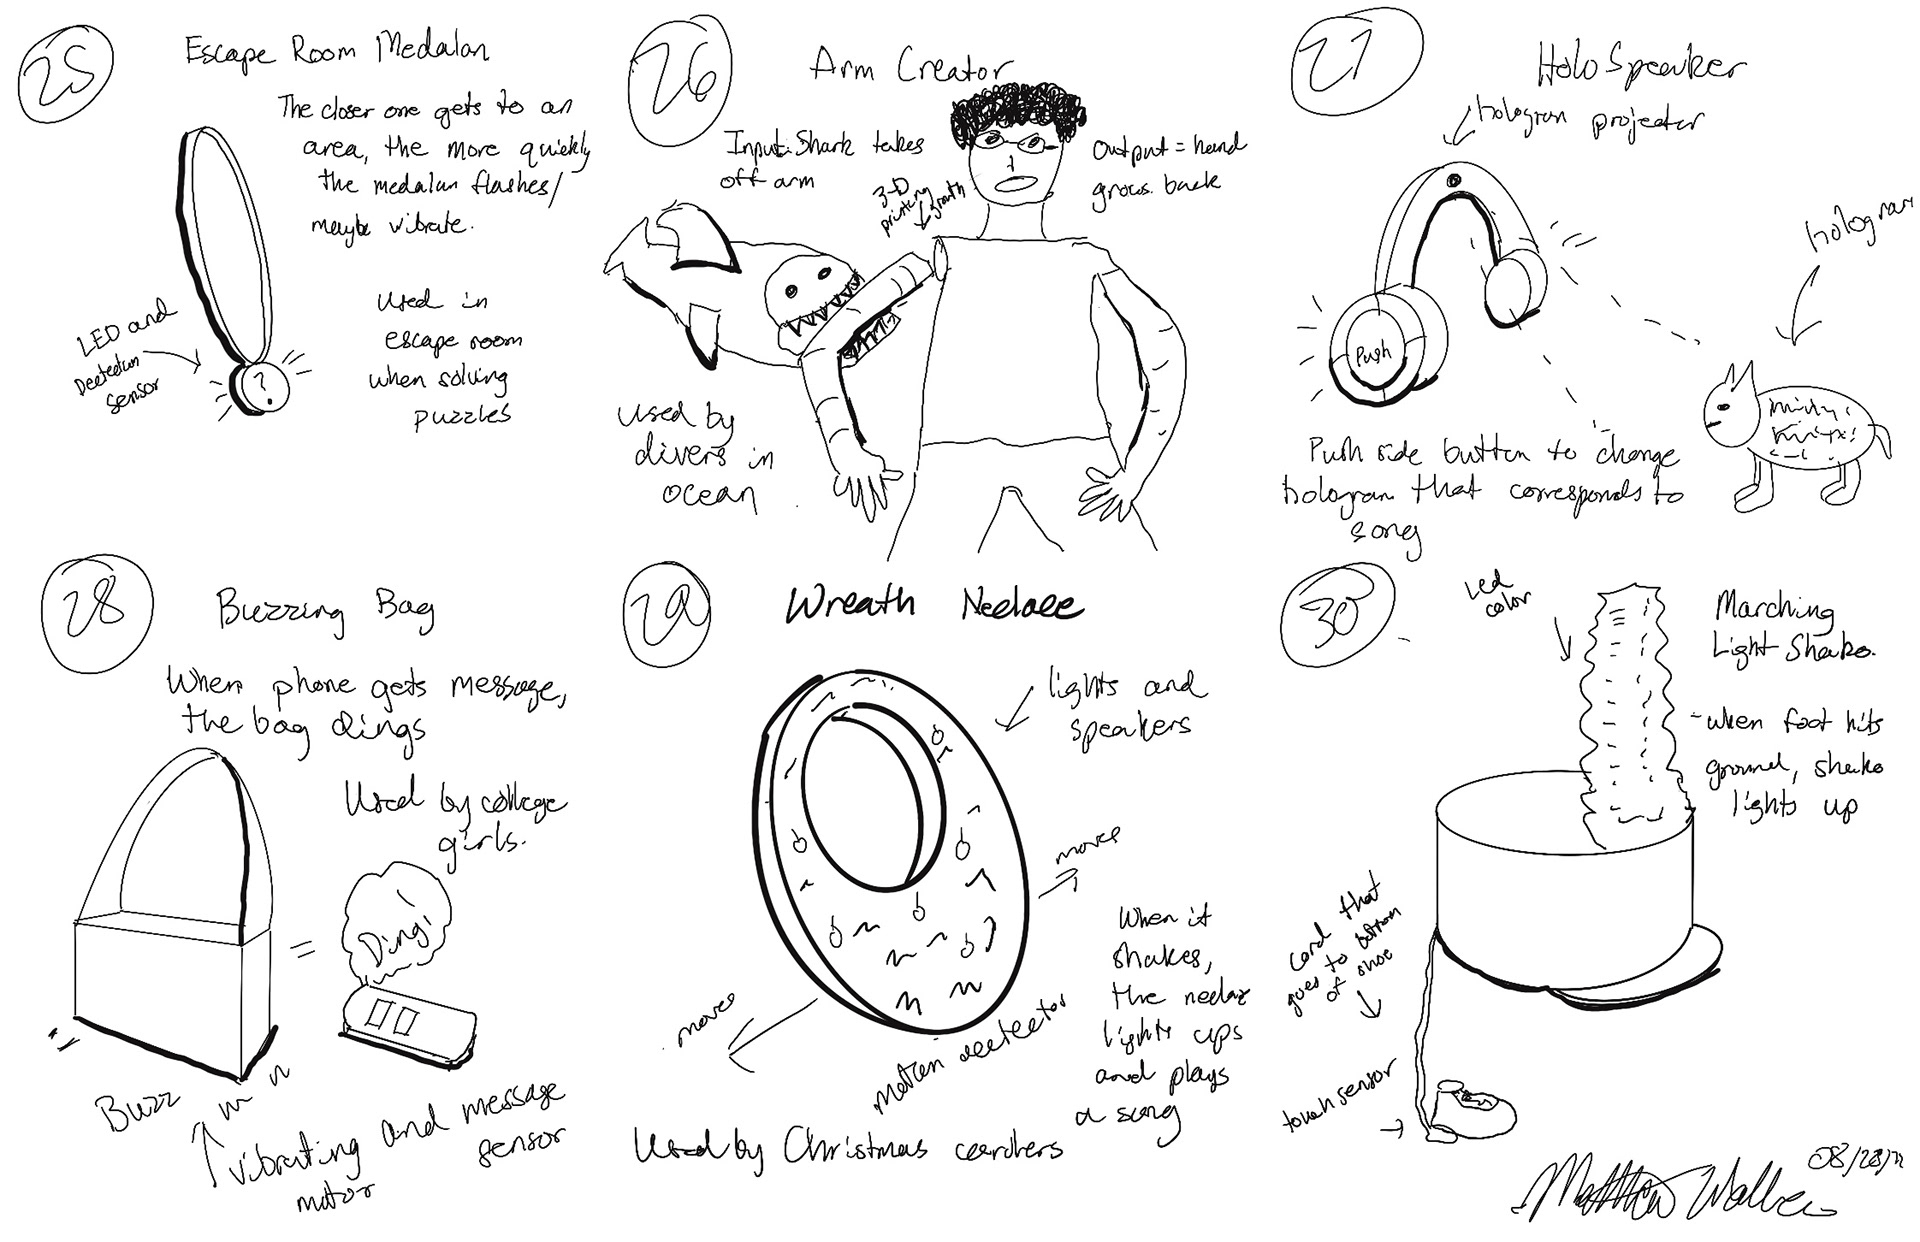
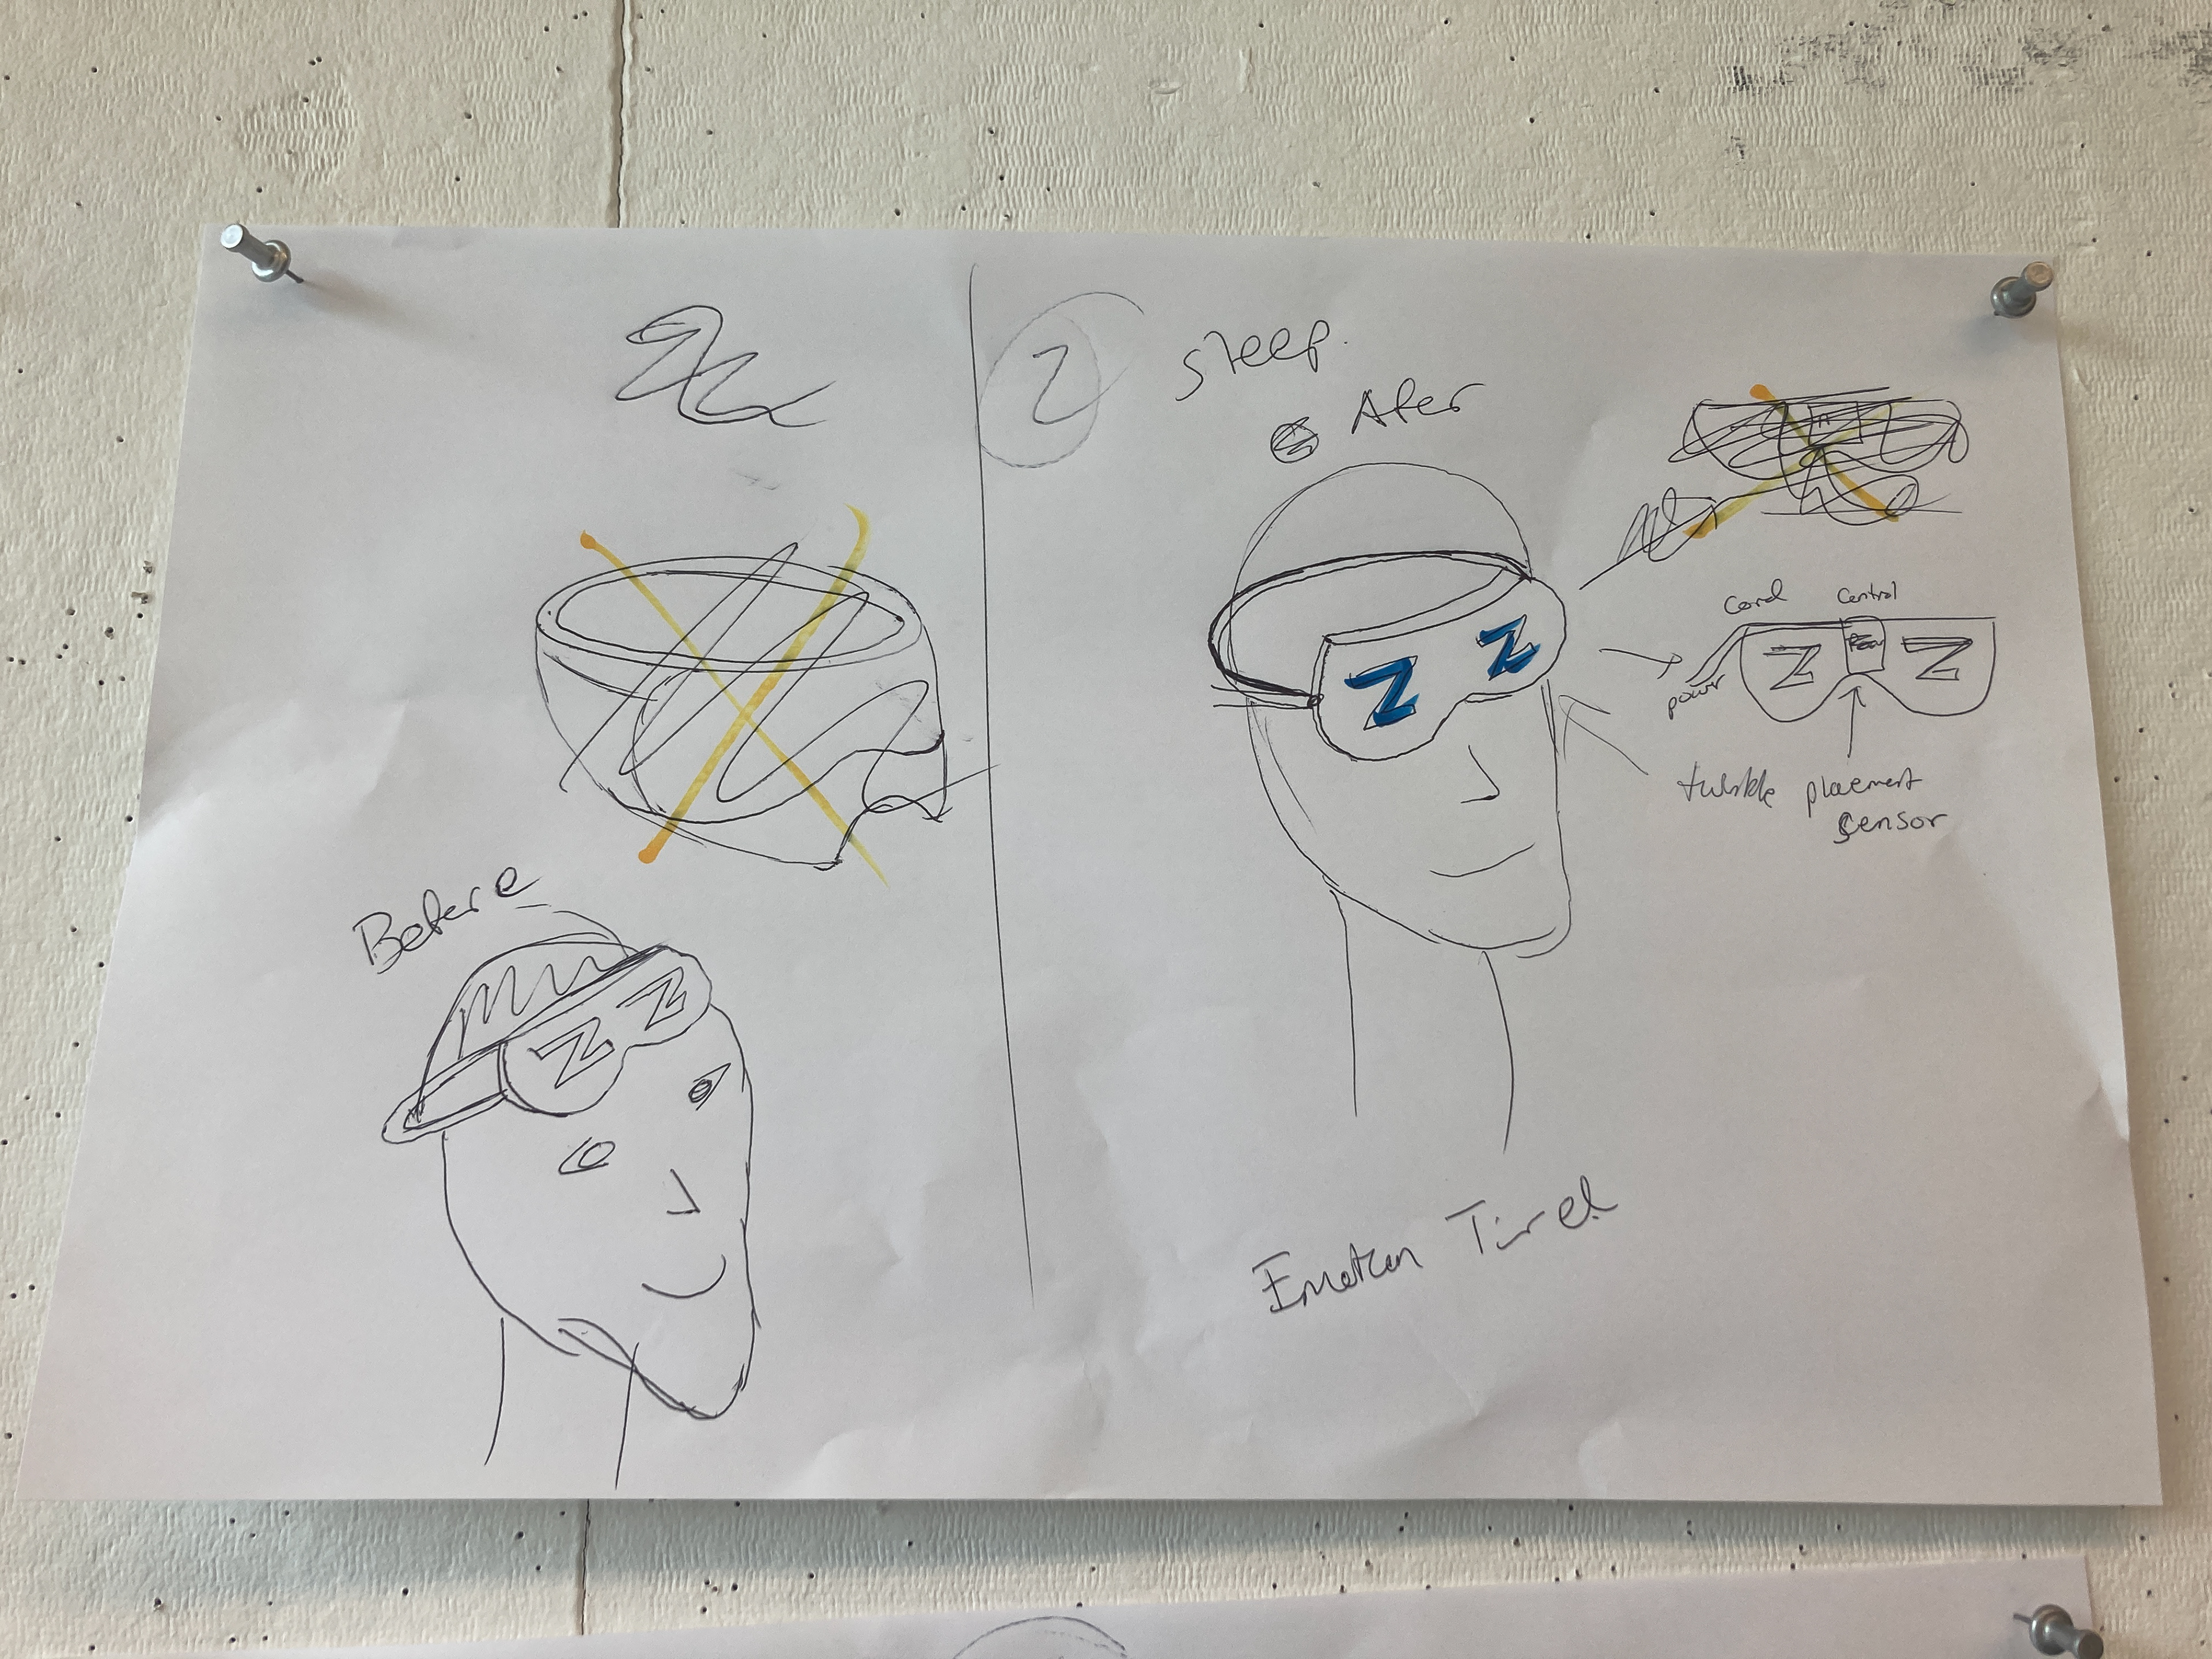
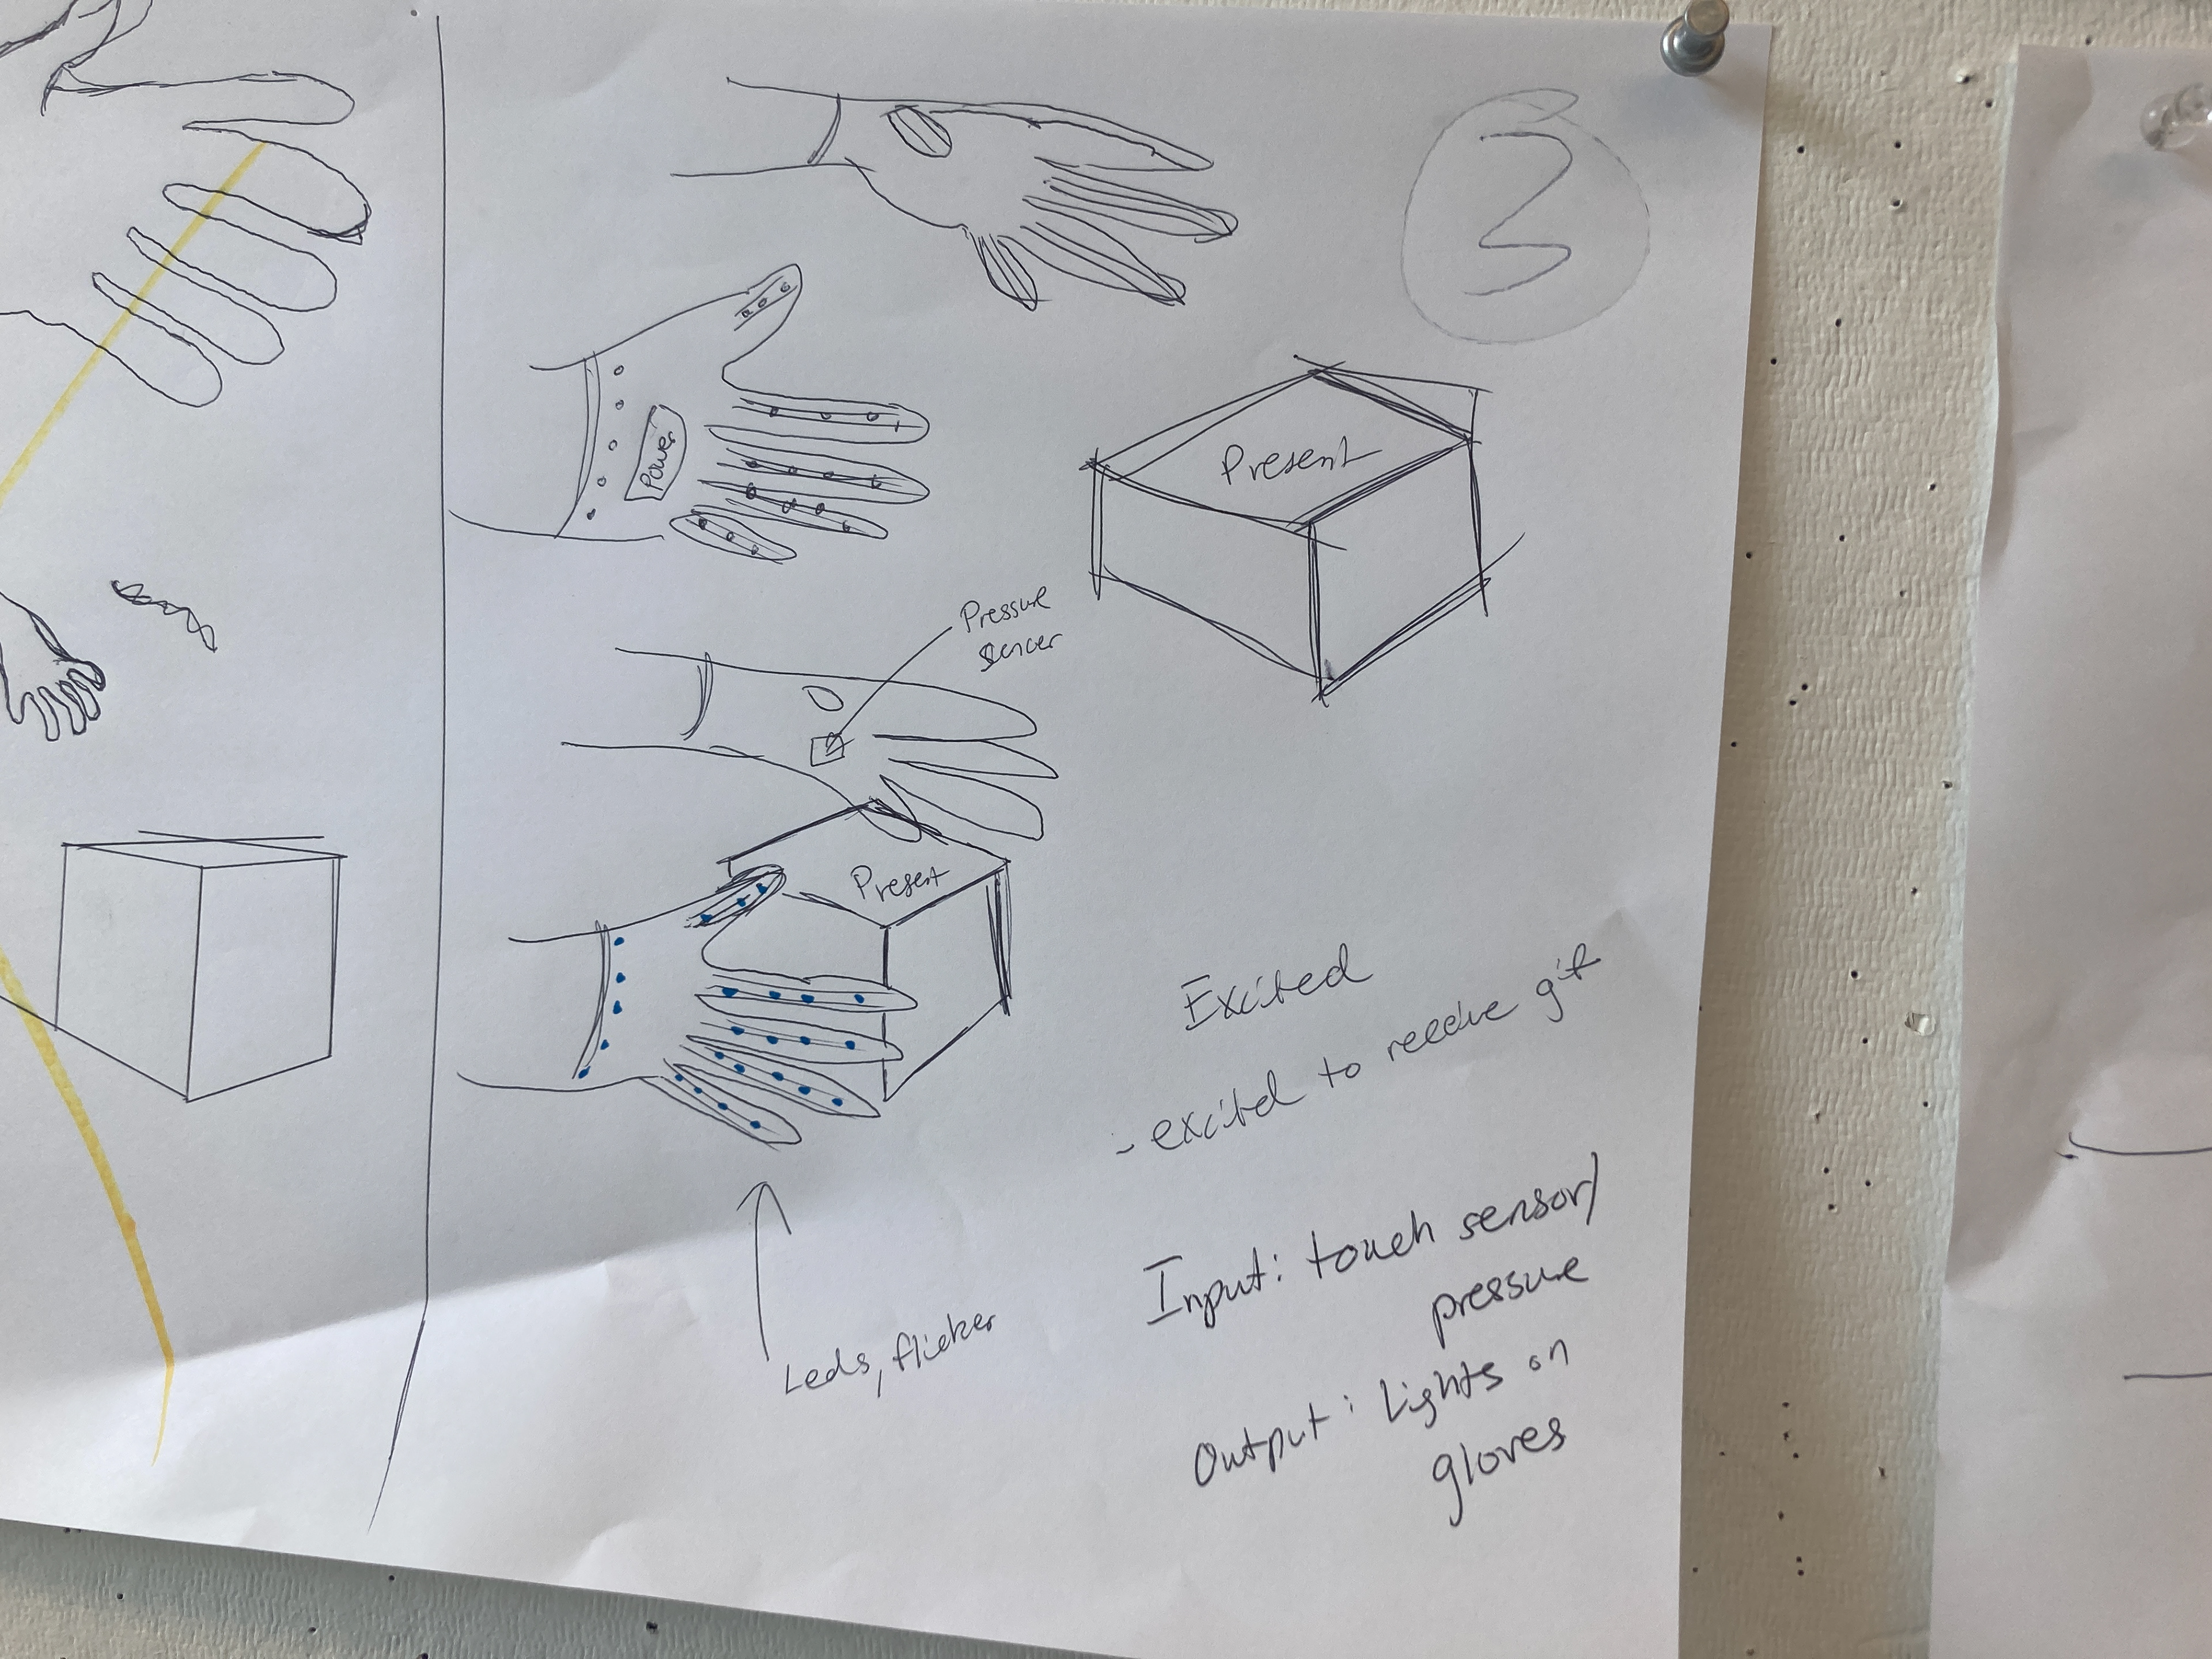
These written ideas were then turned into visual ideas. Some
ideas were very serious, while others were practically impossible
to pull off.
ideas were very serious, while others were practically impossible
to pull off.
Feedback
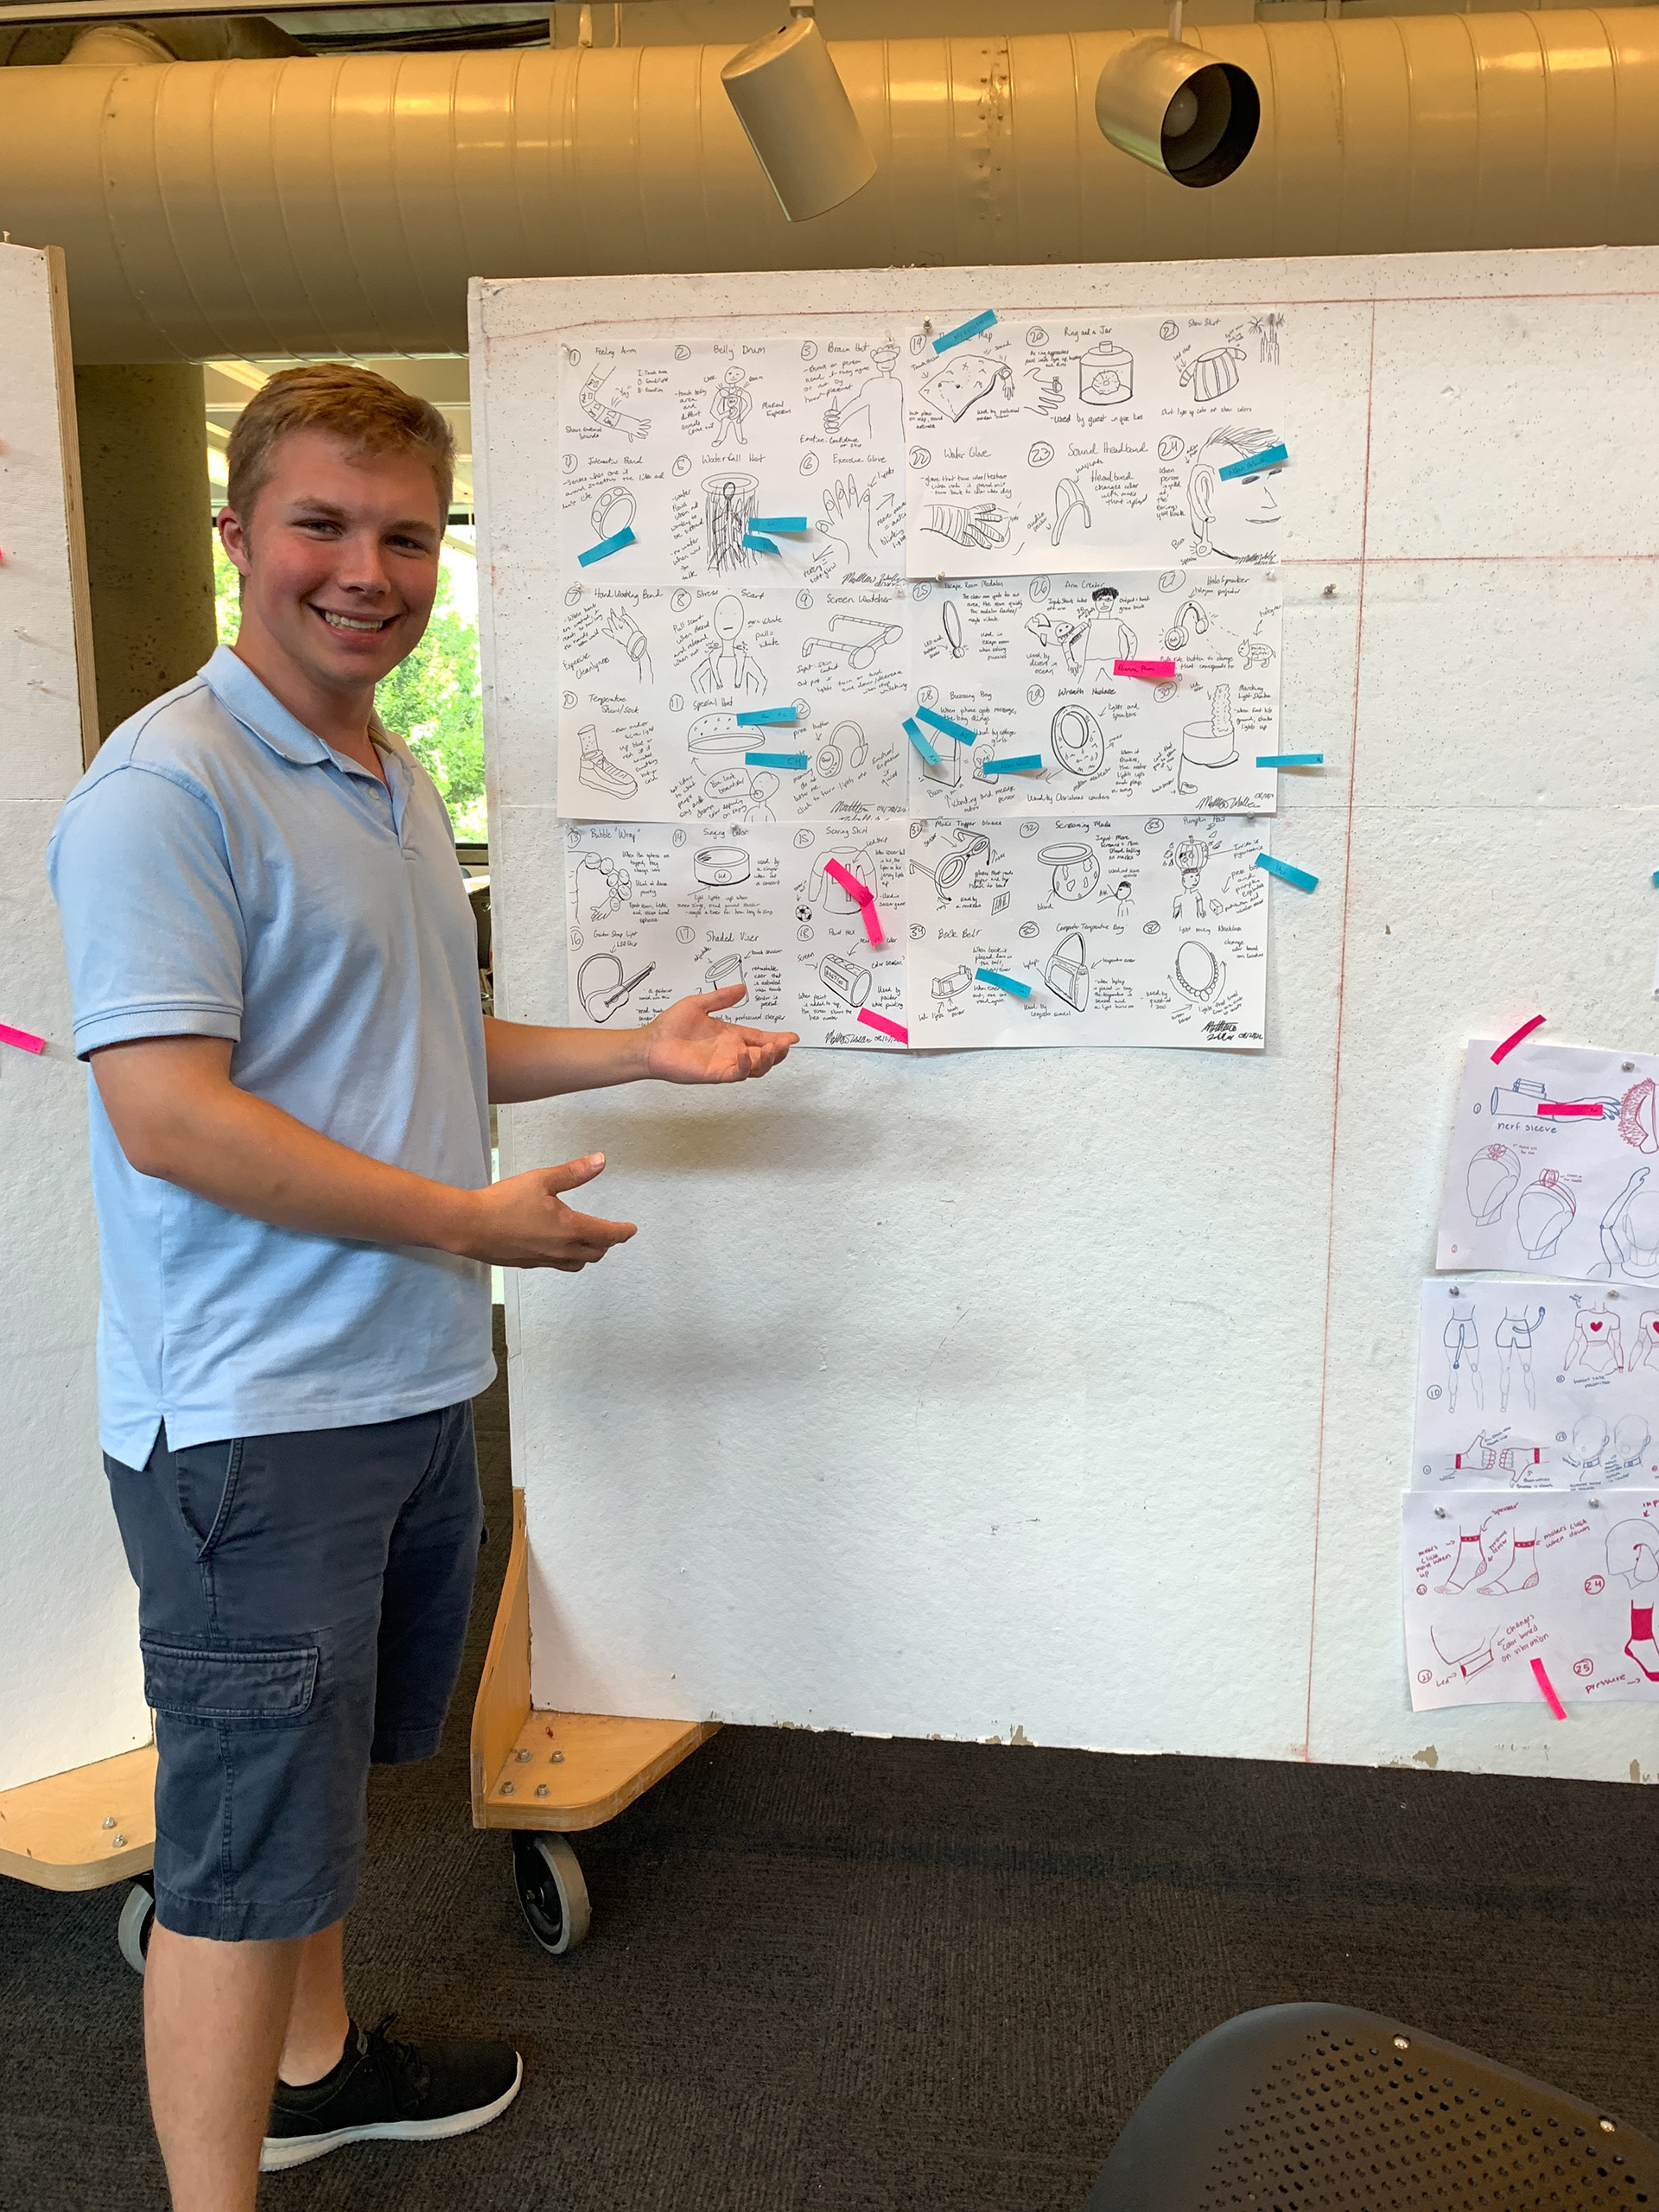
After presenting the concepts in class, I received a lot of great feedback on how to improve the narrative experience, which concepts were strong (with pink stickies beside them) and which were not as strong (with blue stickies beside them).
Revised Ideation
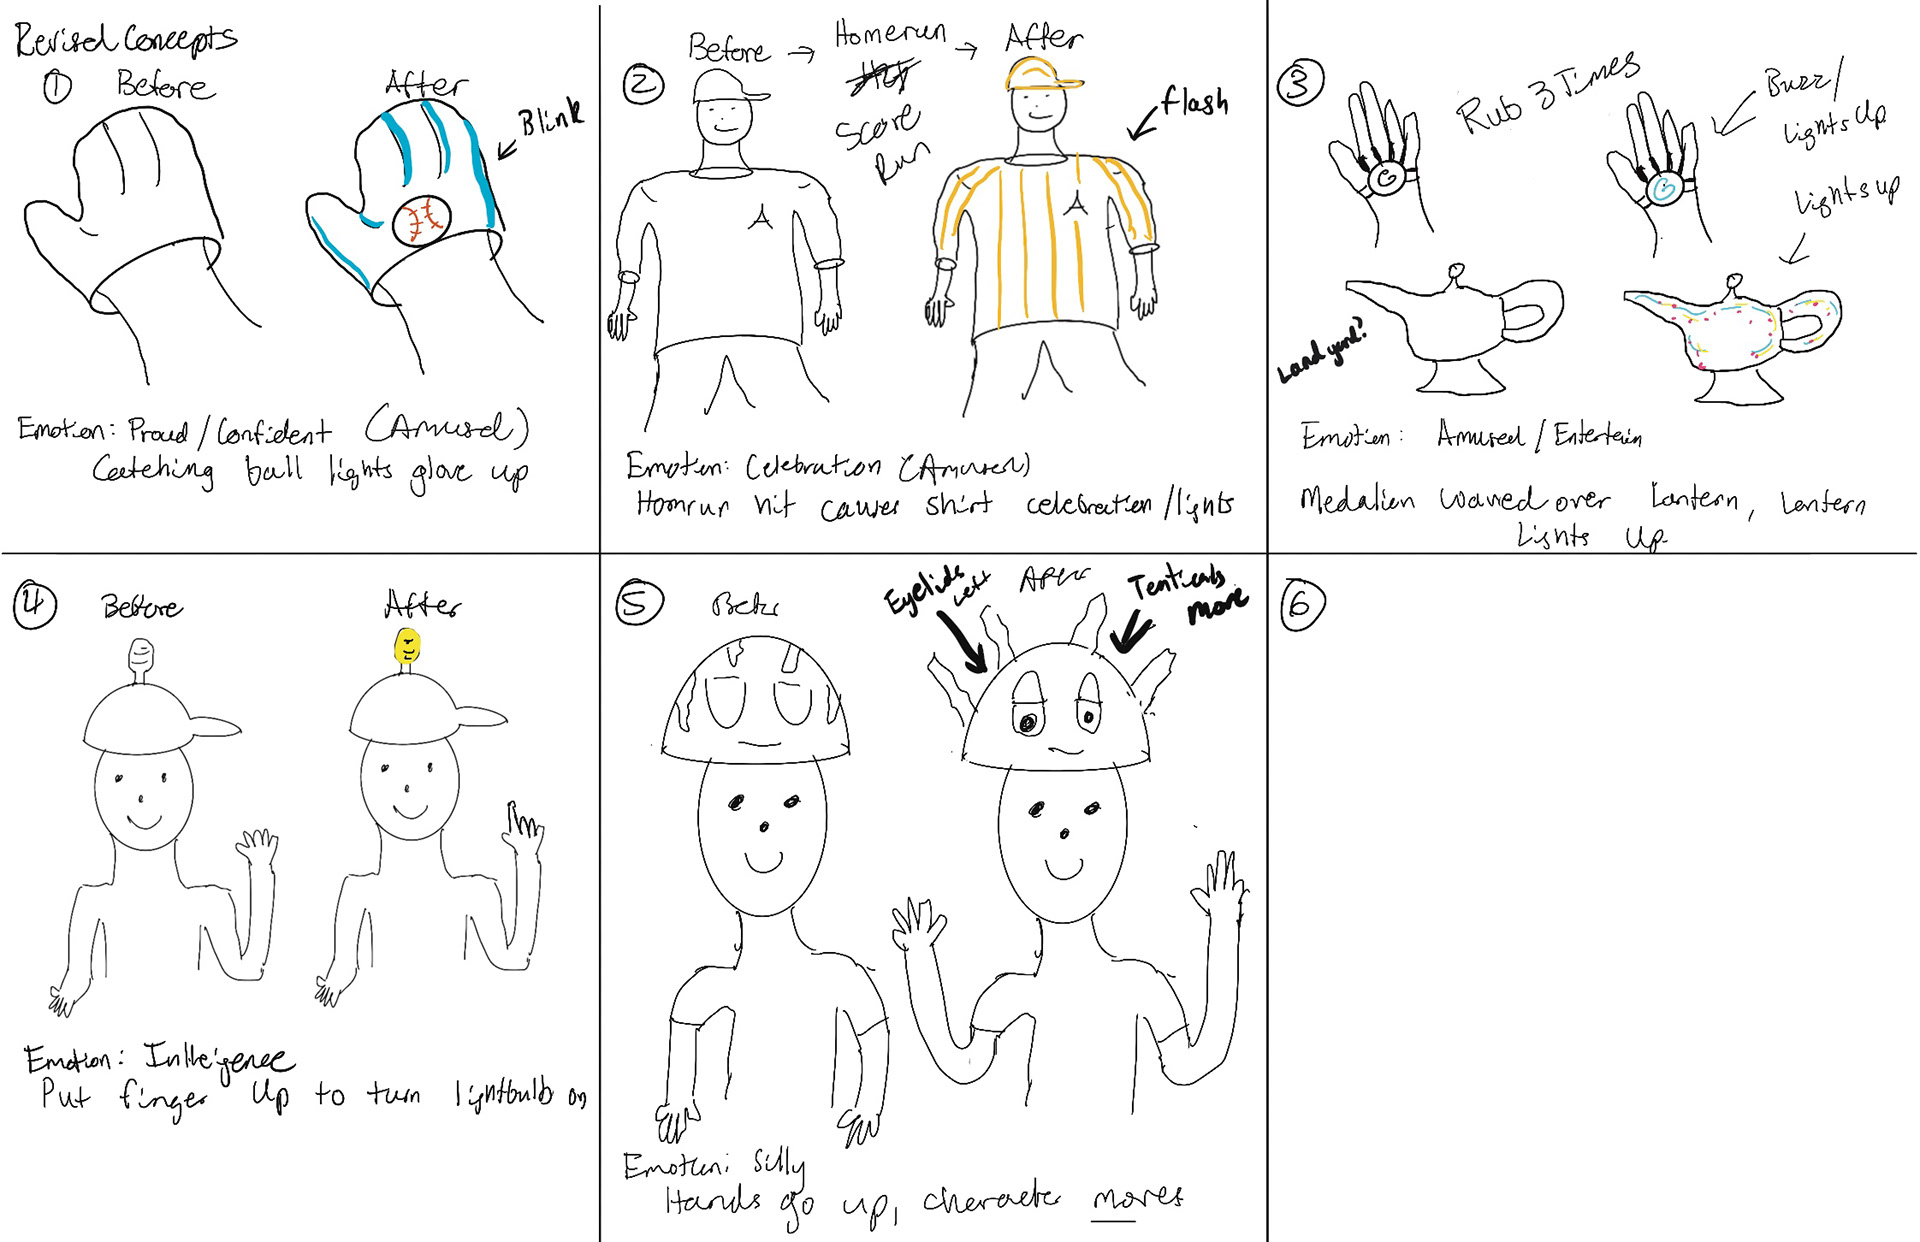
From peer feedback, I revised some of his ideas. While these ideas above were well thought out, I was pushed to further explore the narrative and how emotions can drive the design of an interactive wearable.
Revised Story Development
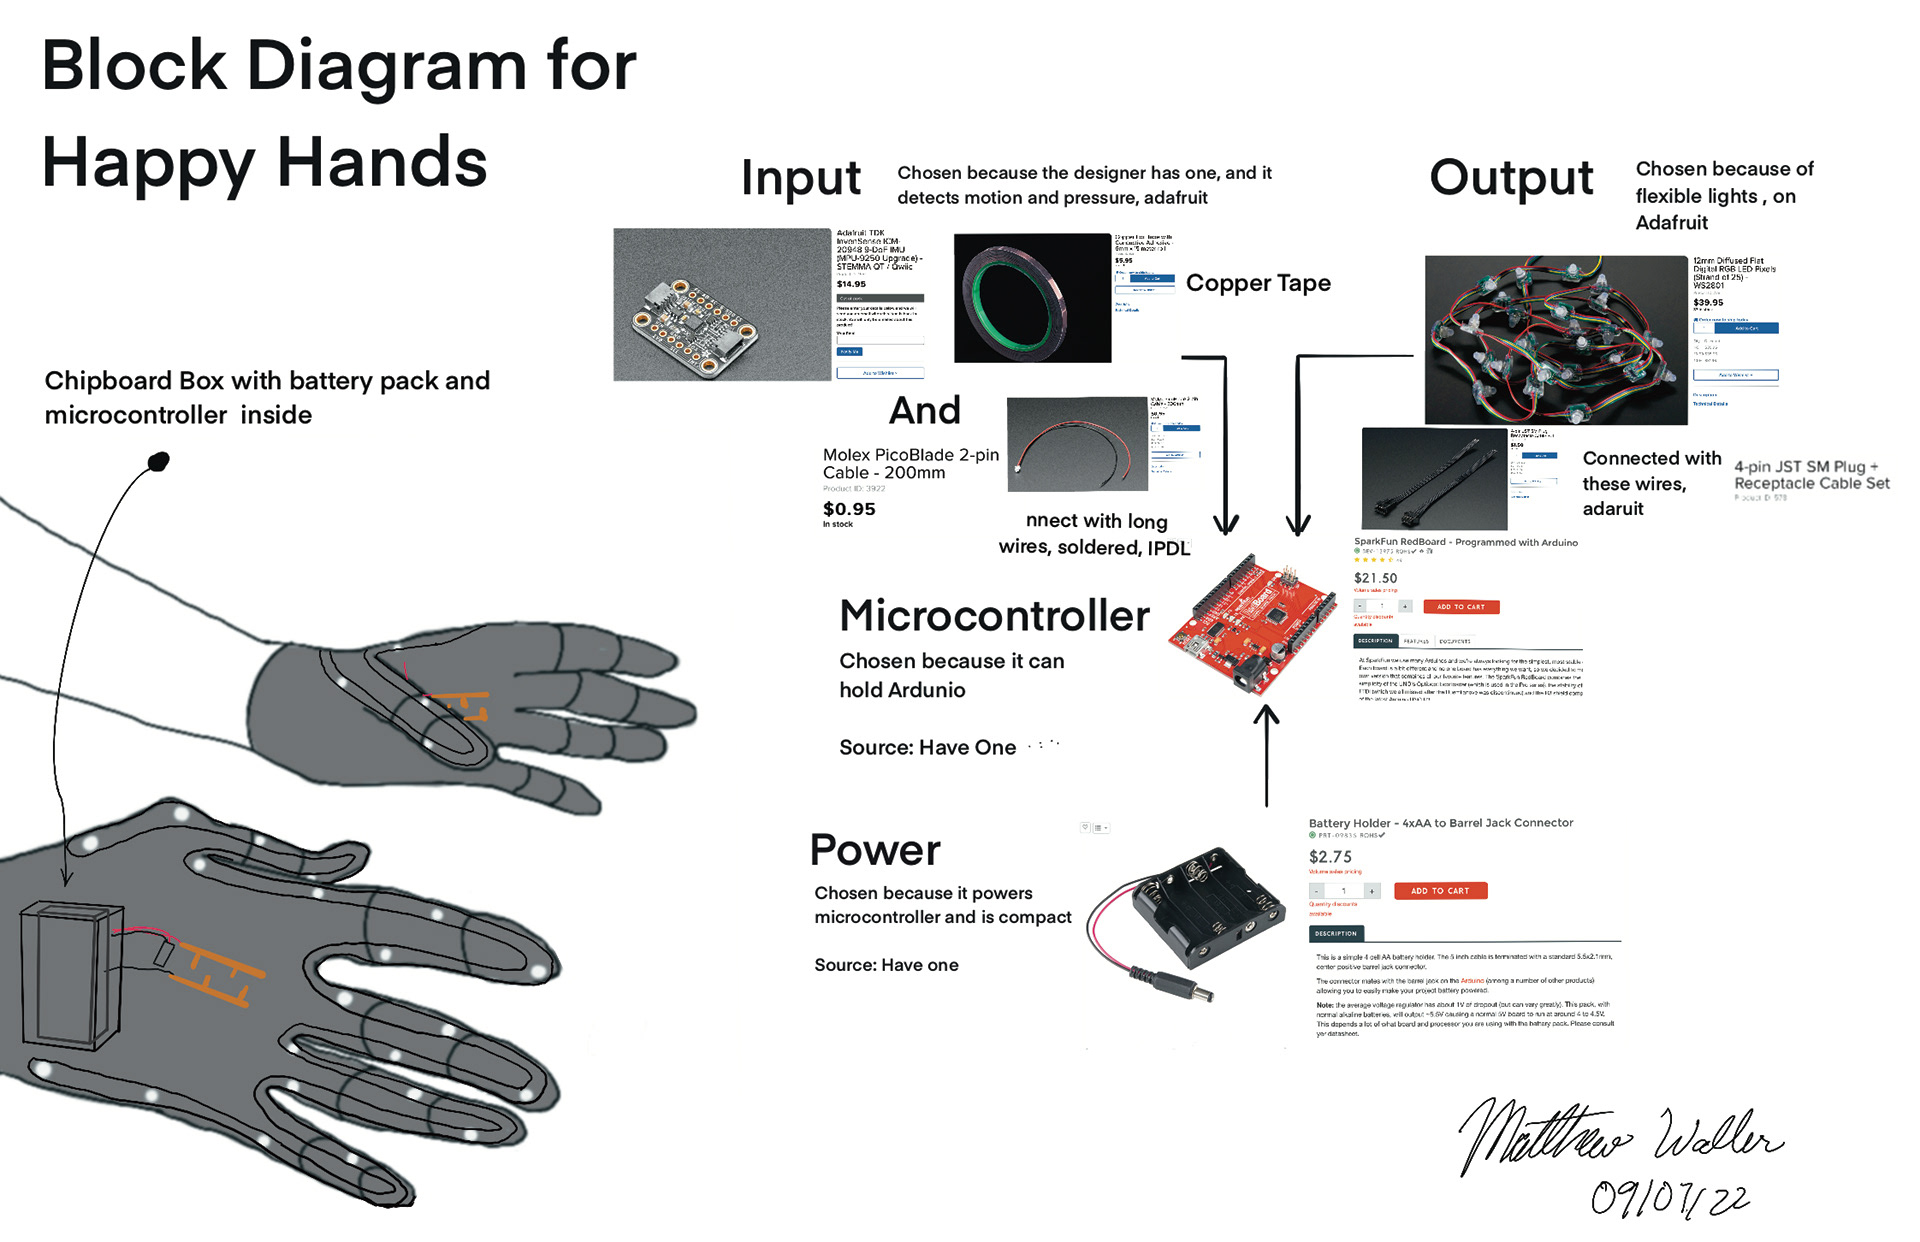
I went back to the drawing board to revise some of his stories that could be used within the experience of the wearable. I began to focus on the feeling of being scared. From feedback, I found that some of these concepts could be felt by the person wearing them but not seen externally, which is a requirement.
Conceptualization
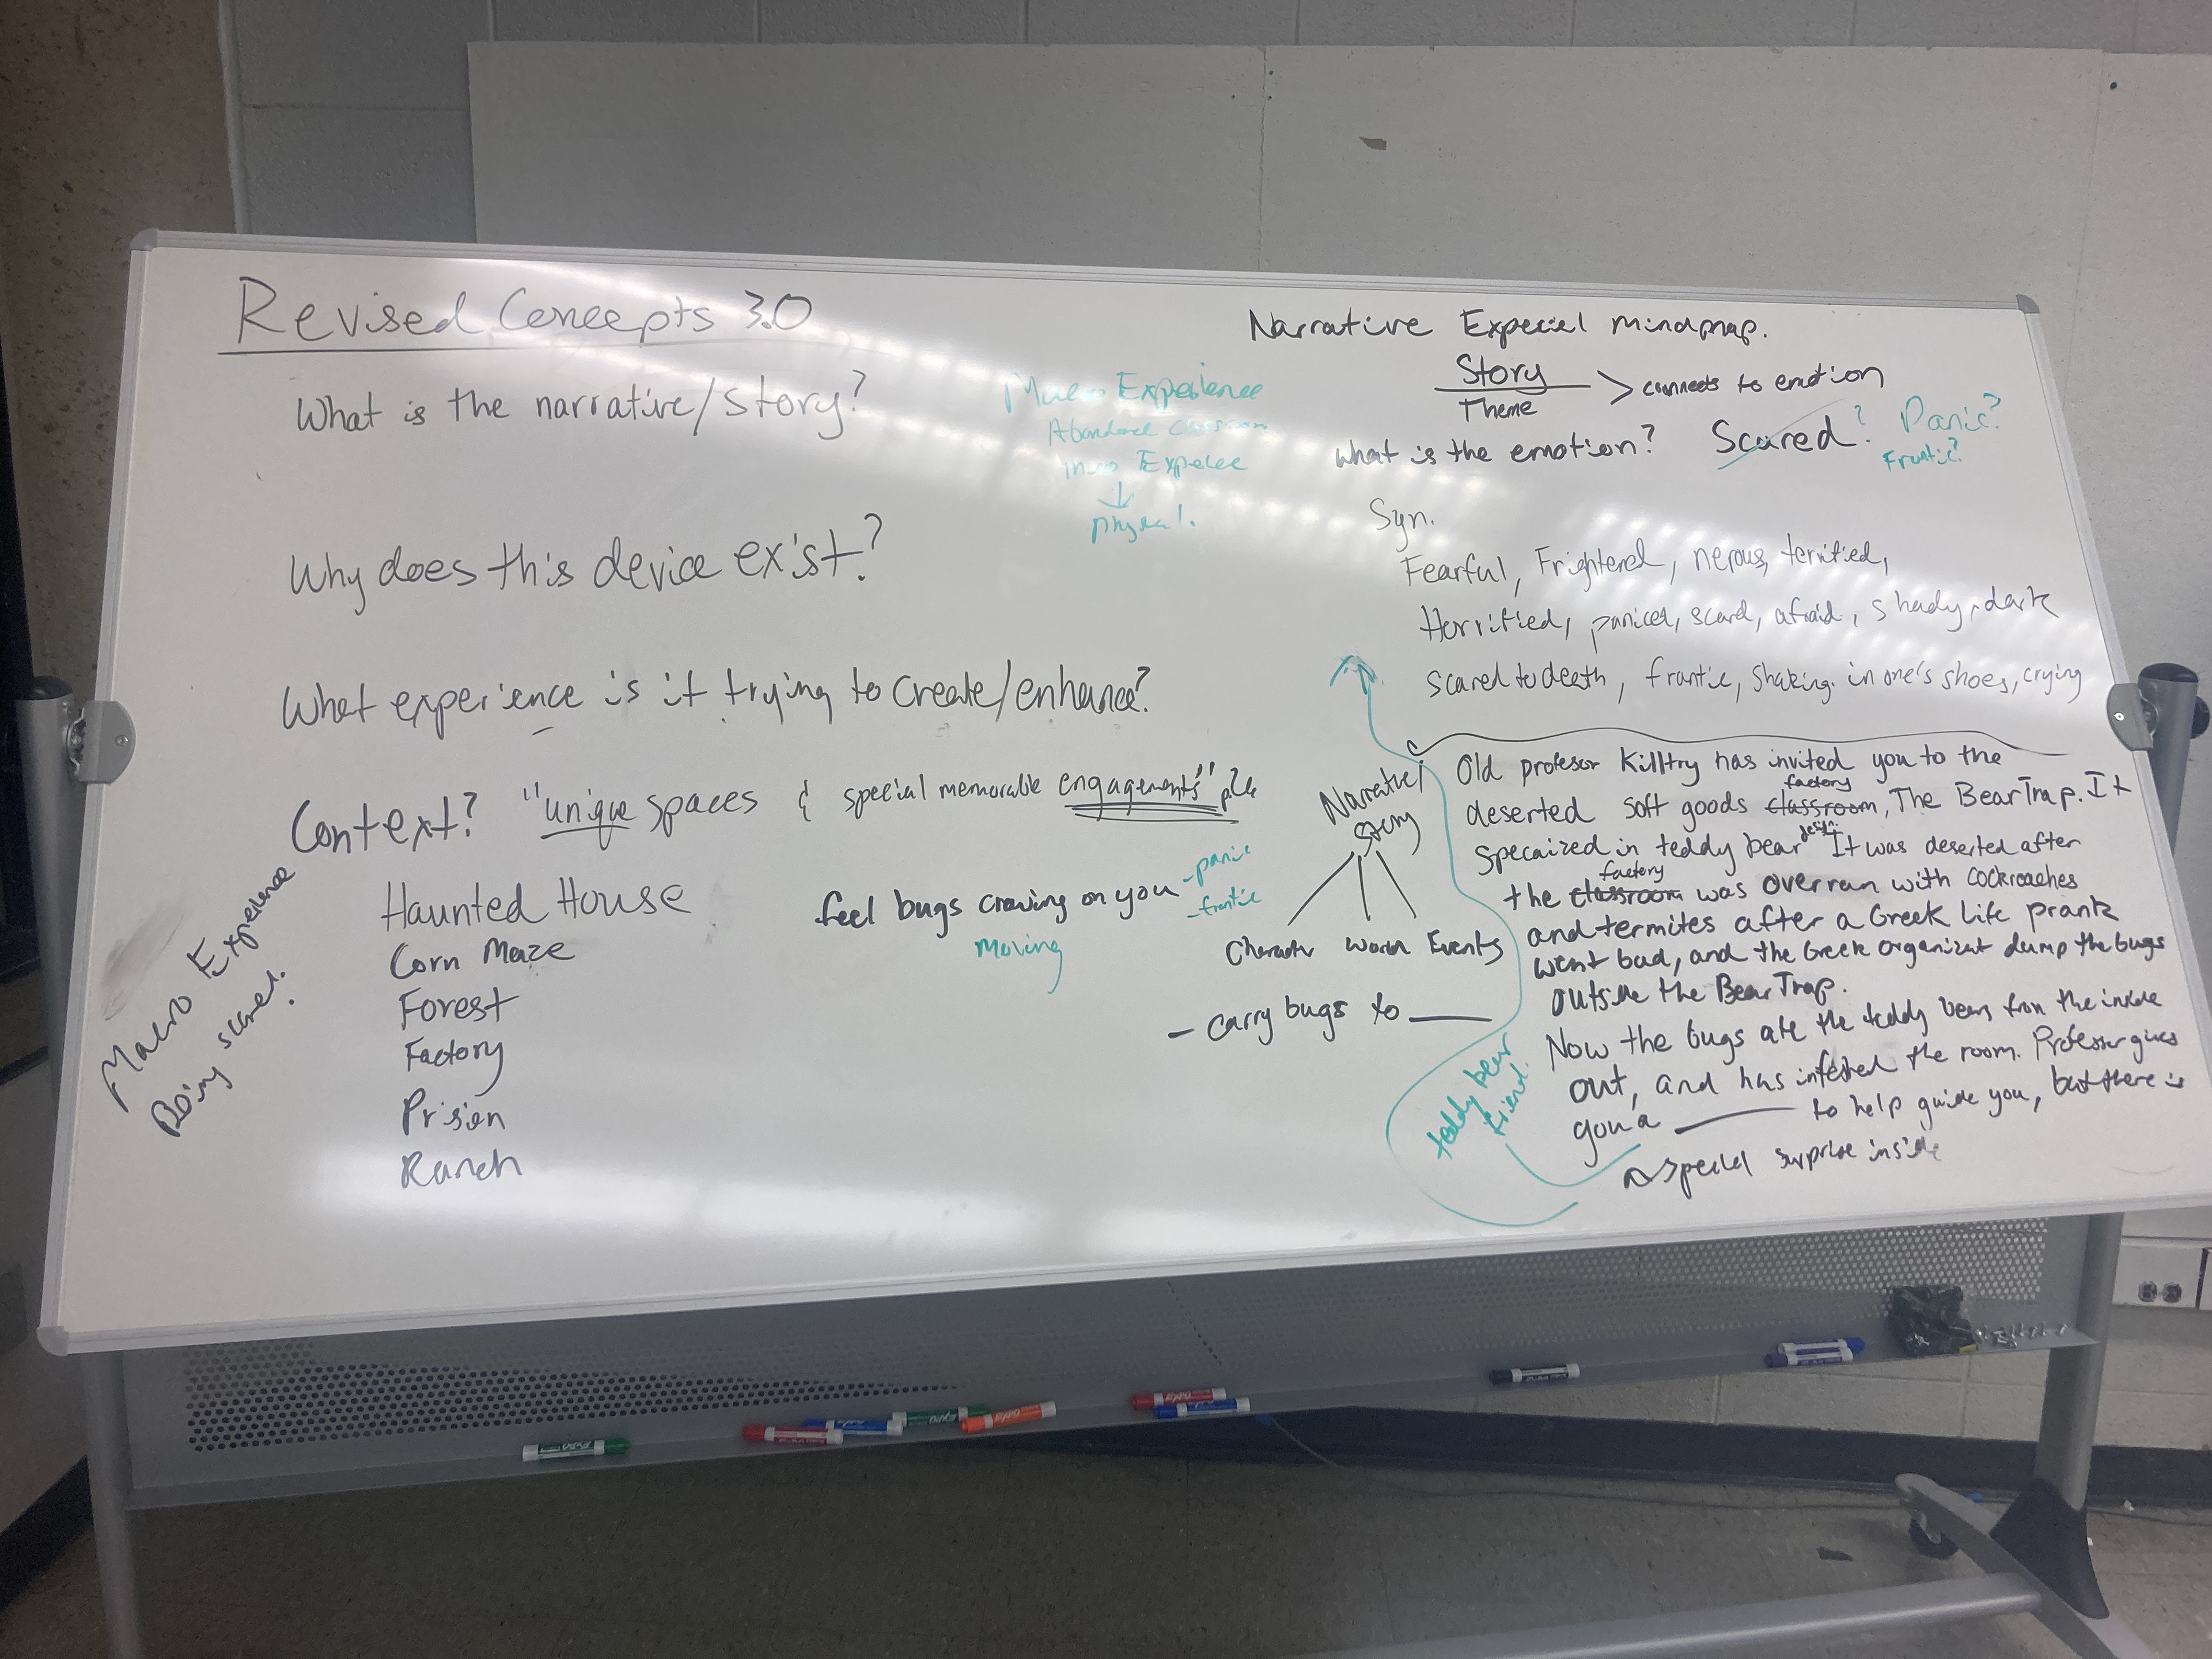
I then took some of these concepts, including new ones from peer feedback, and began conceptualizing them. This included writing other stories and simplifying the experience.
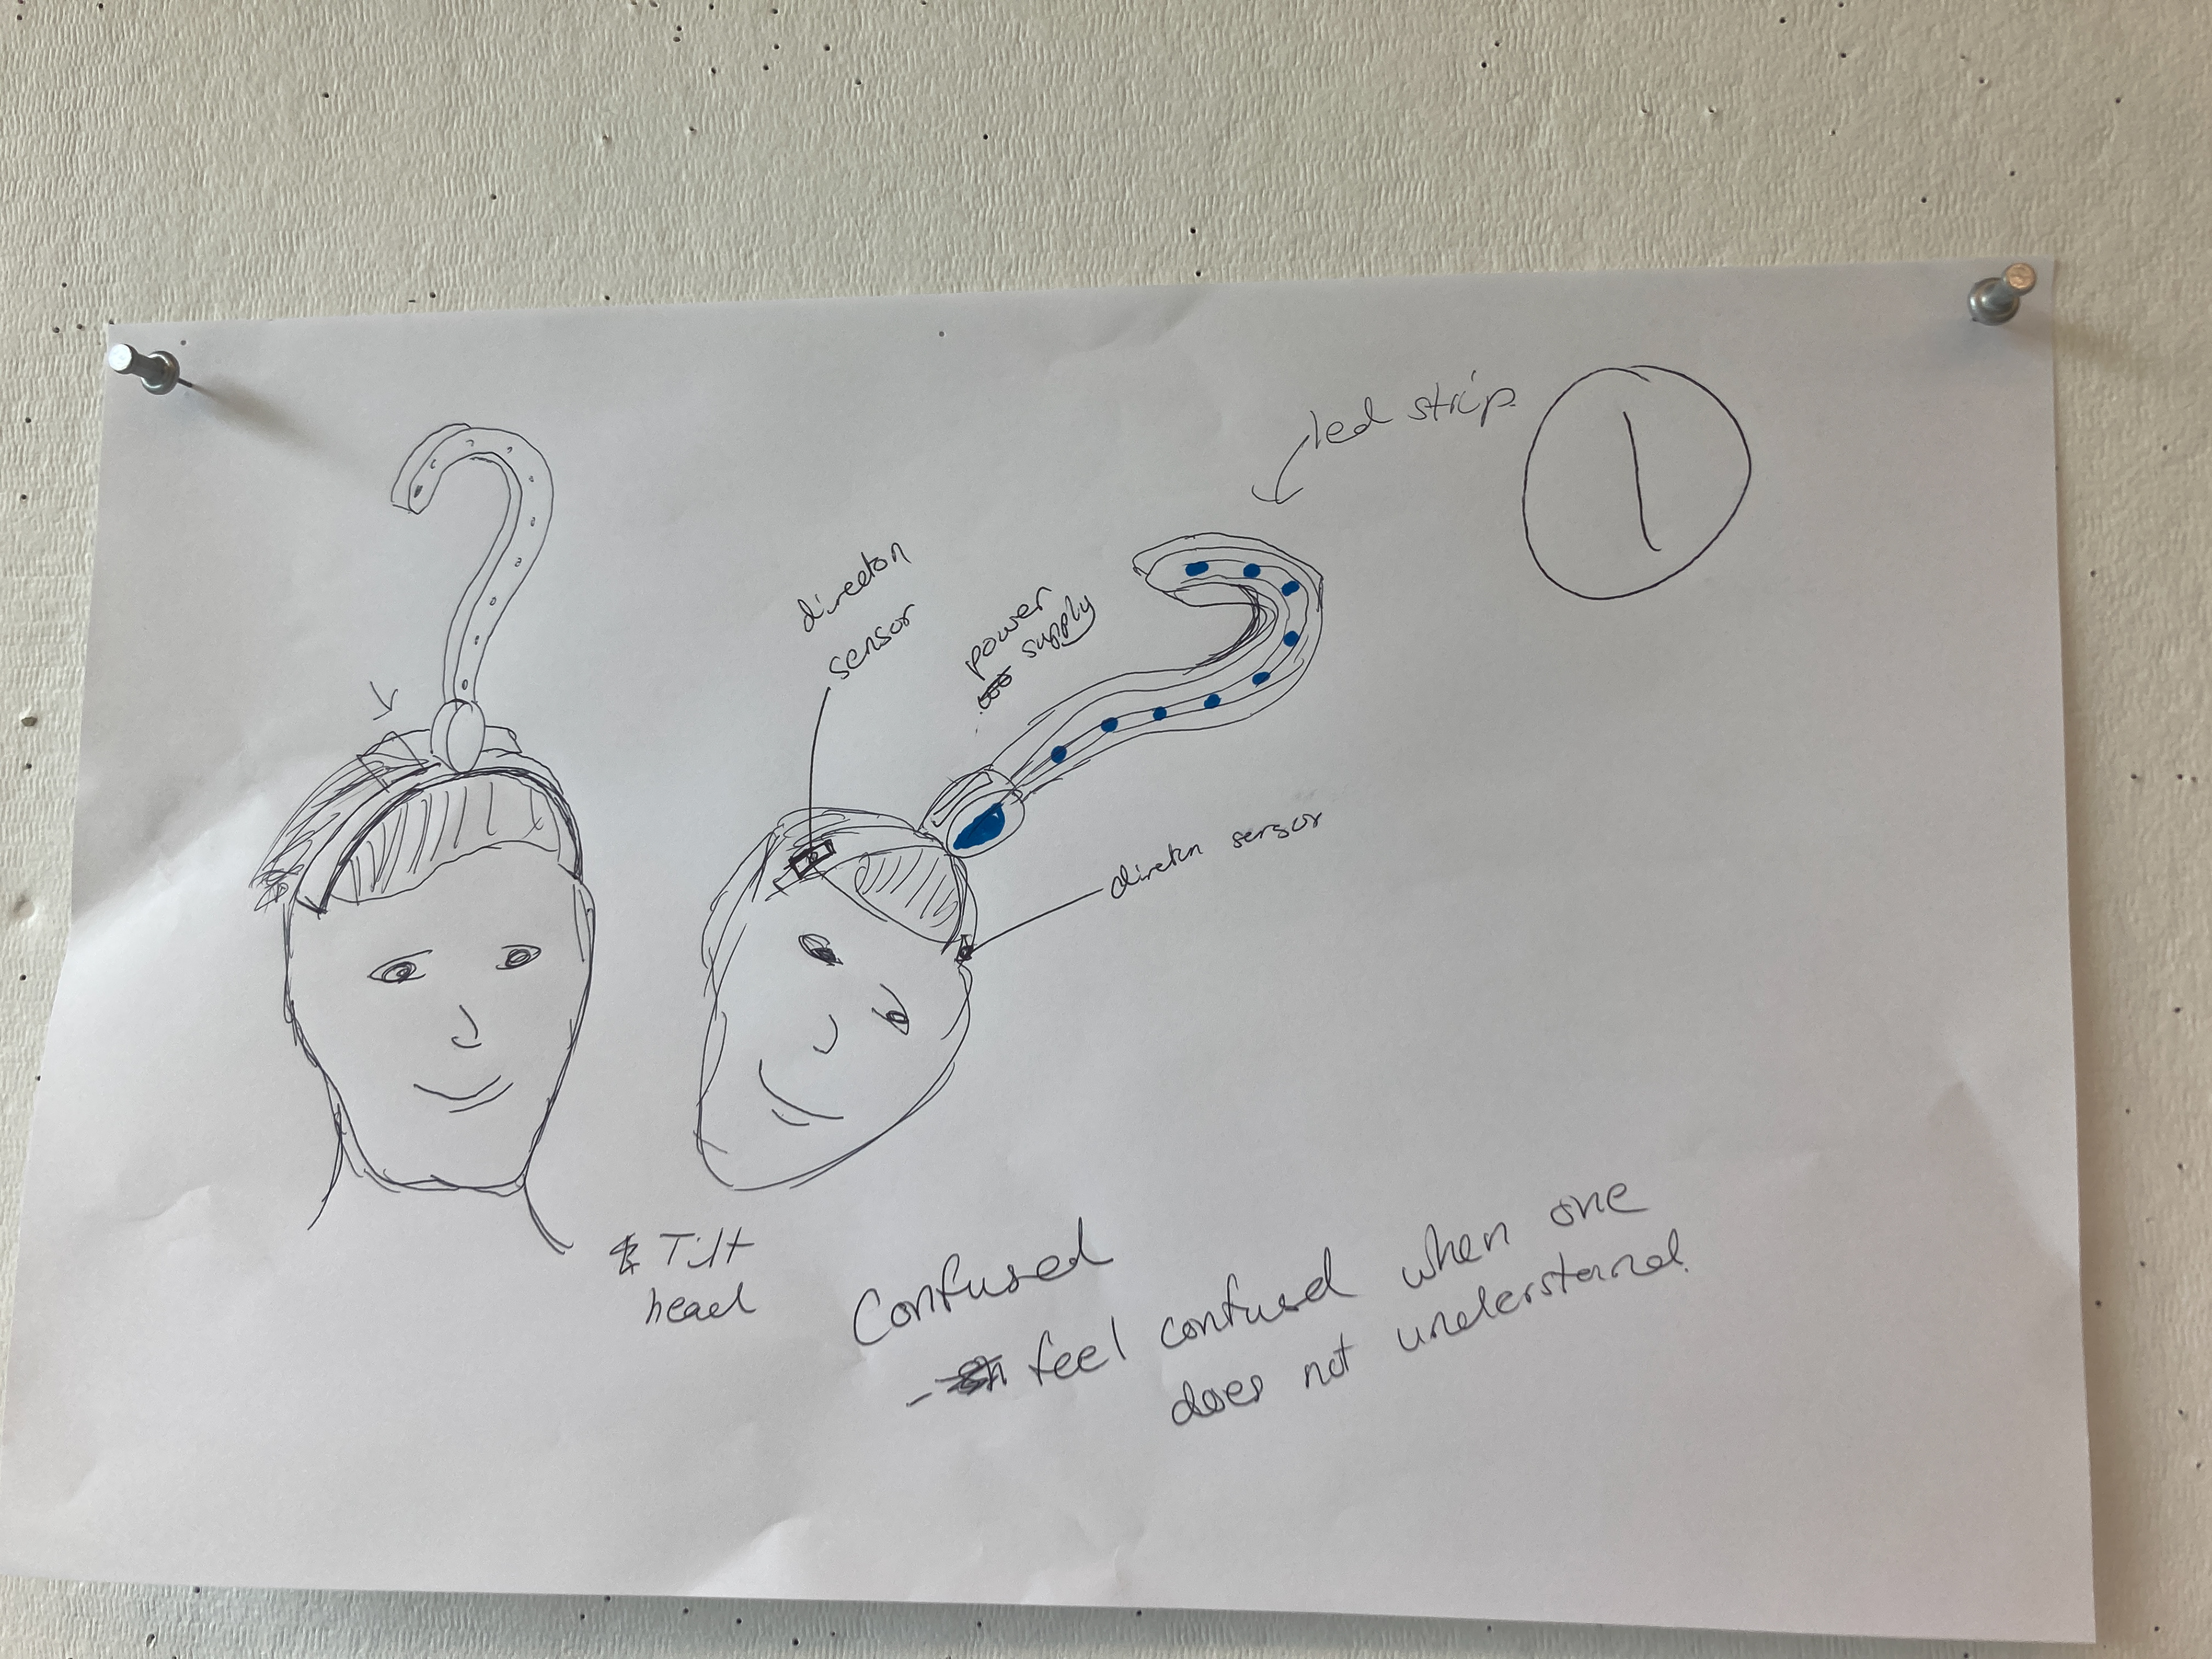
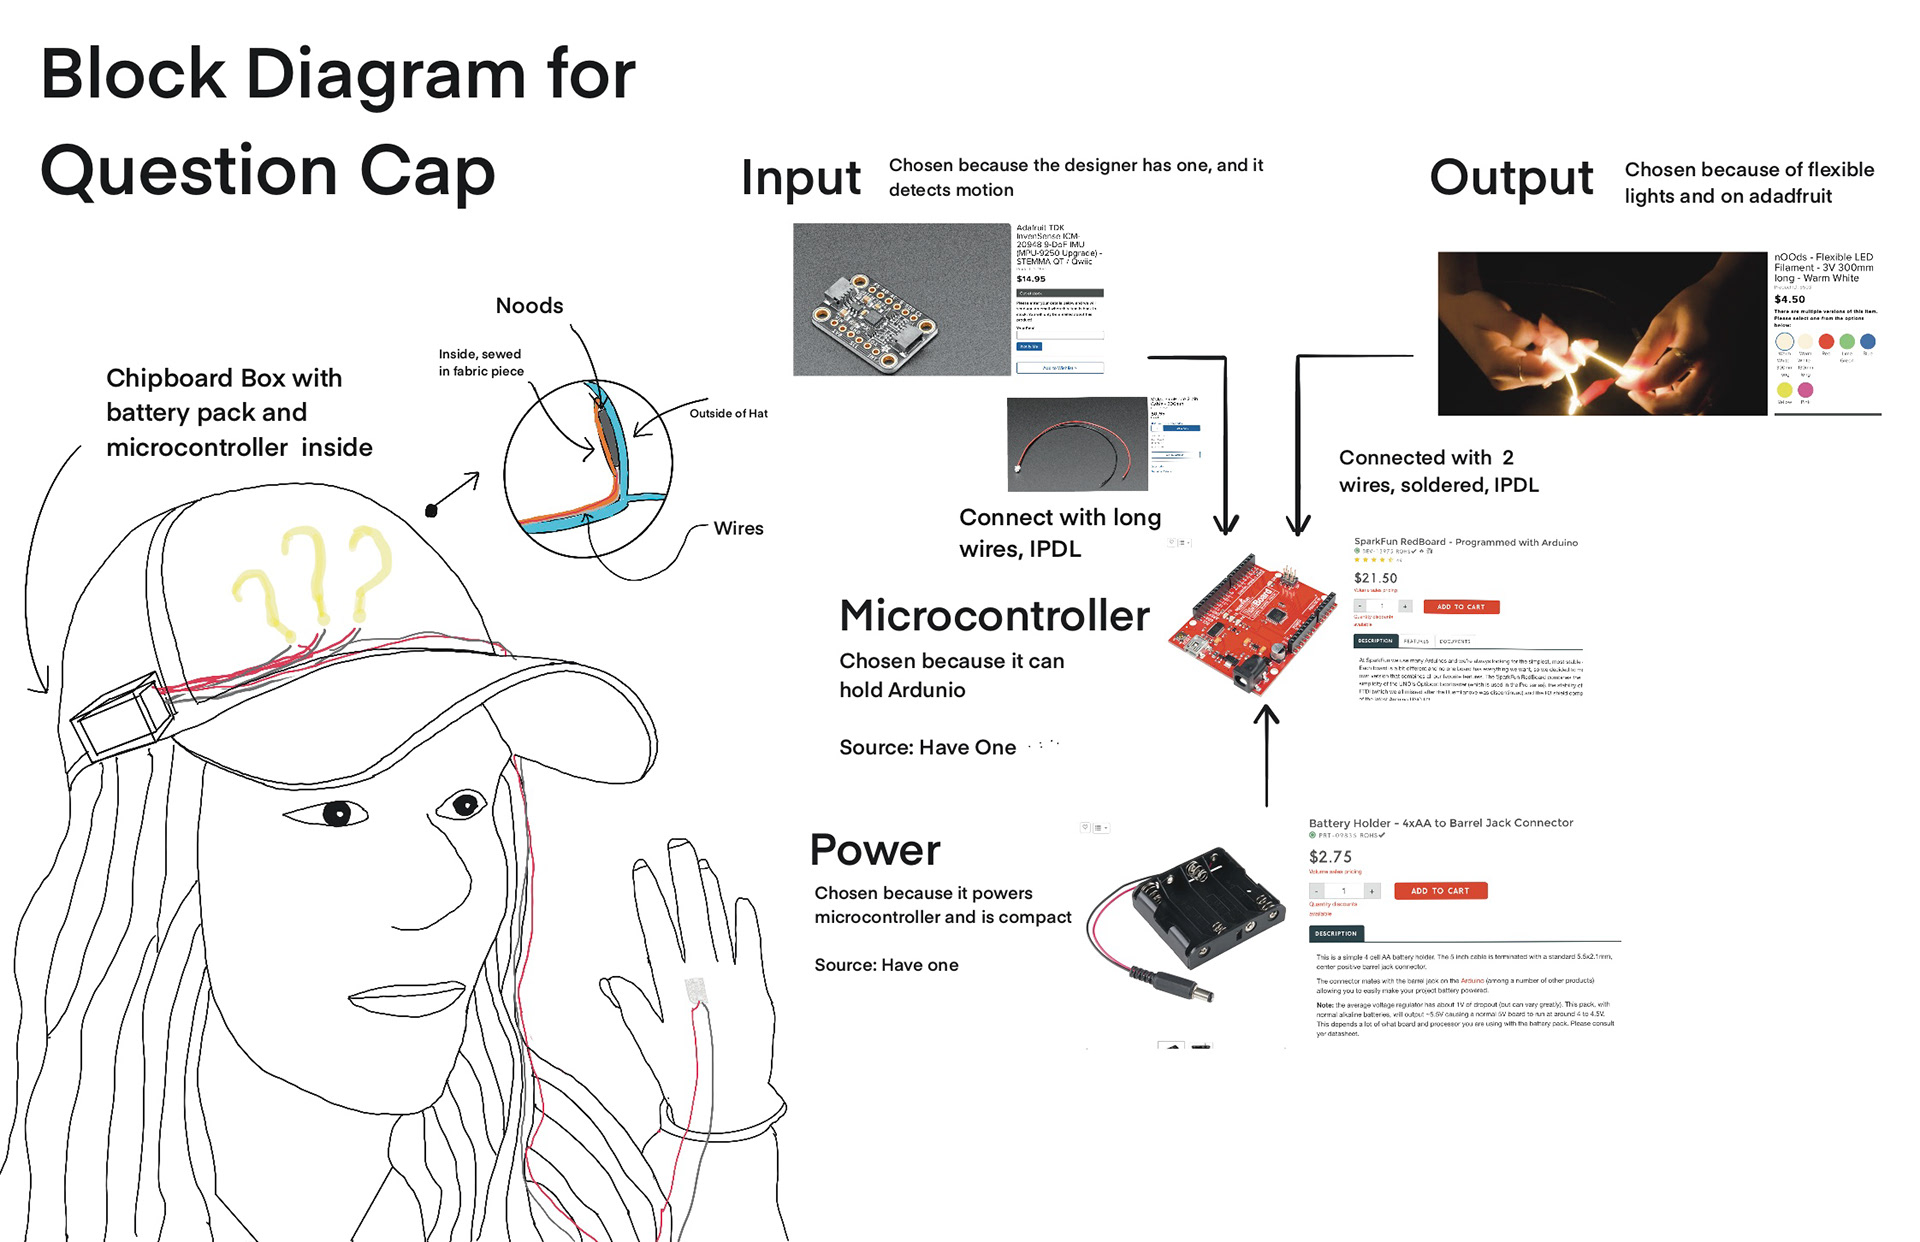
Revised Concepts and Block Diagrams
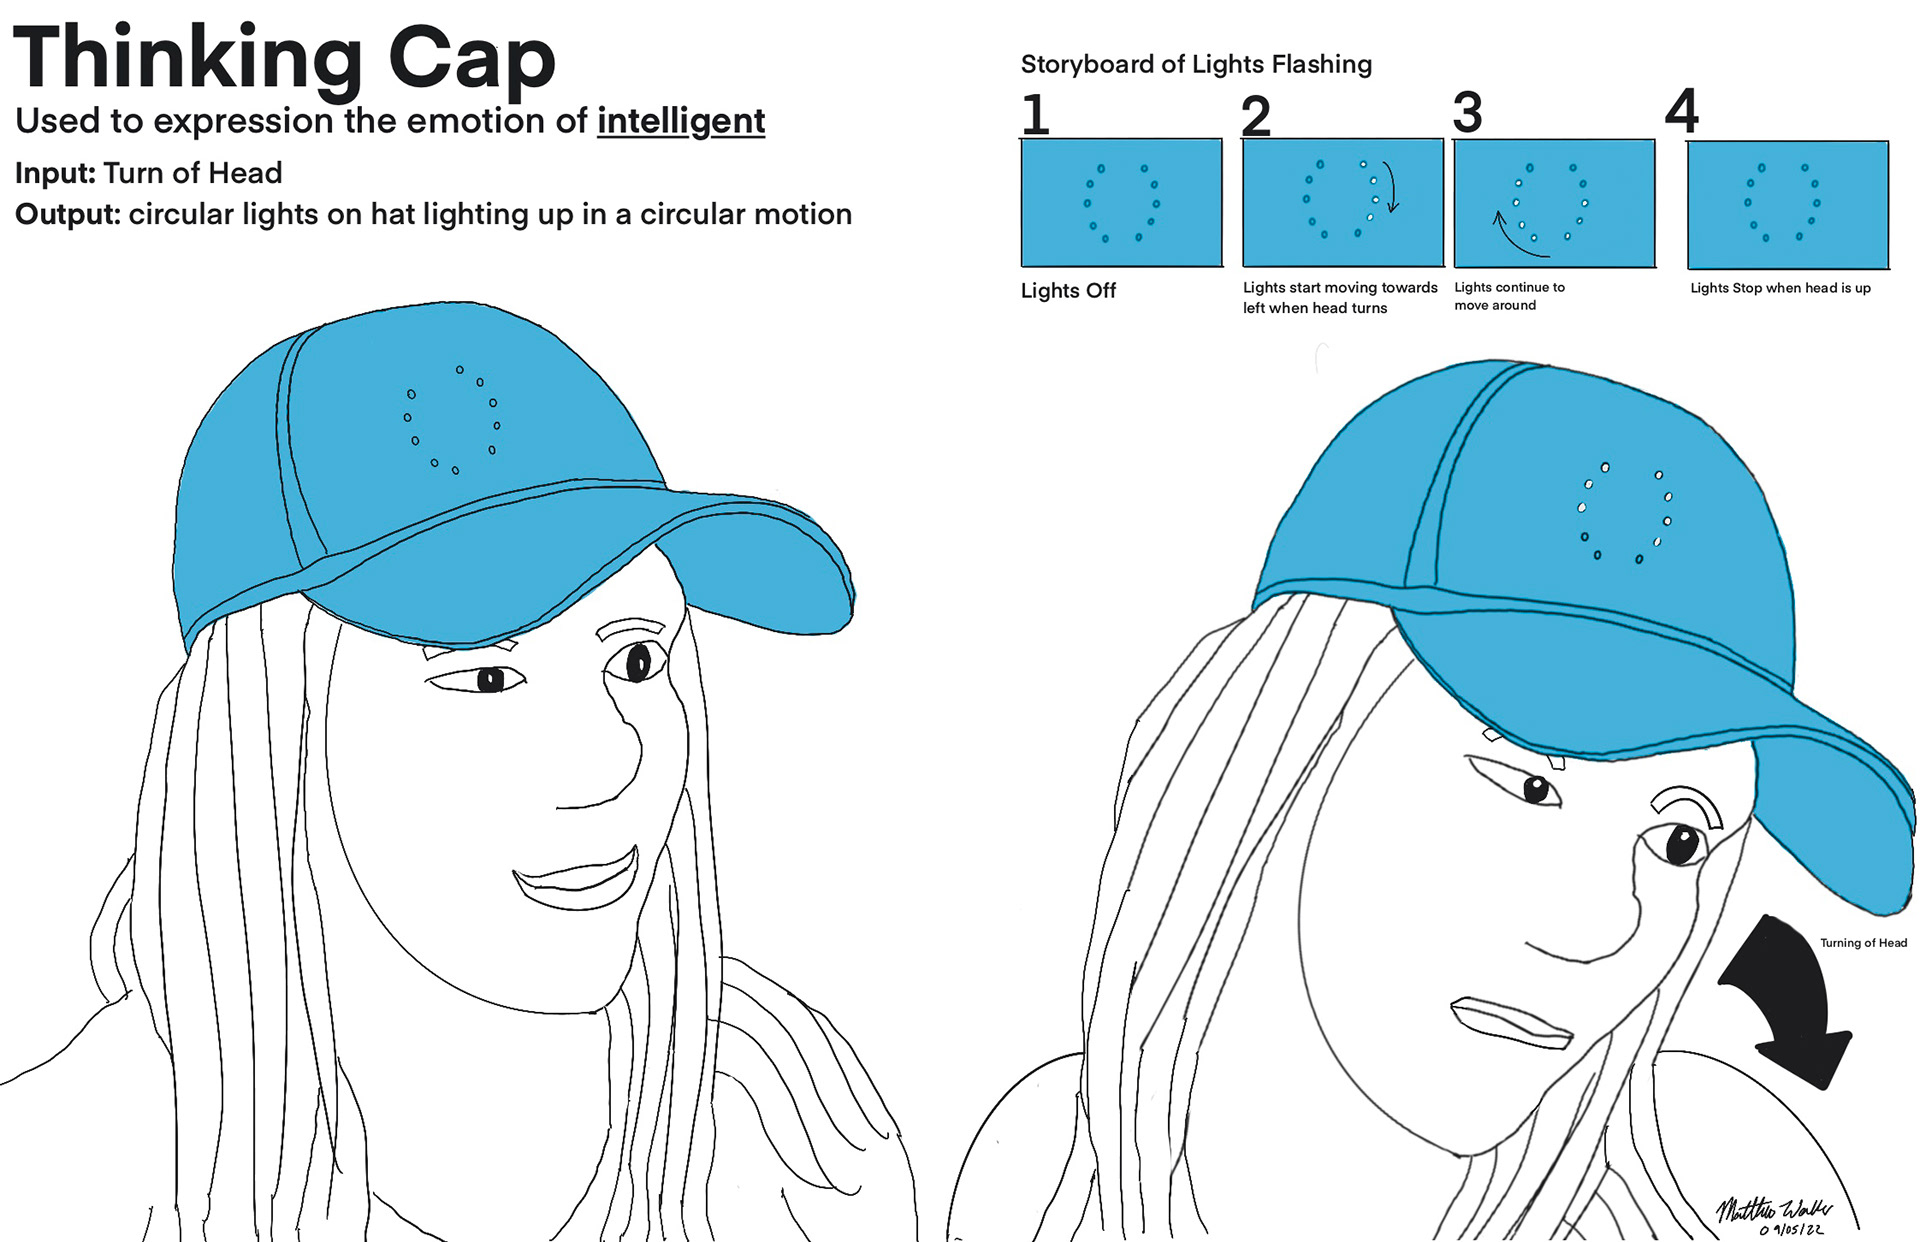
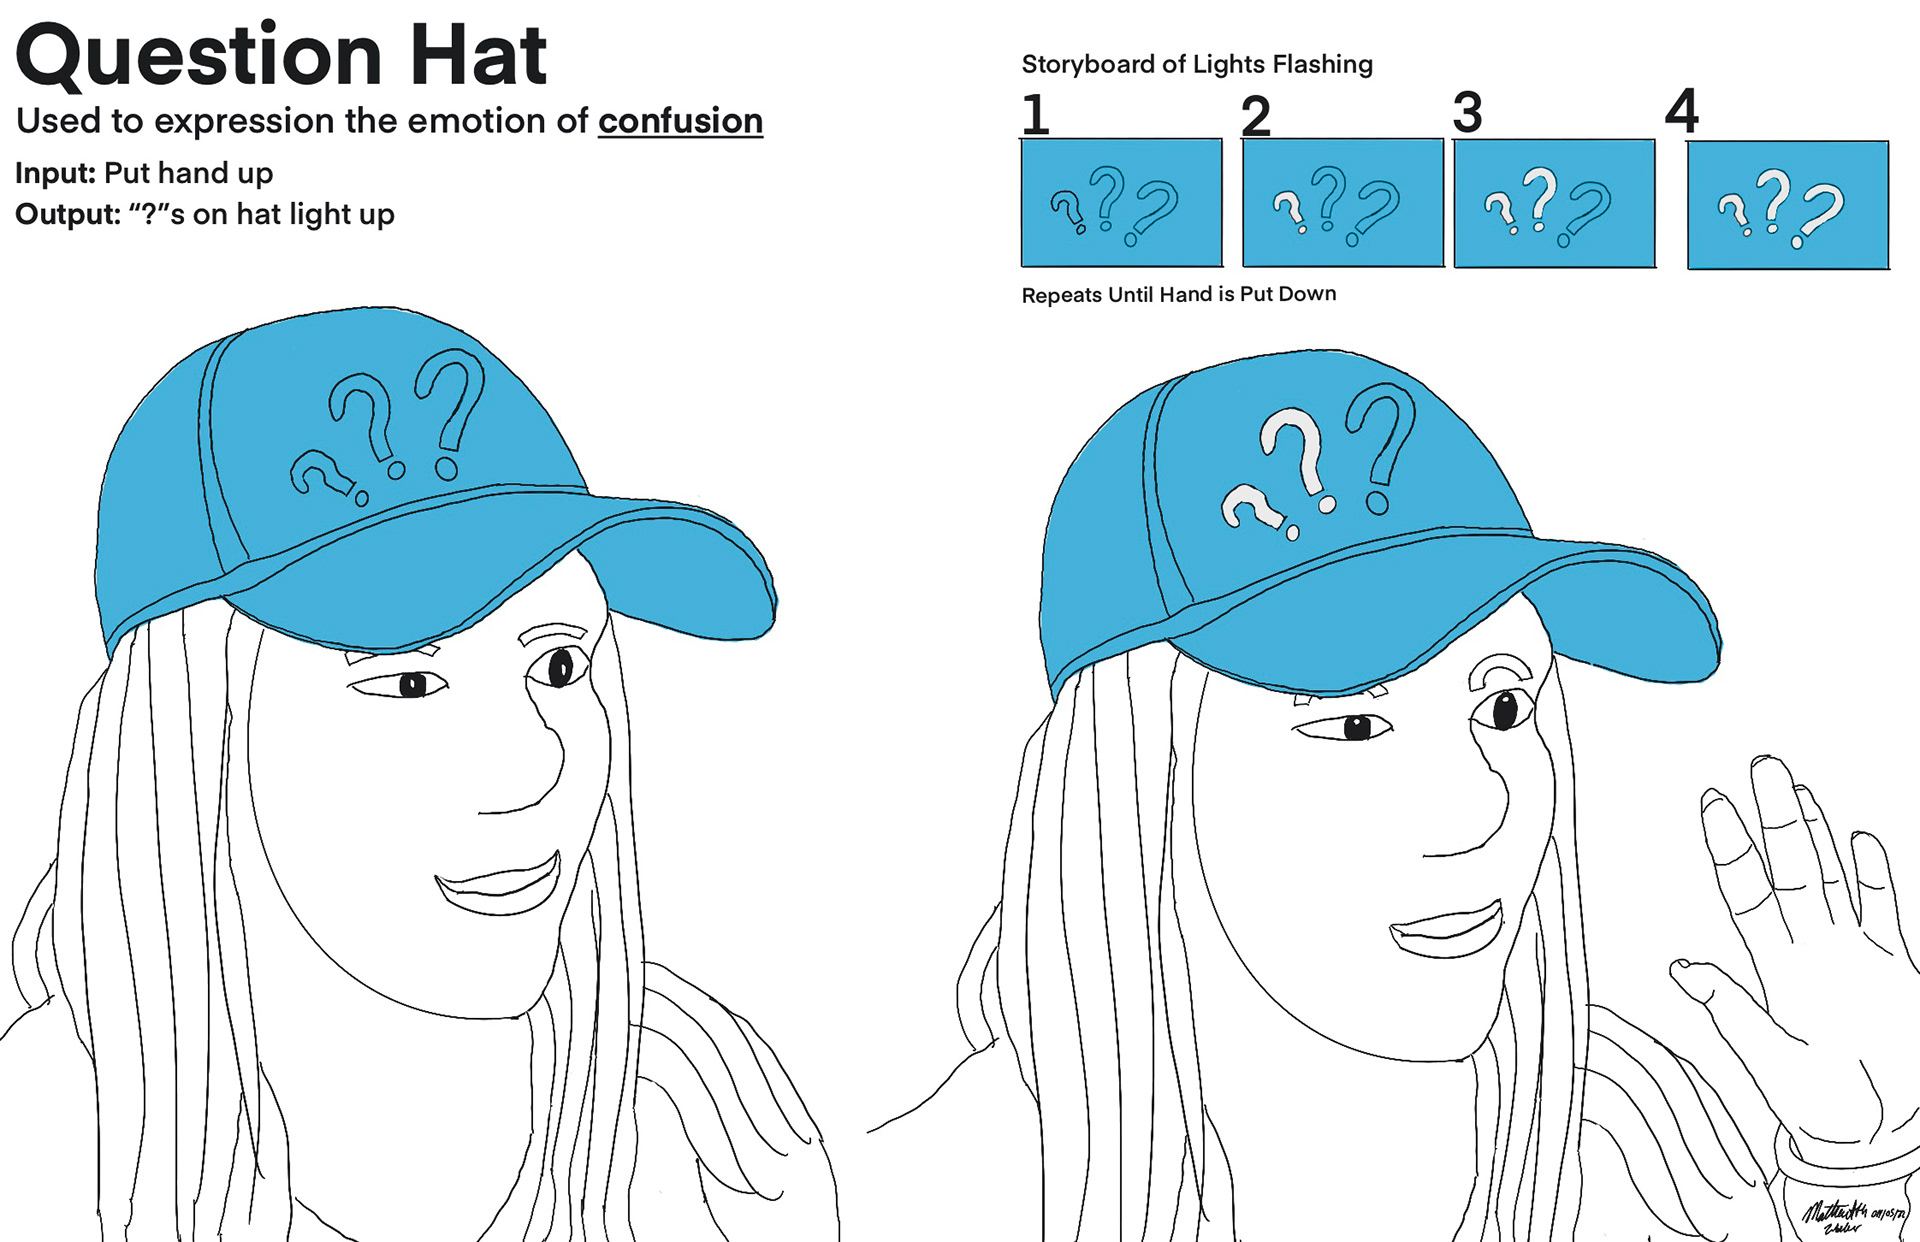
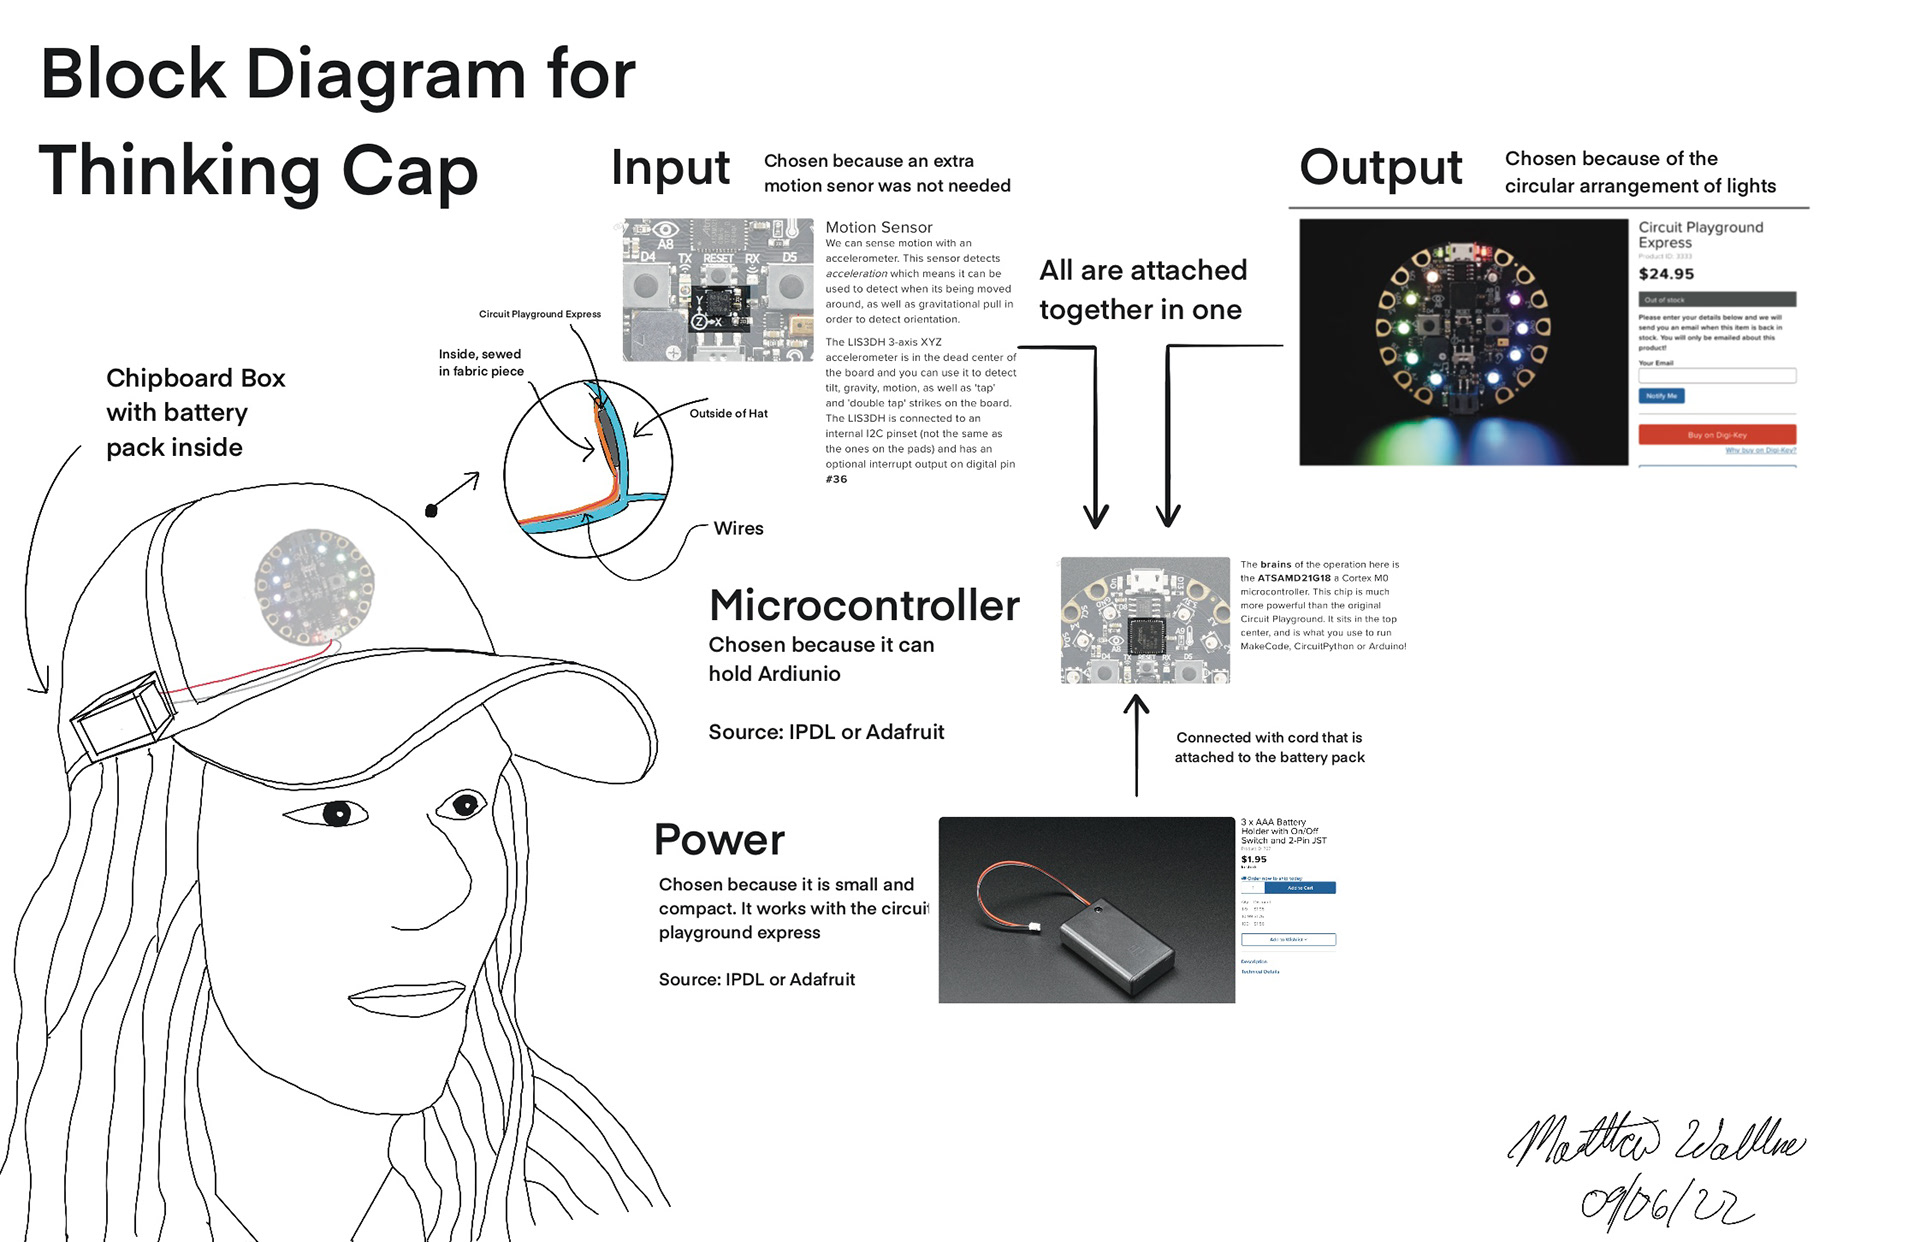
Due to the best feedback coming from concepts 1 and 3 above, I then revised those concepts in ProCreate, where he put the wearables in context, added storyboards, and detailed the design. At the same time, I created block diagrams of electronic components that would make the interaction occur. Peers felt the "Question Hat" was the strongest concept.
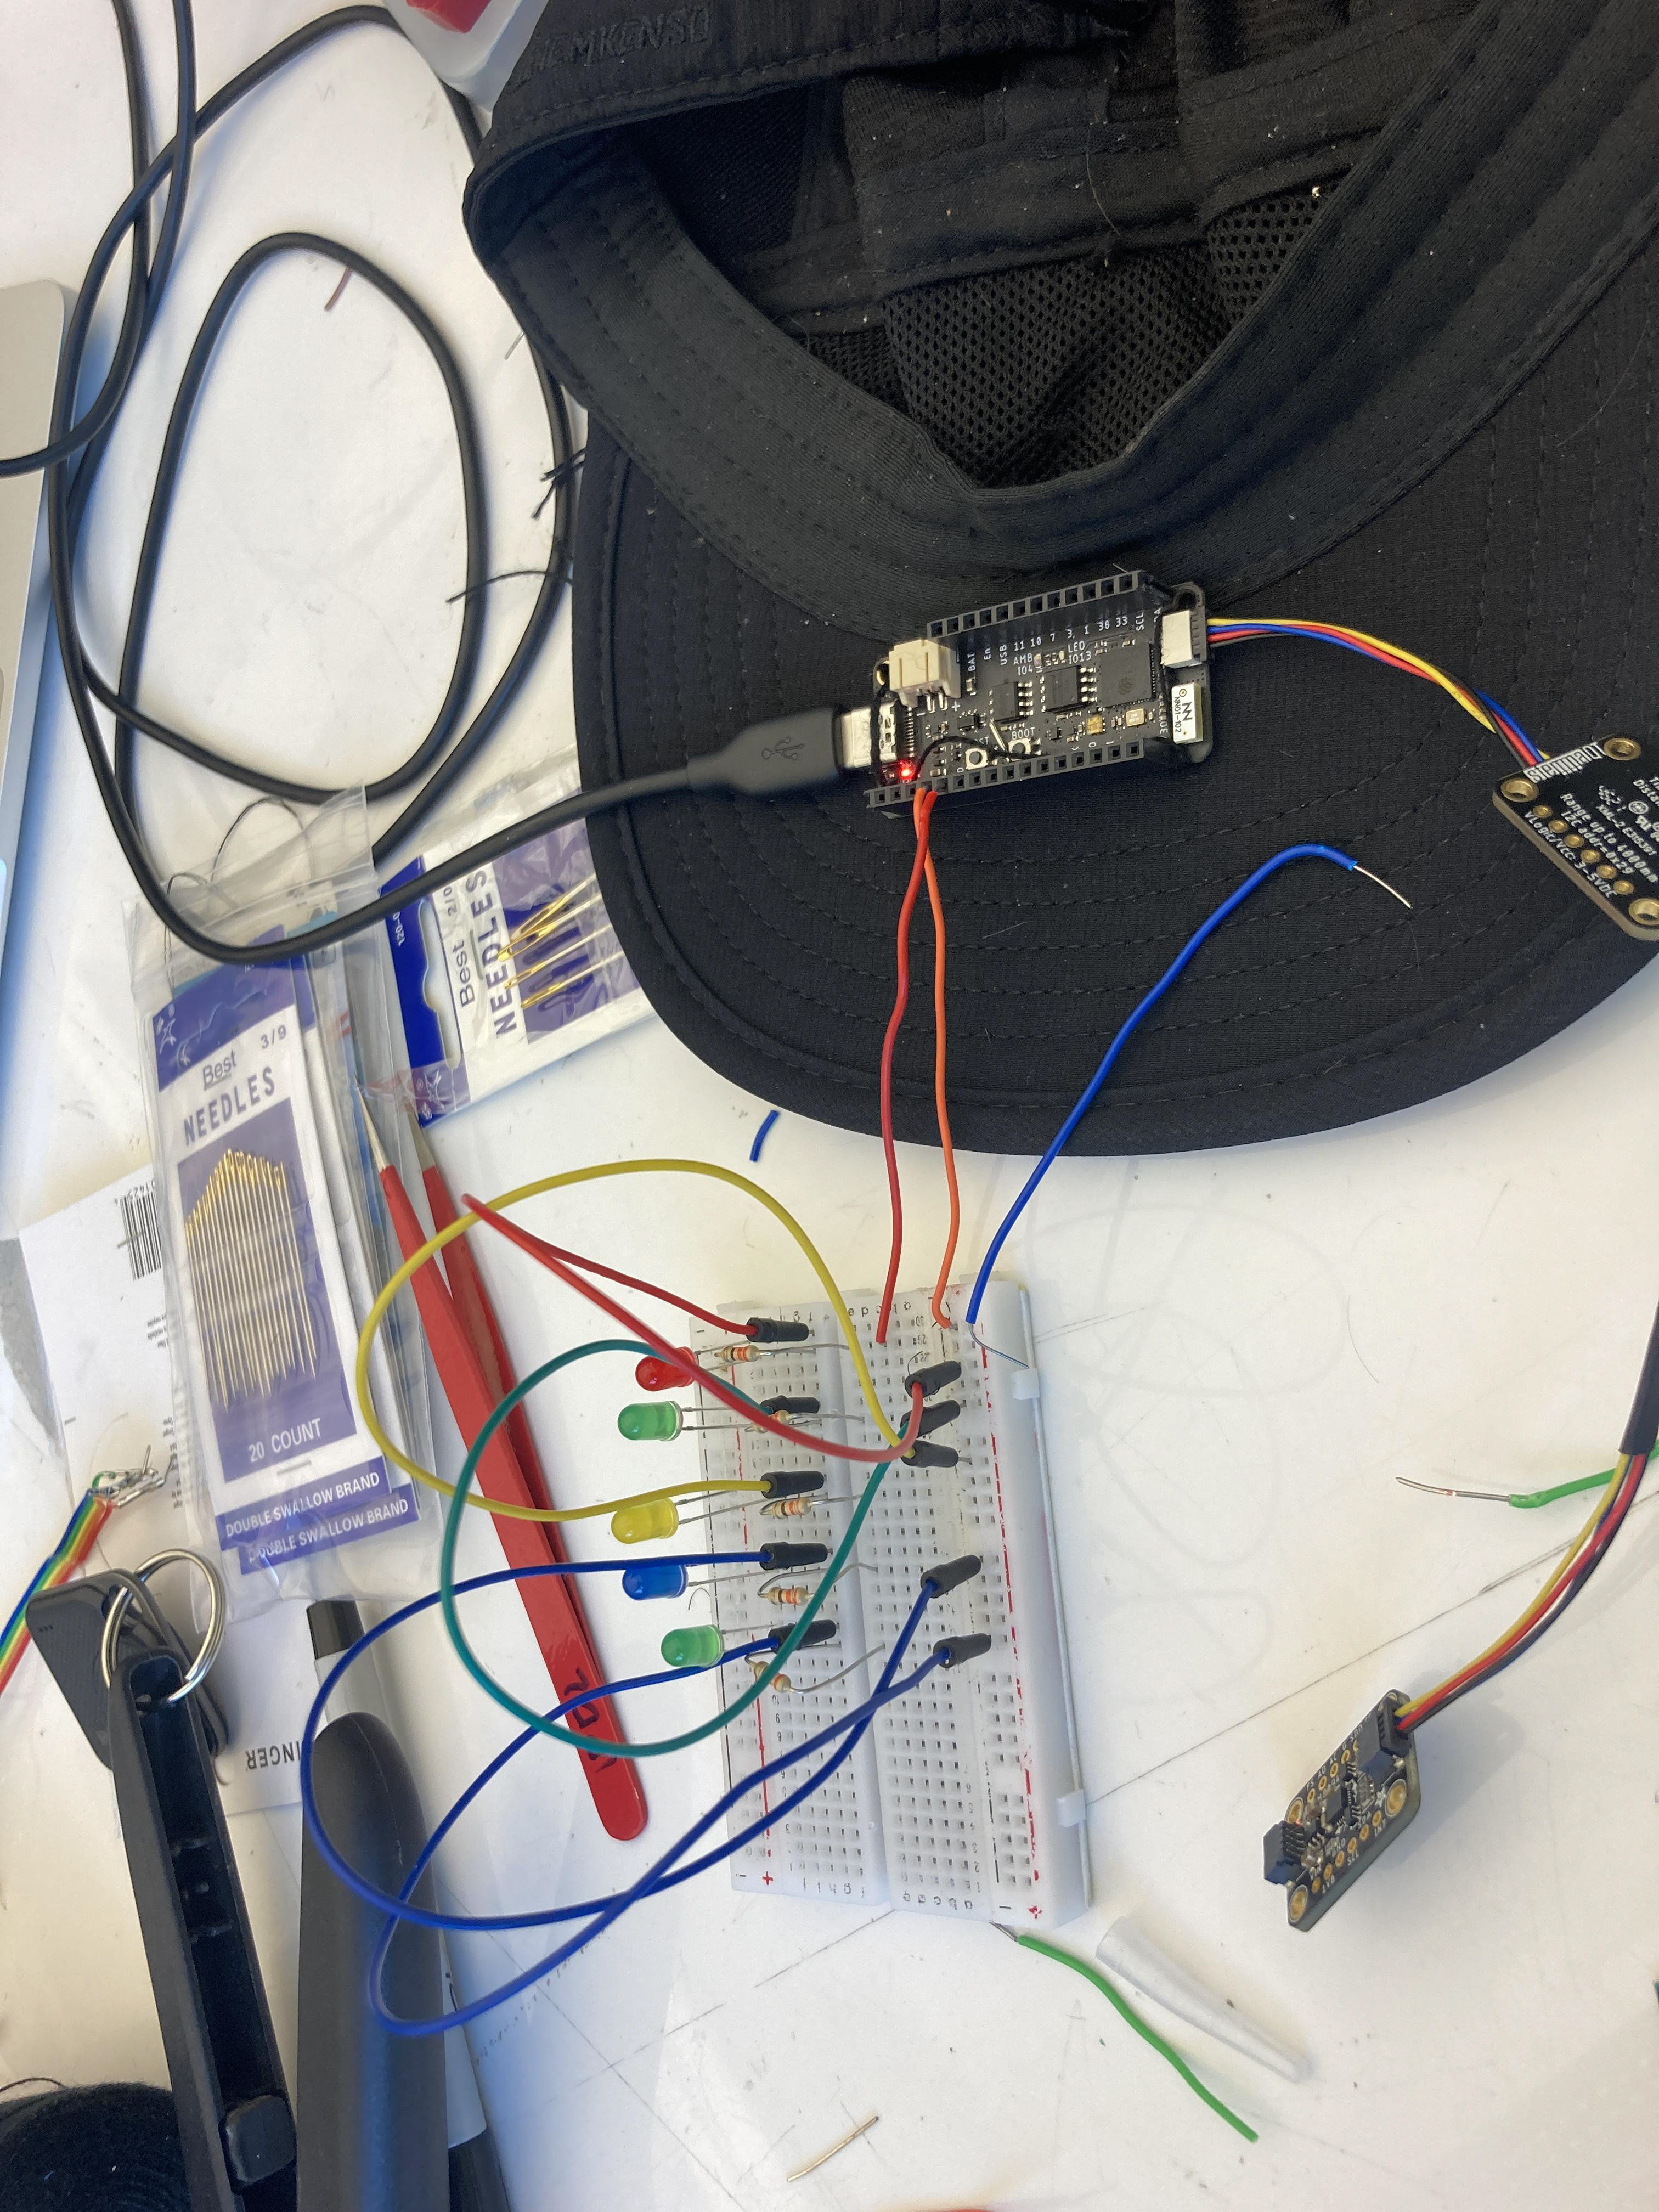
Low-Fidelity Prototype
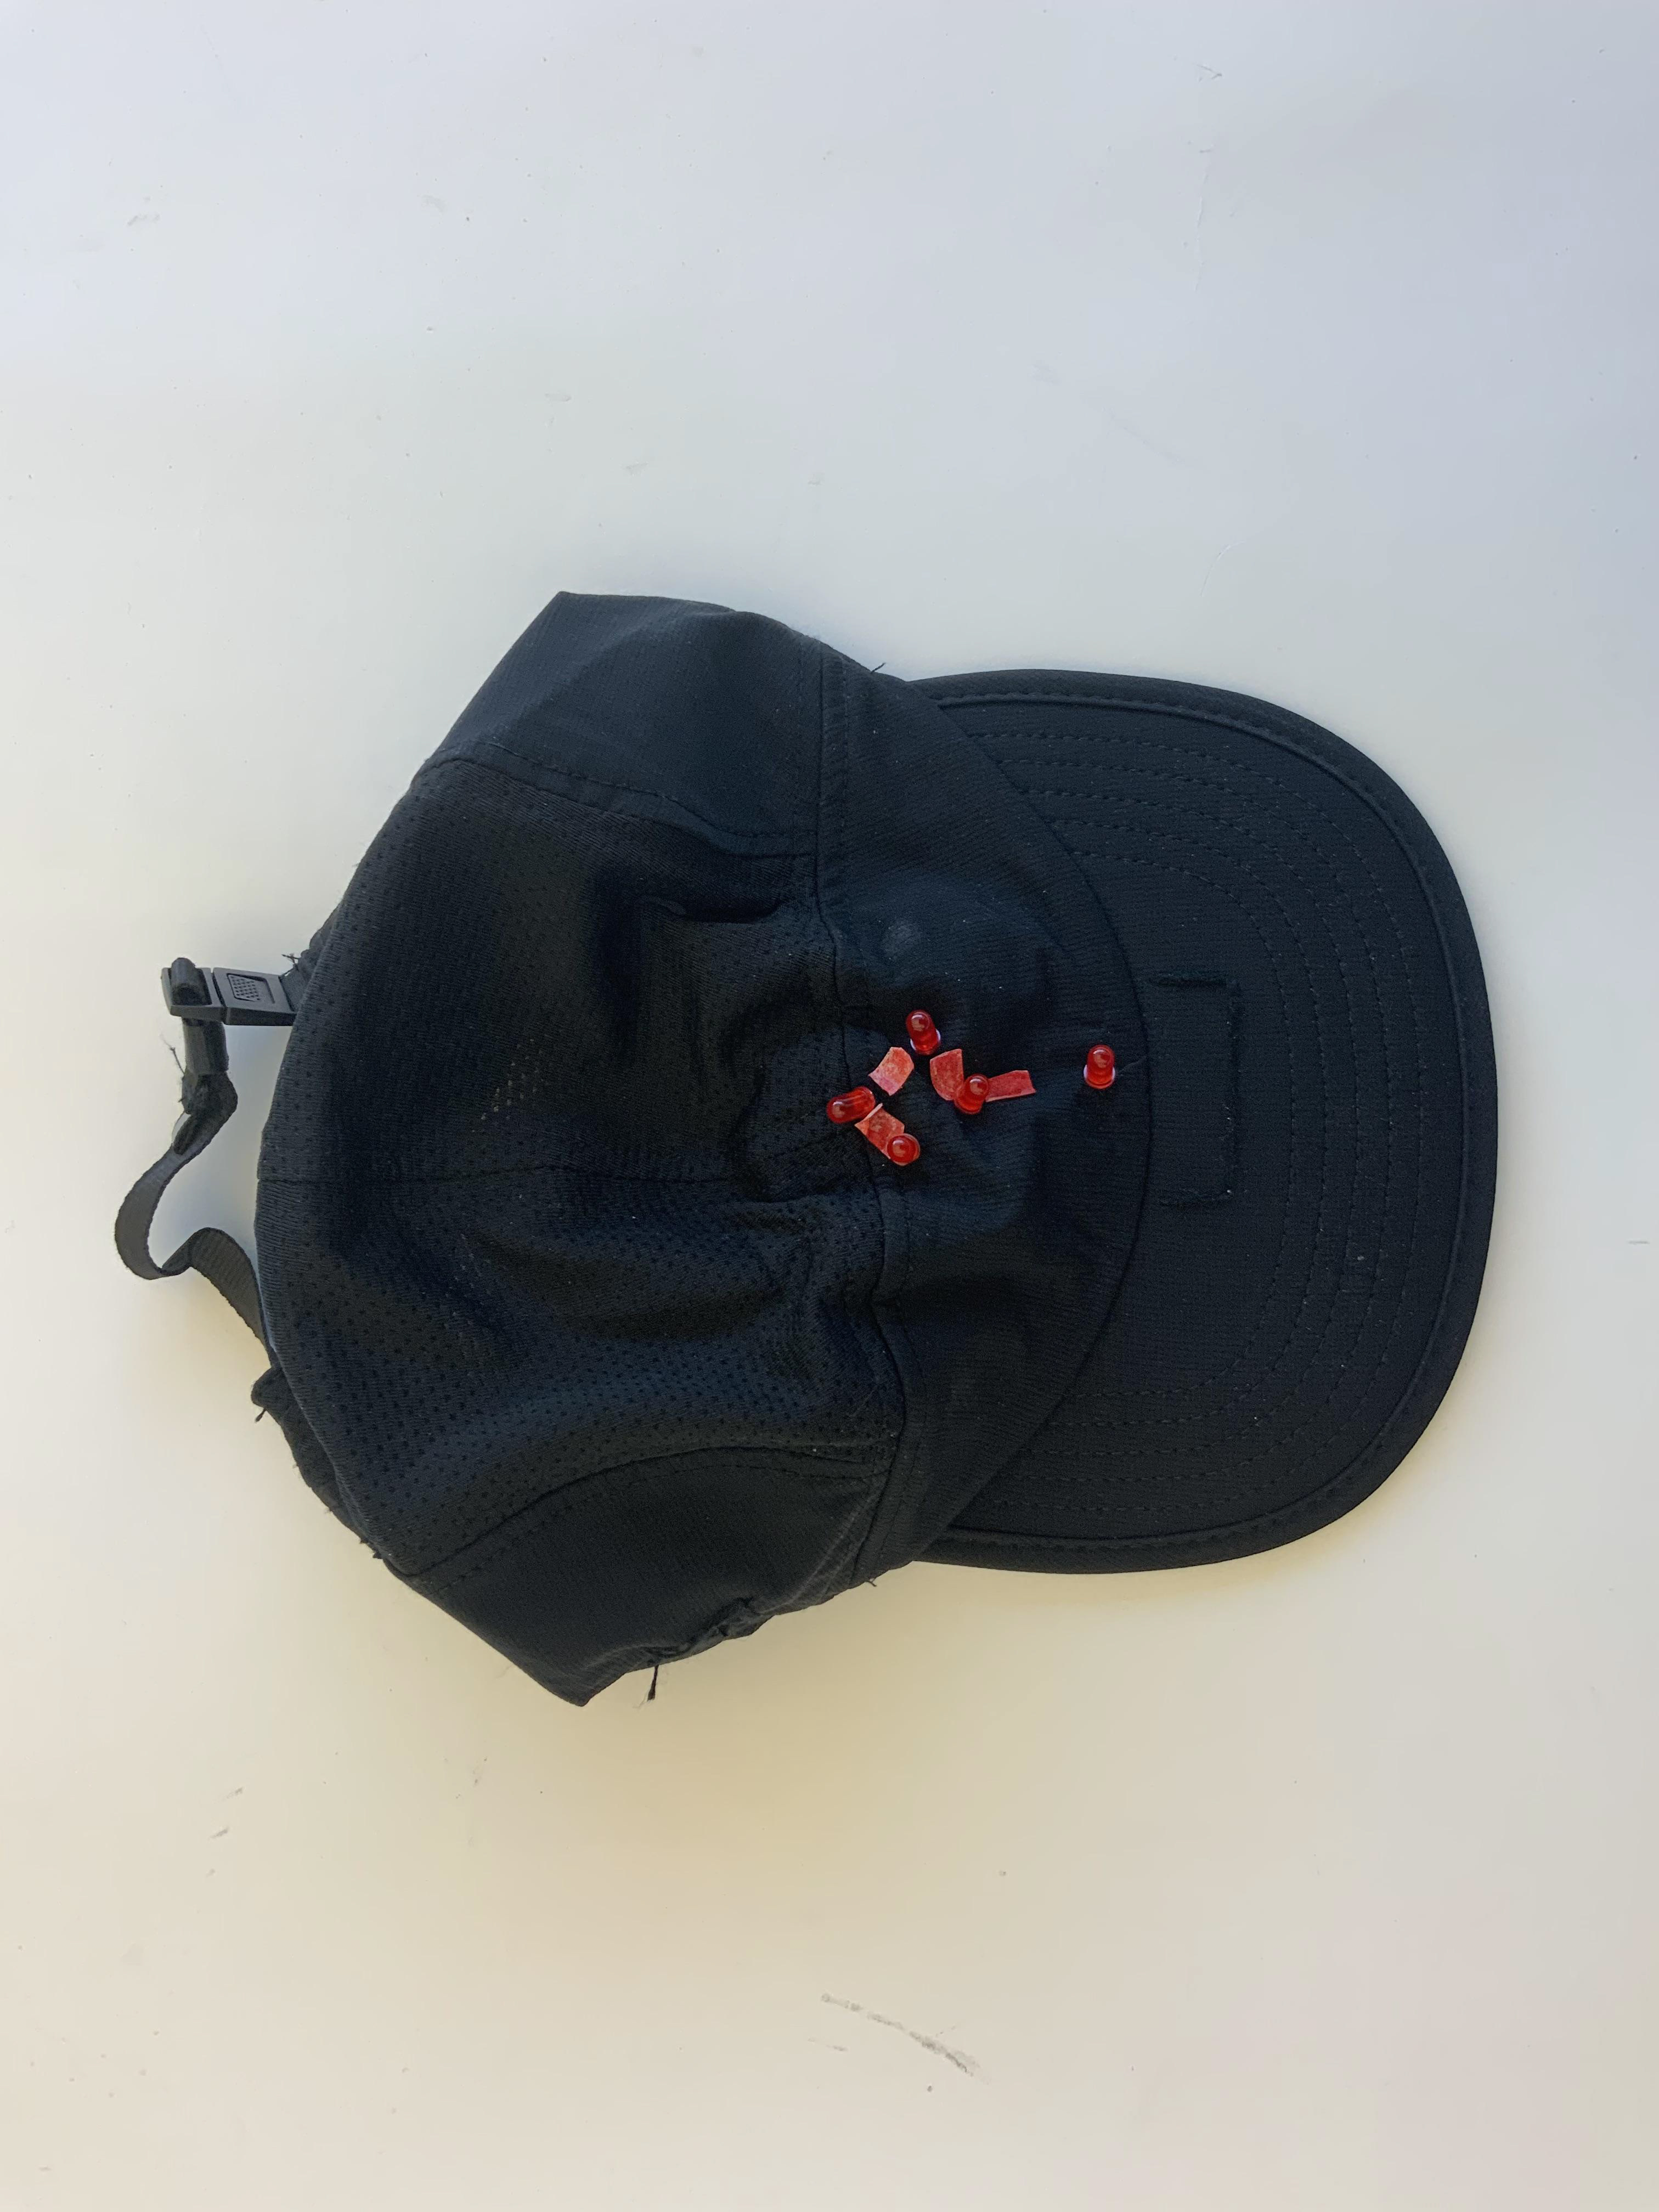
I began building the low-fidelity model with battery packs, Ardunio Redboard Uno, stemma wires, time of flight distance sensor, breadboard, and ICM sensor. However, the battery back and Arduino Uno were too big to be on the hat, so a FeatherS2 was needed, along with a lithium-chargeable battery.
The hat shown was bought online. All rights reserved to the hat itself and respected parties.
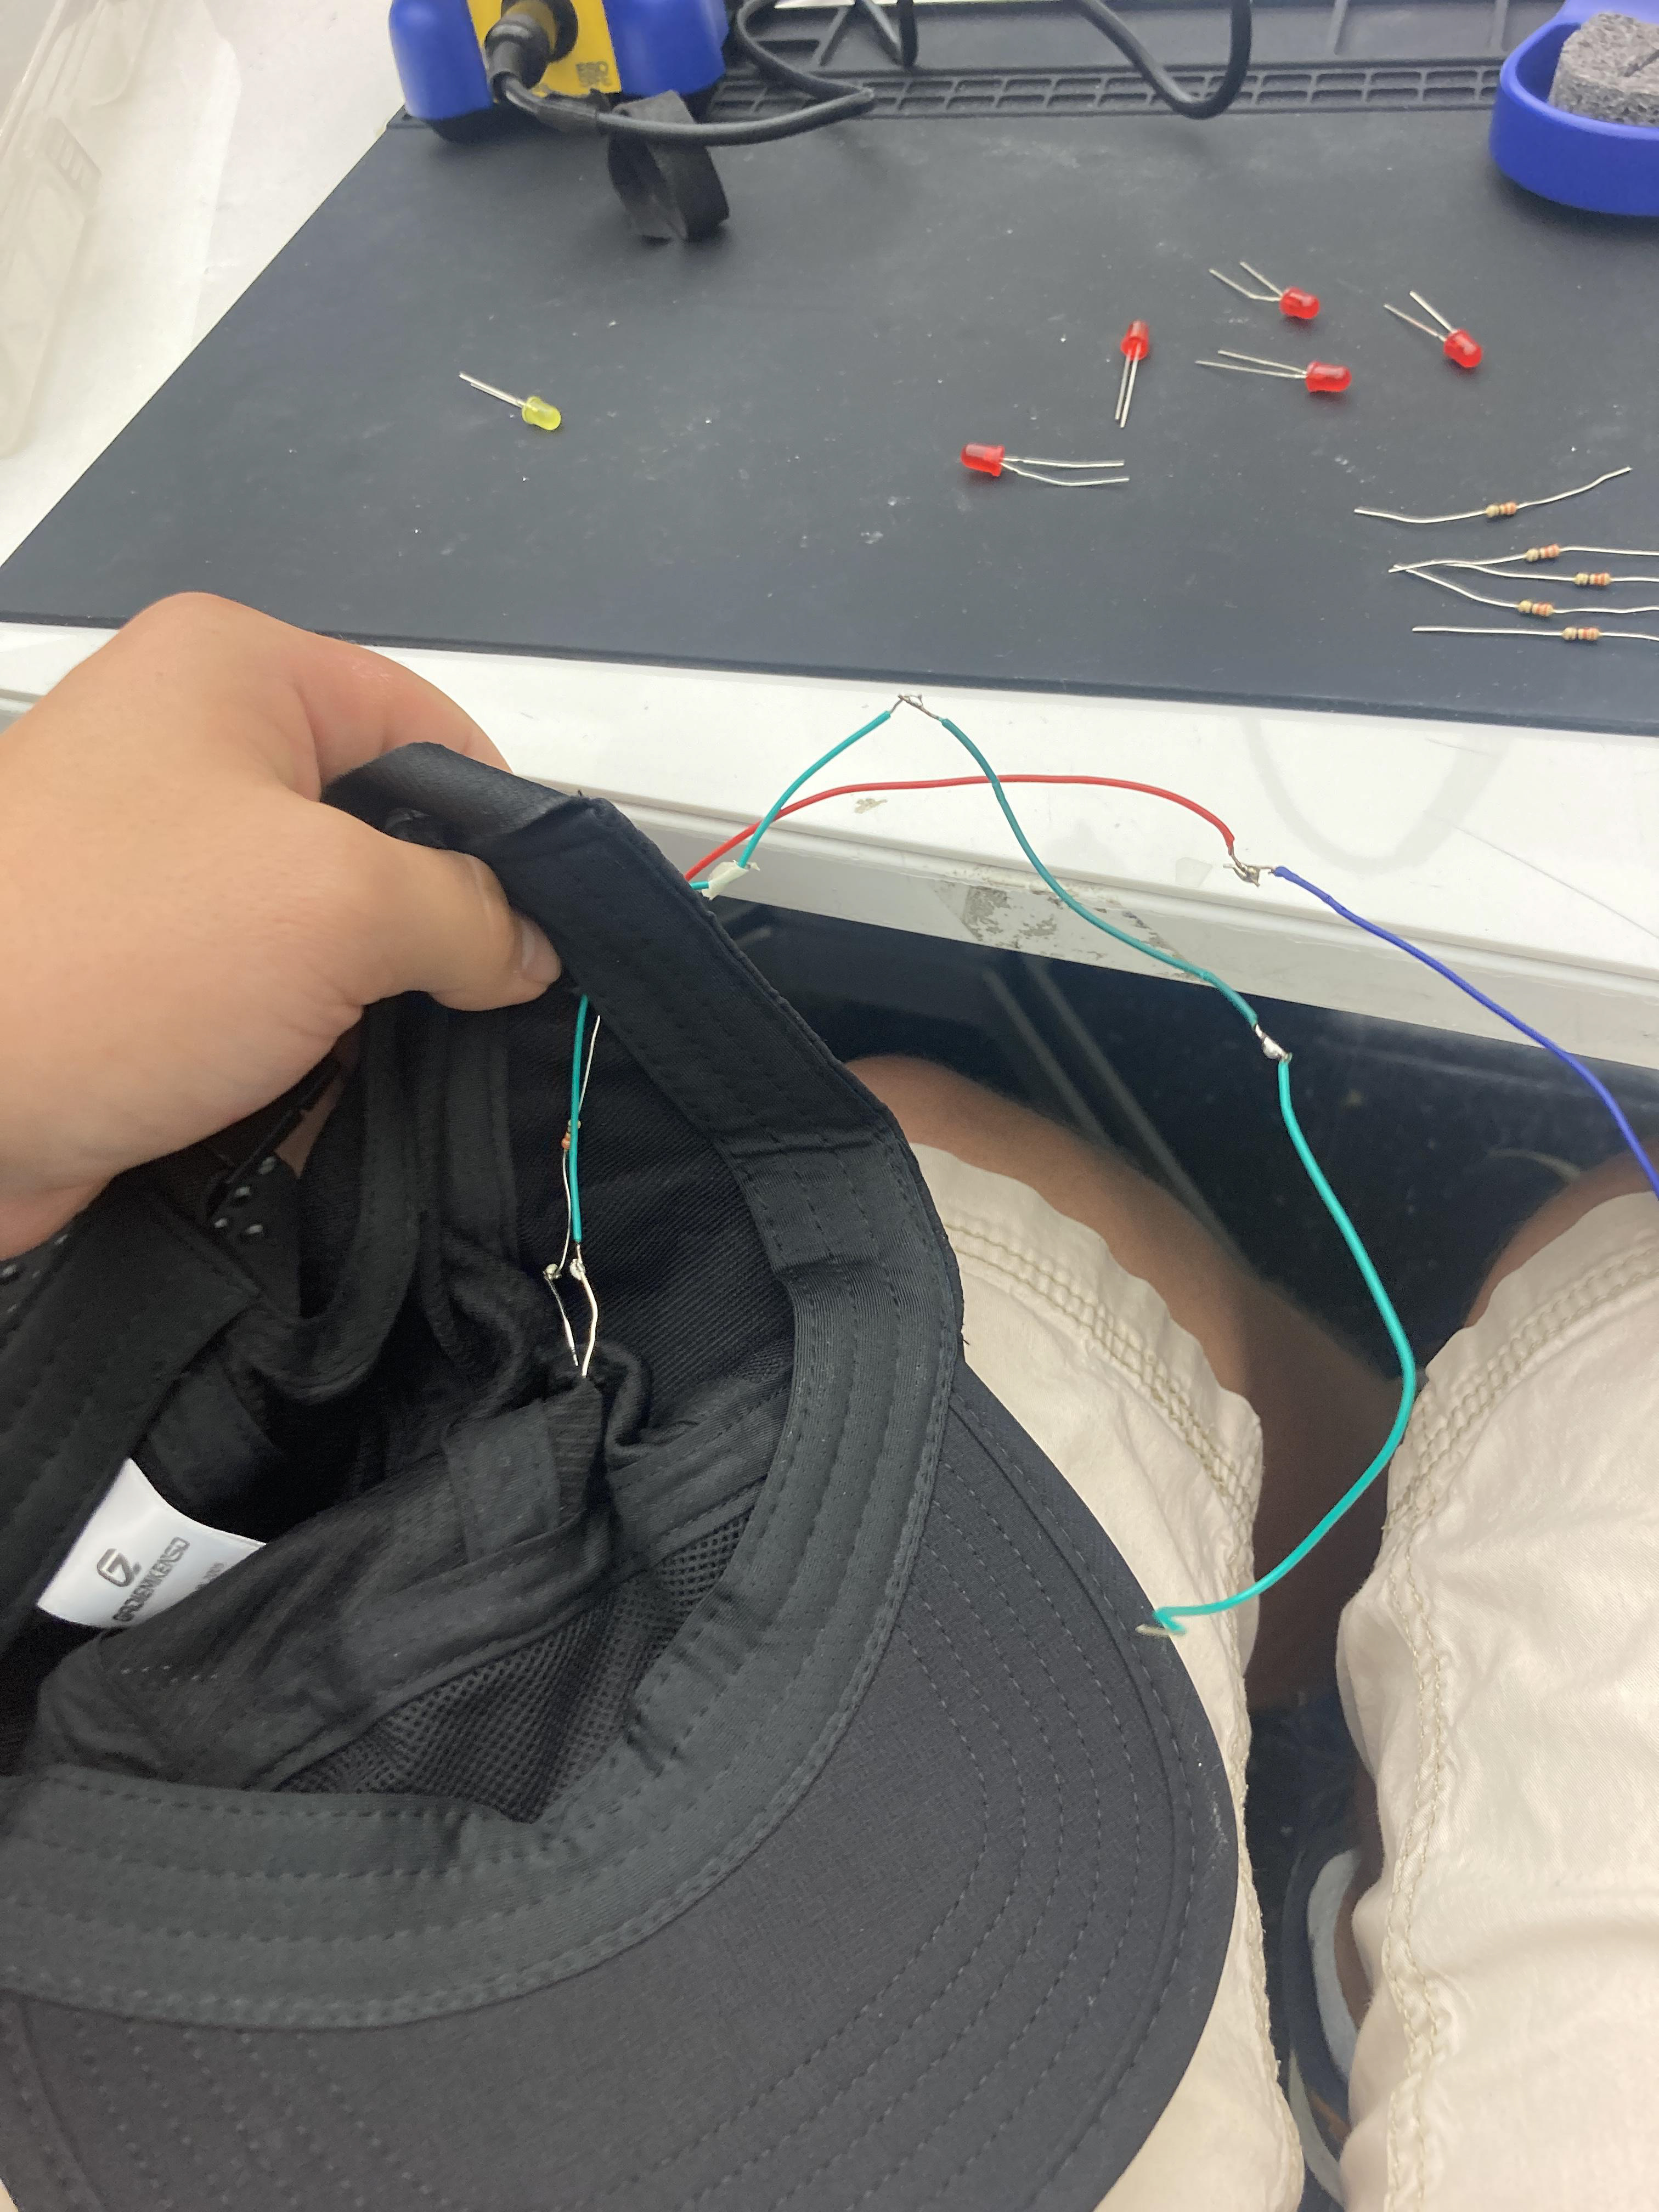
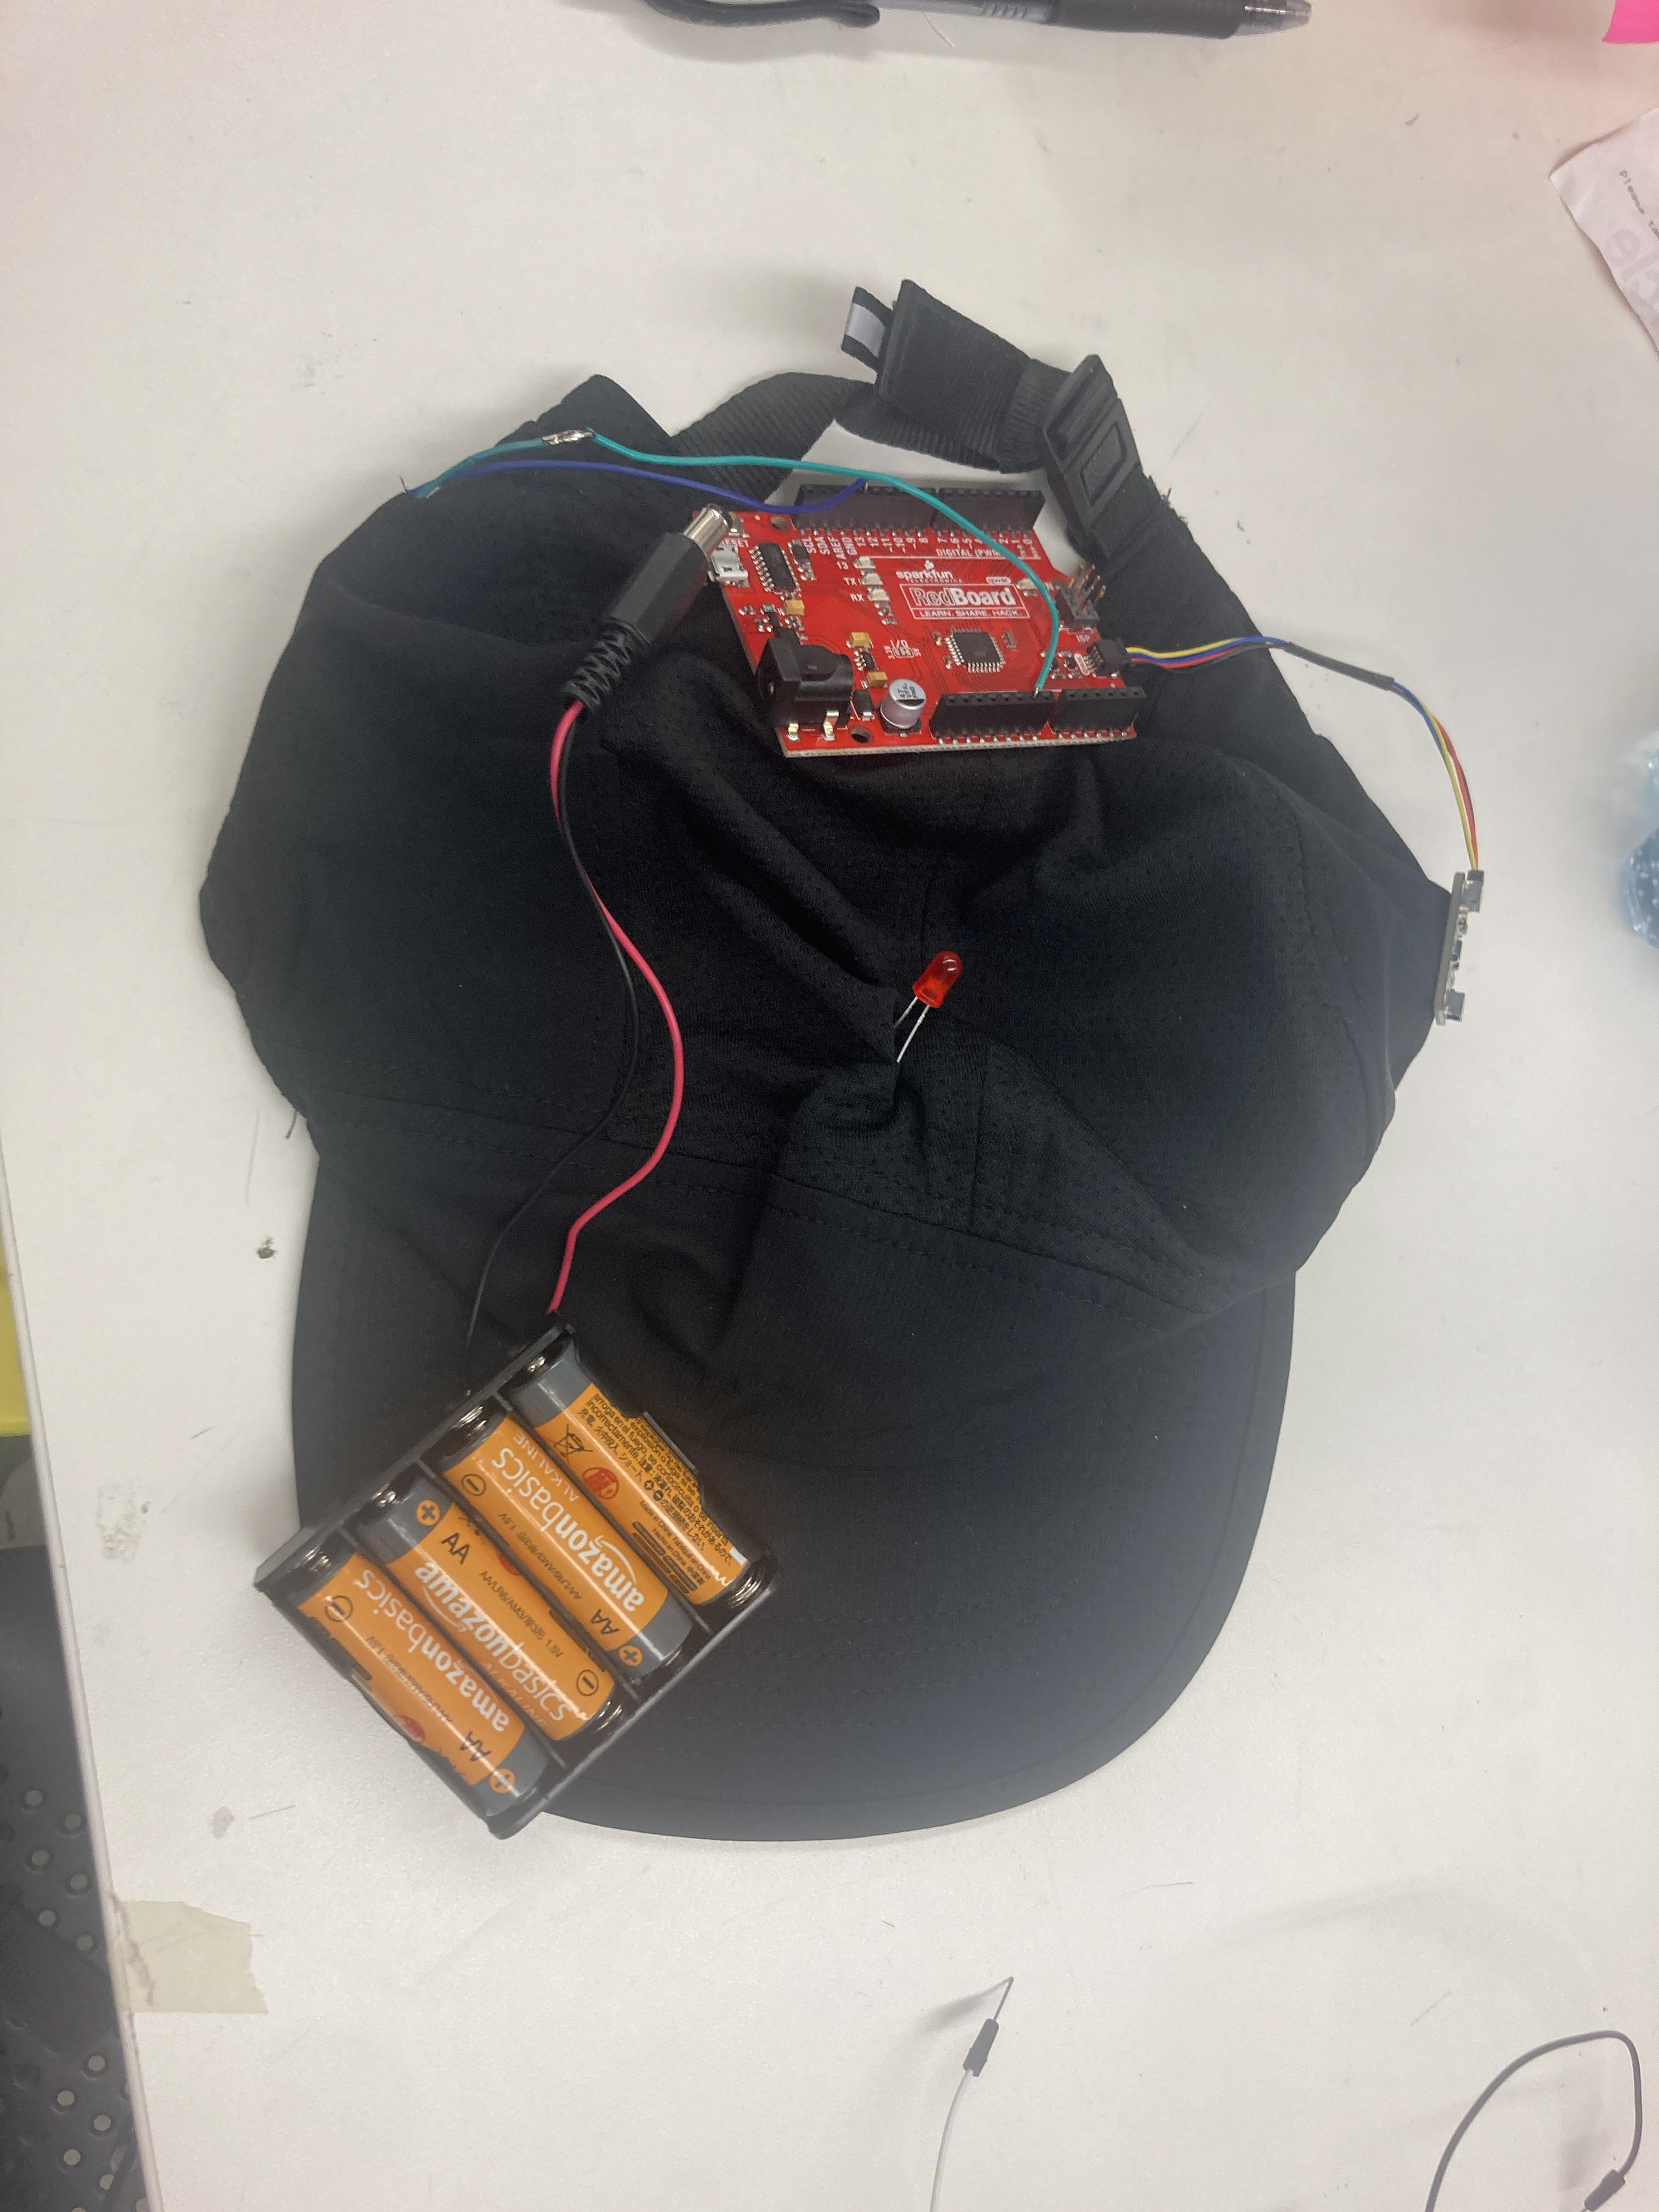

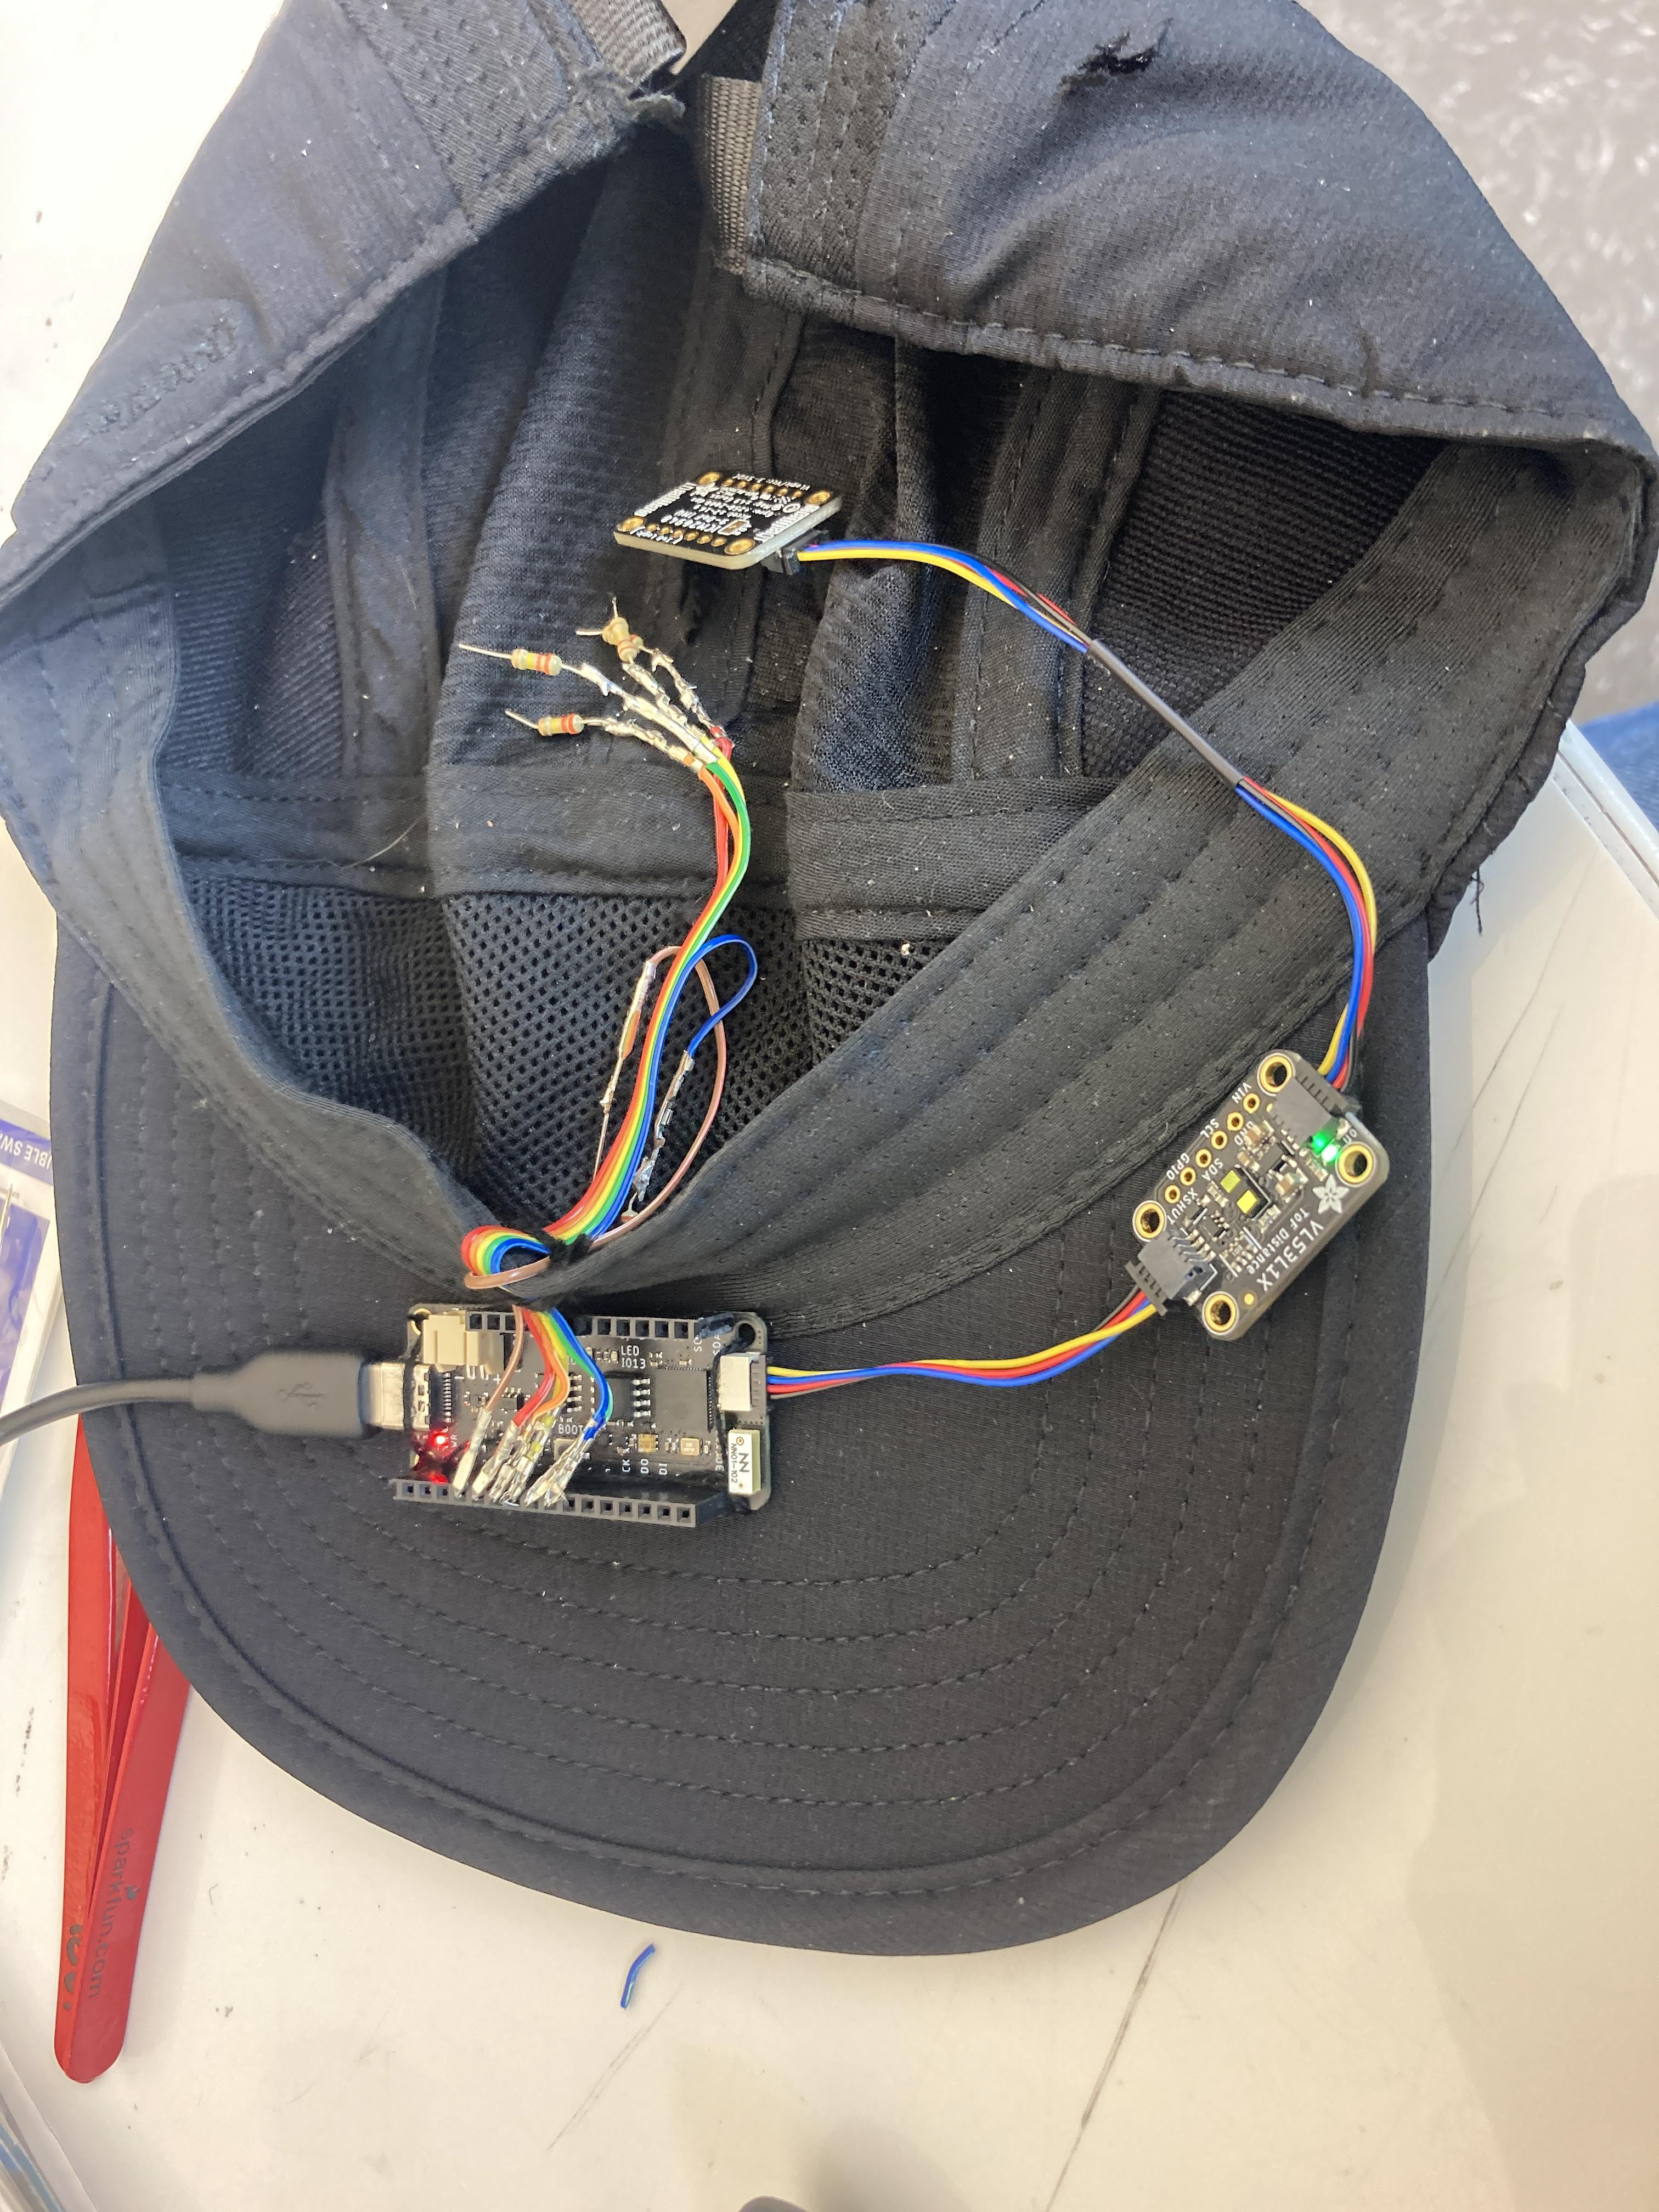
Developing a Revised Model
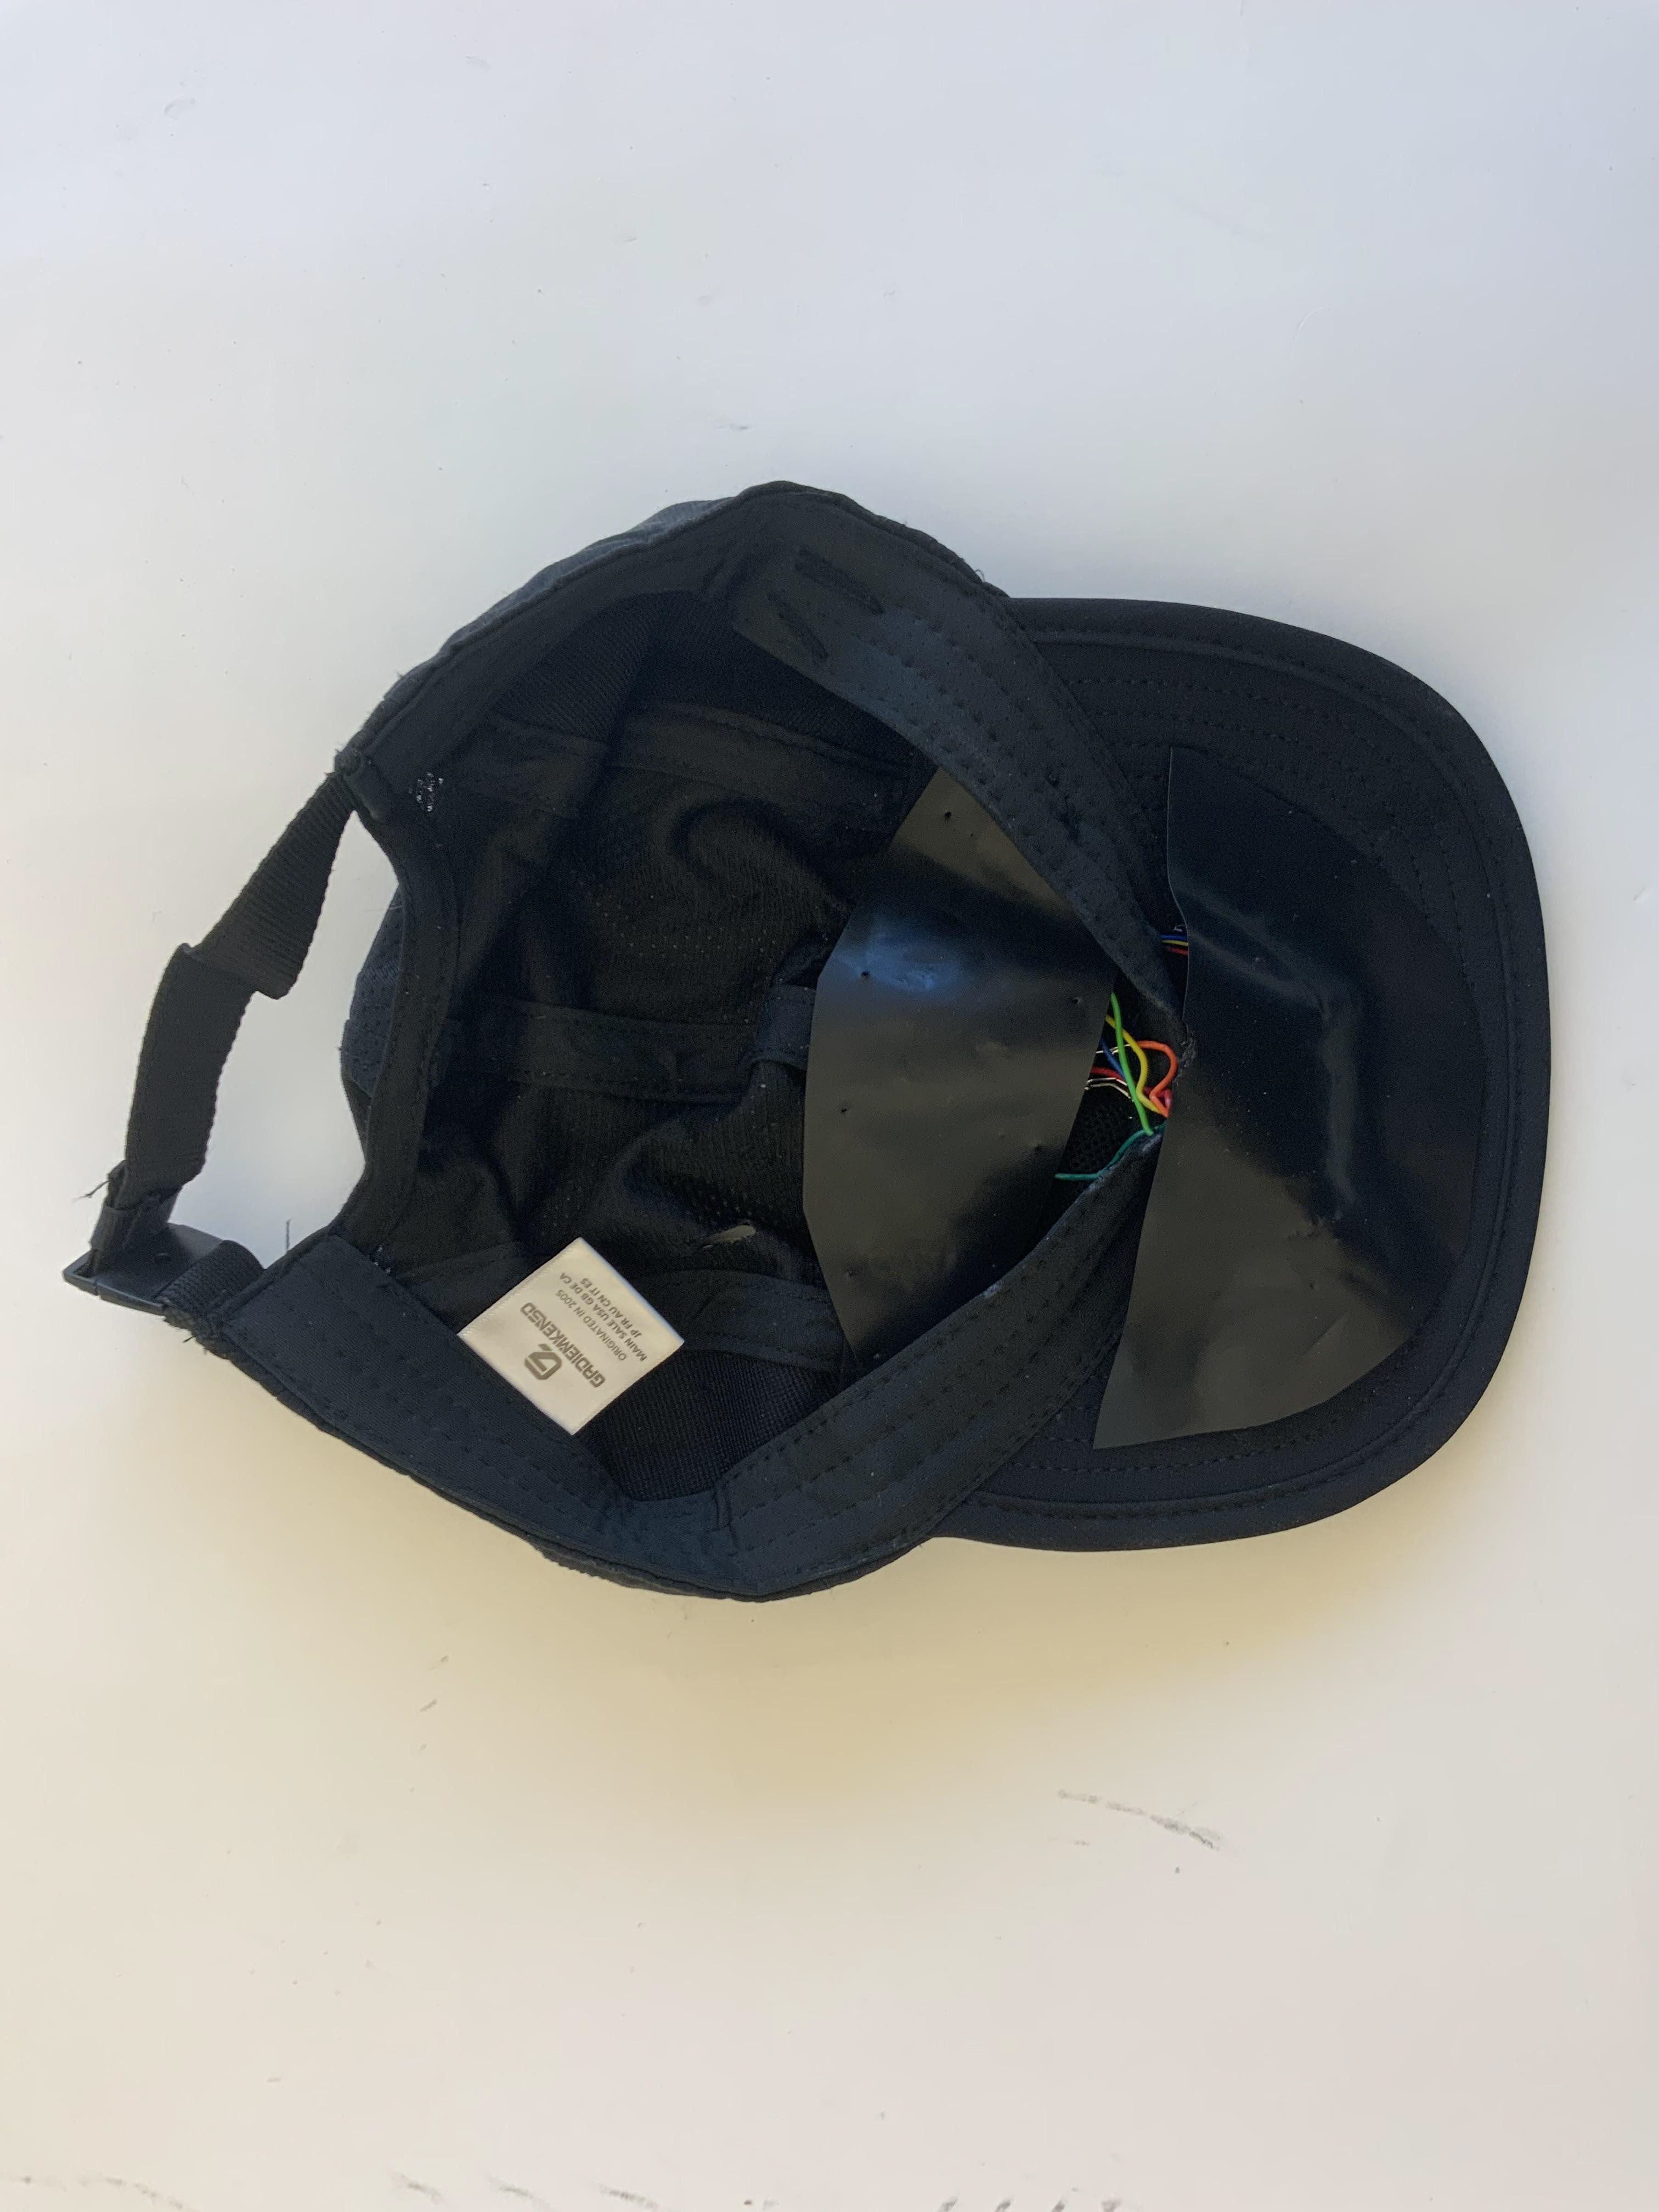
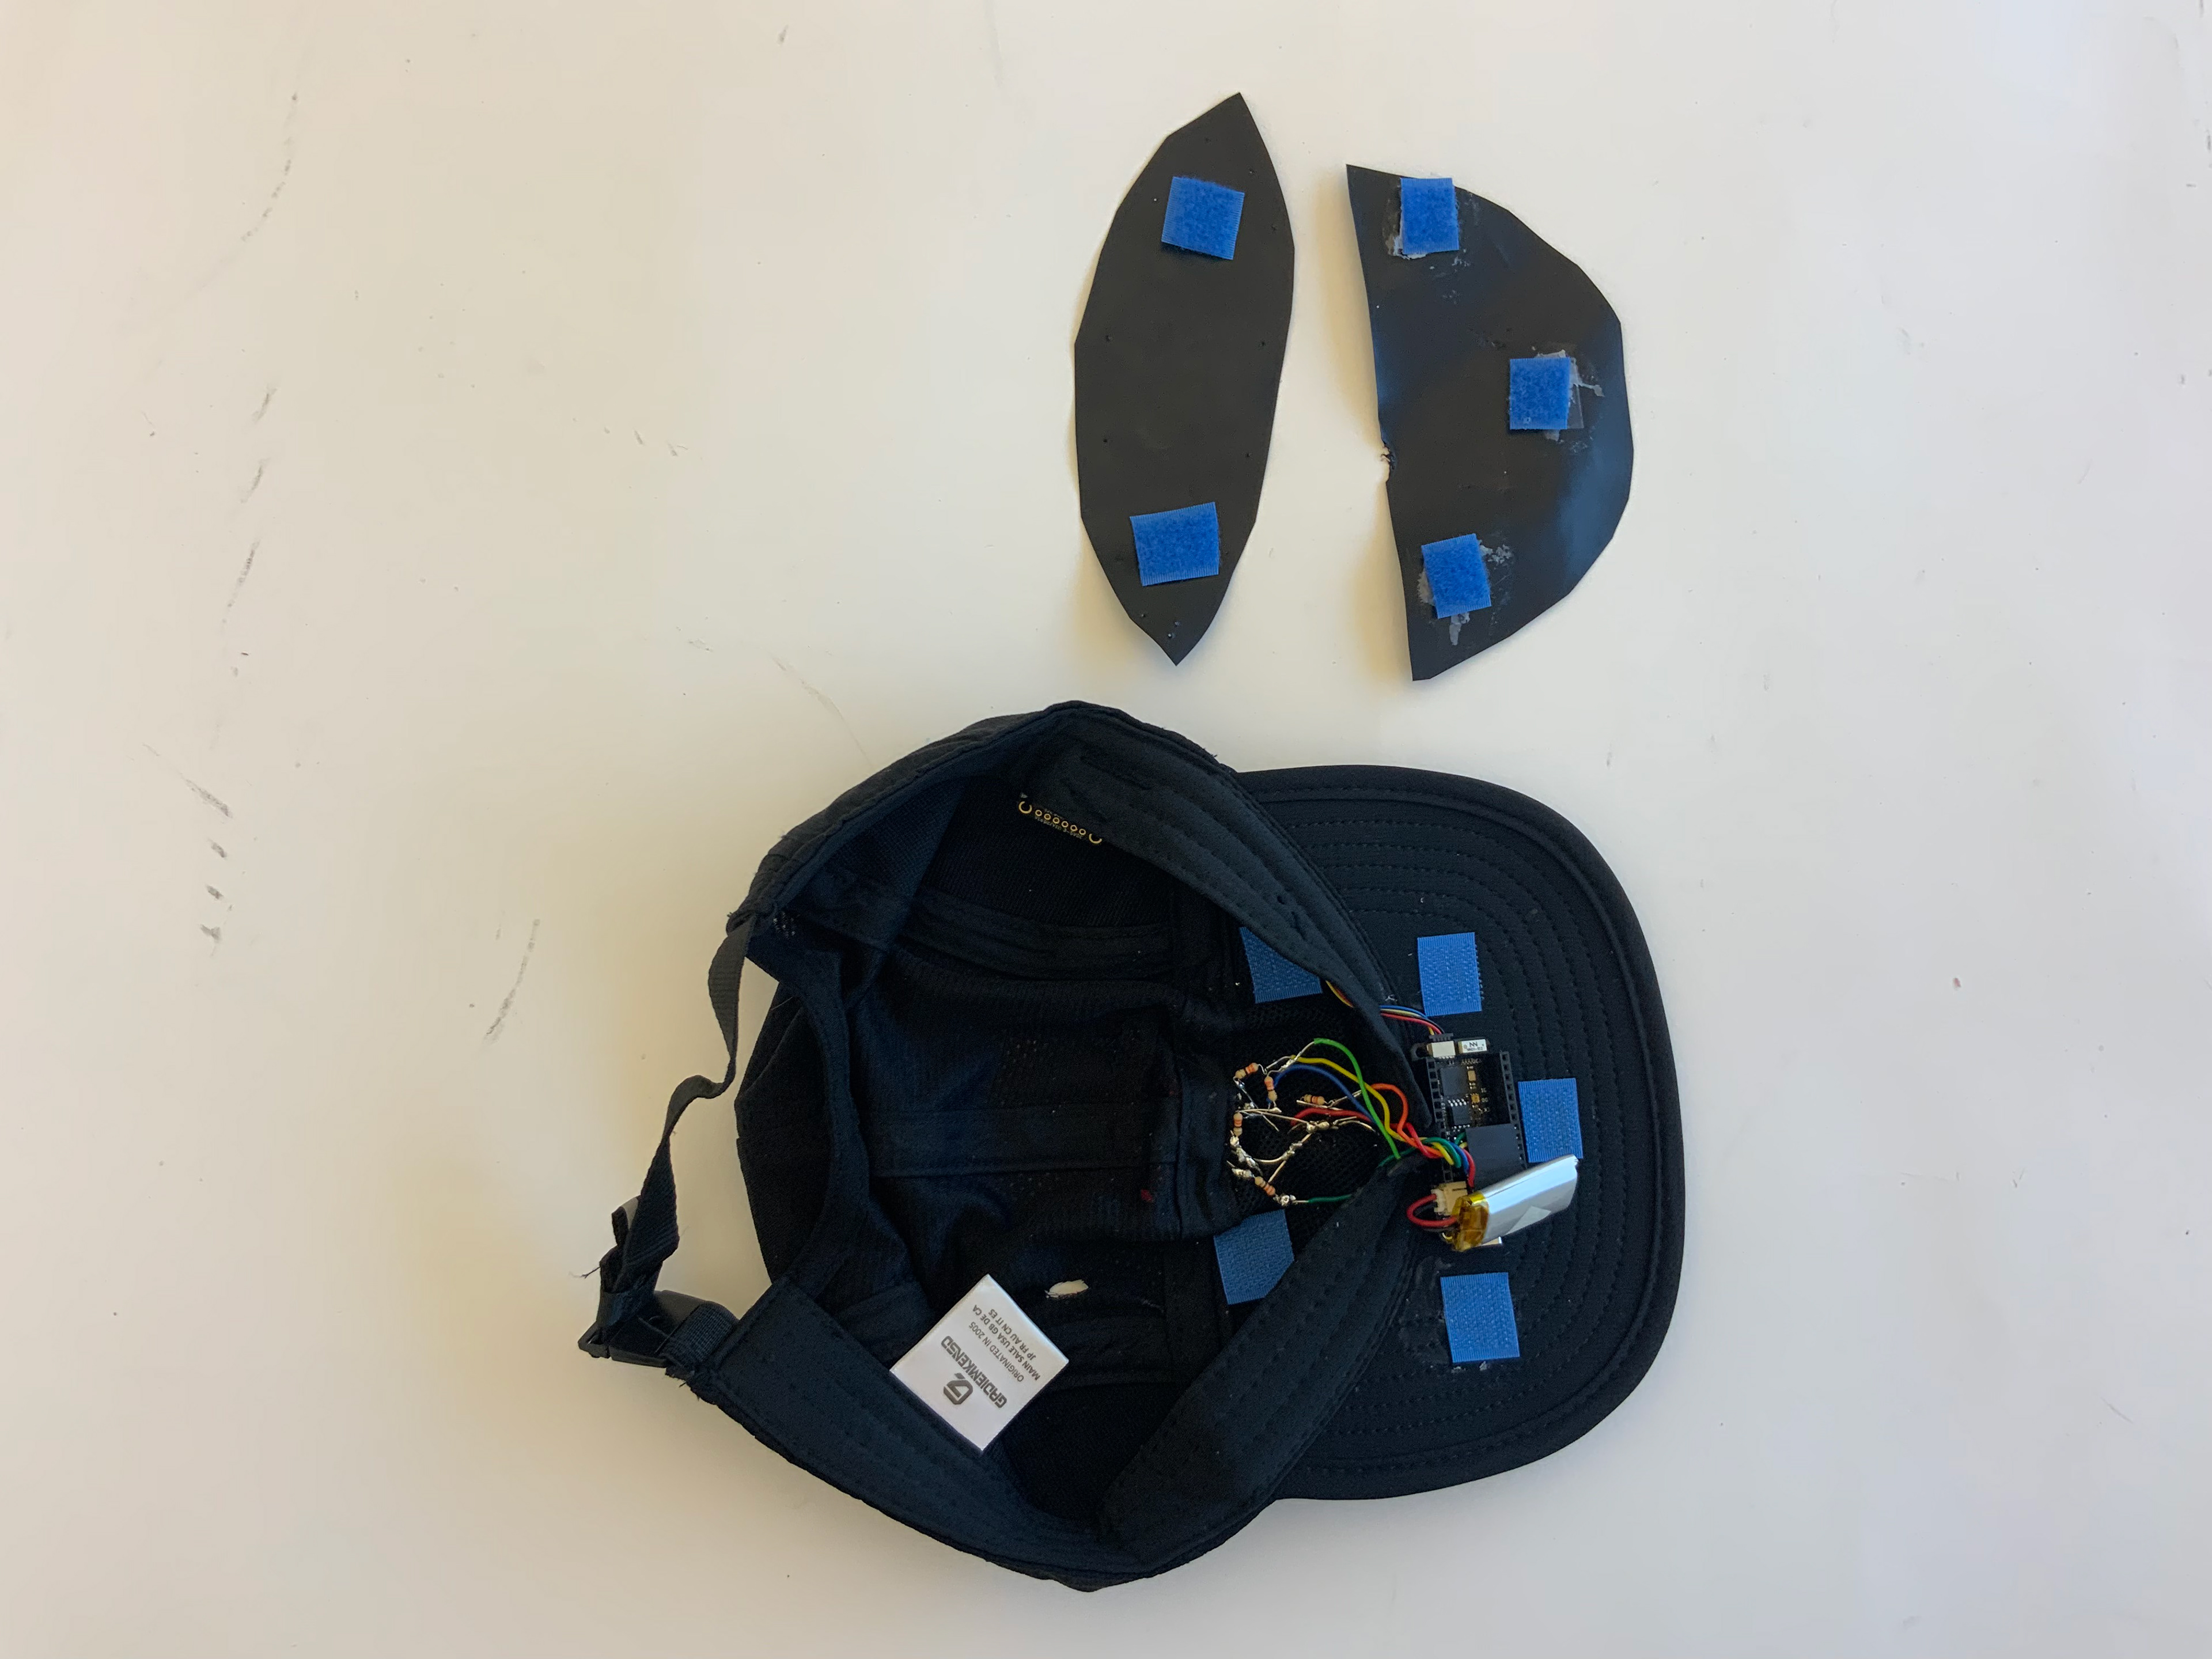
While an attempt to crimp rainbow wires did not work out, the design and integration of the wires were revised to fit smoothly into the inside of the hat.. Velostat, a black flat material was used to cover the wires and FeatherS2 that were sewn onto the hat.

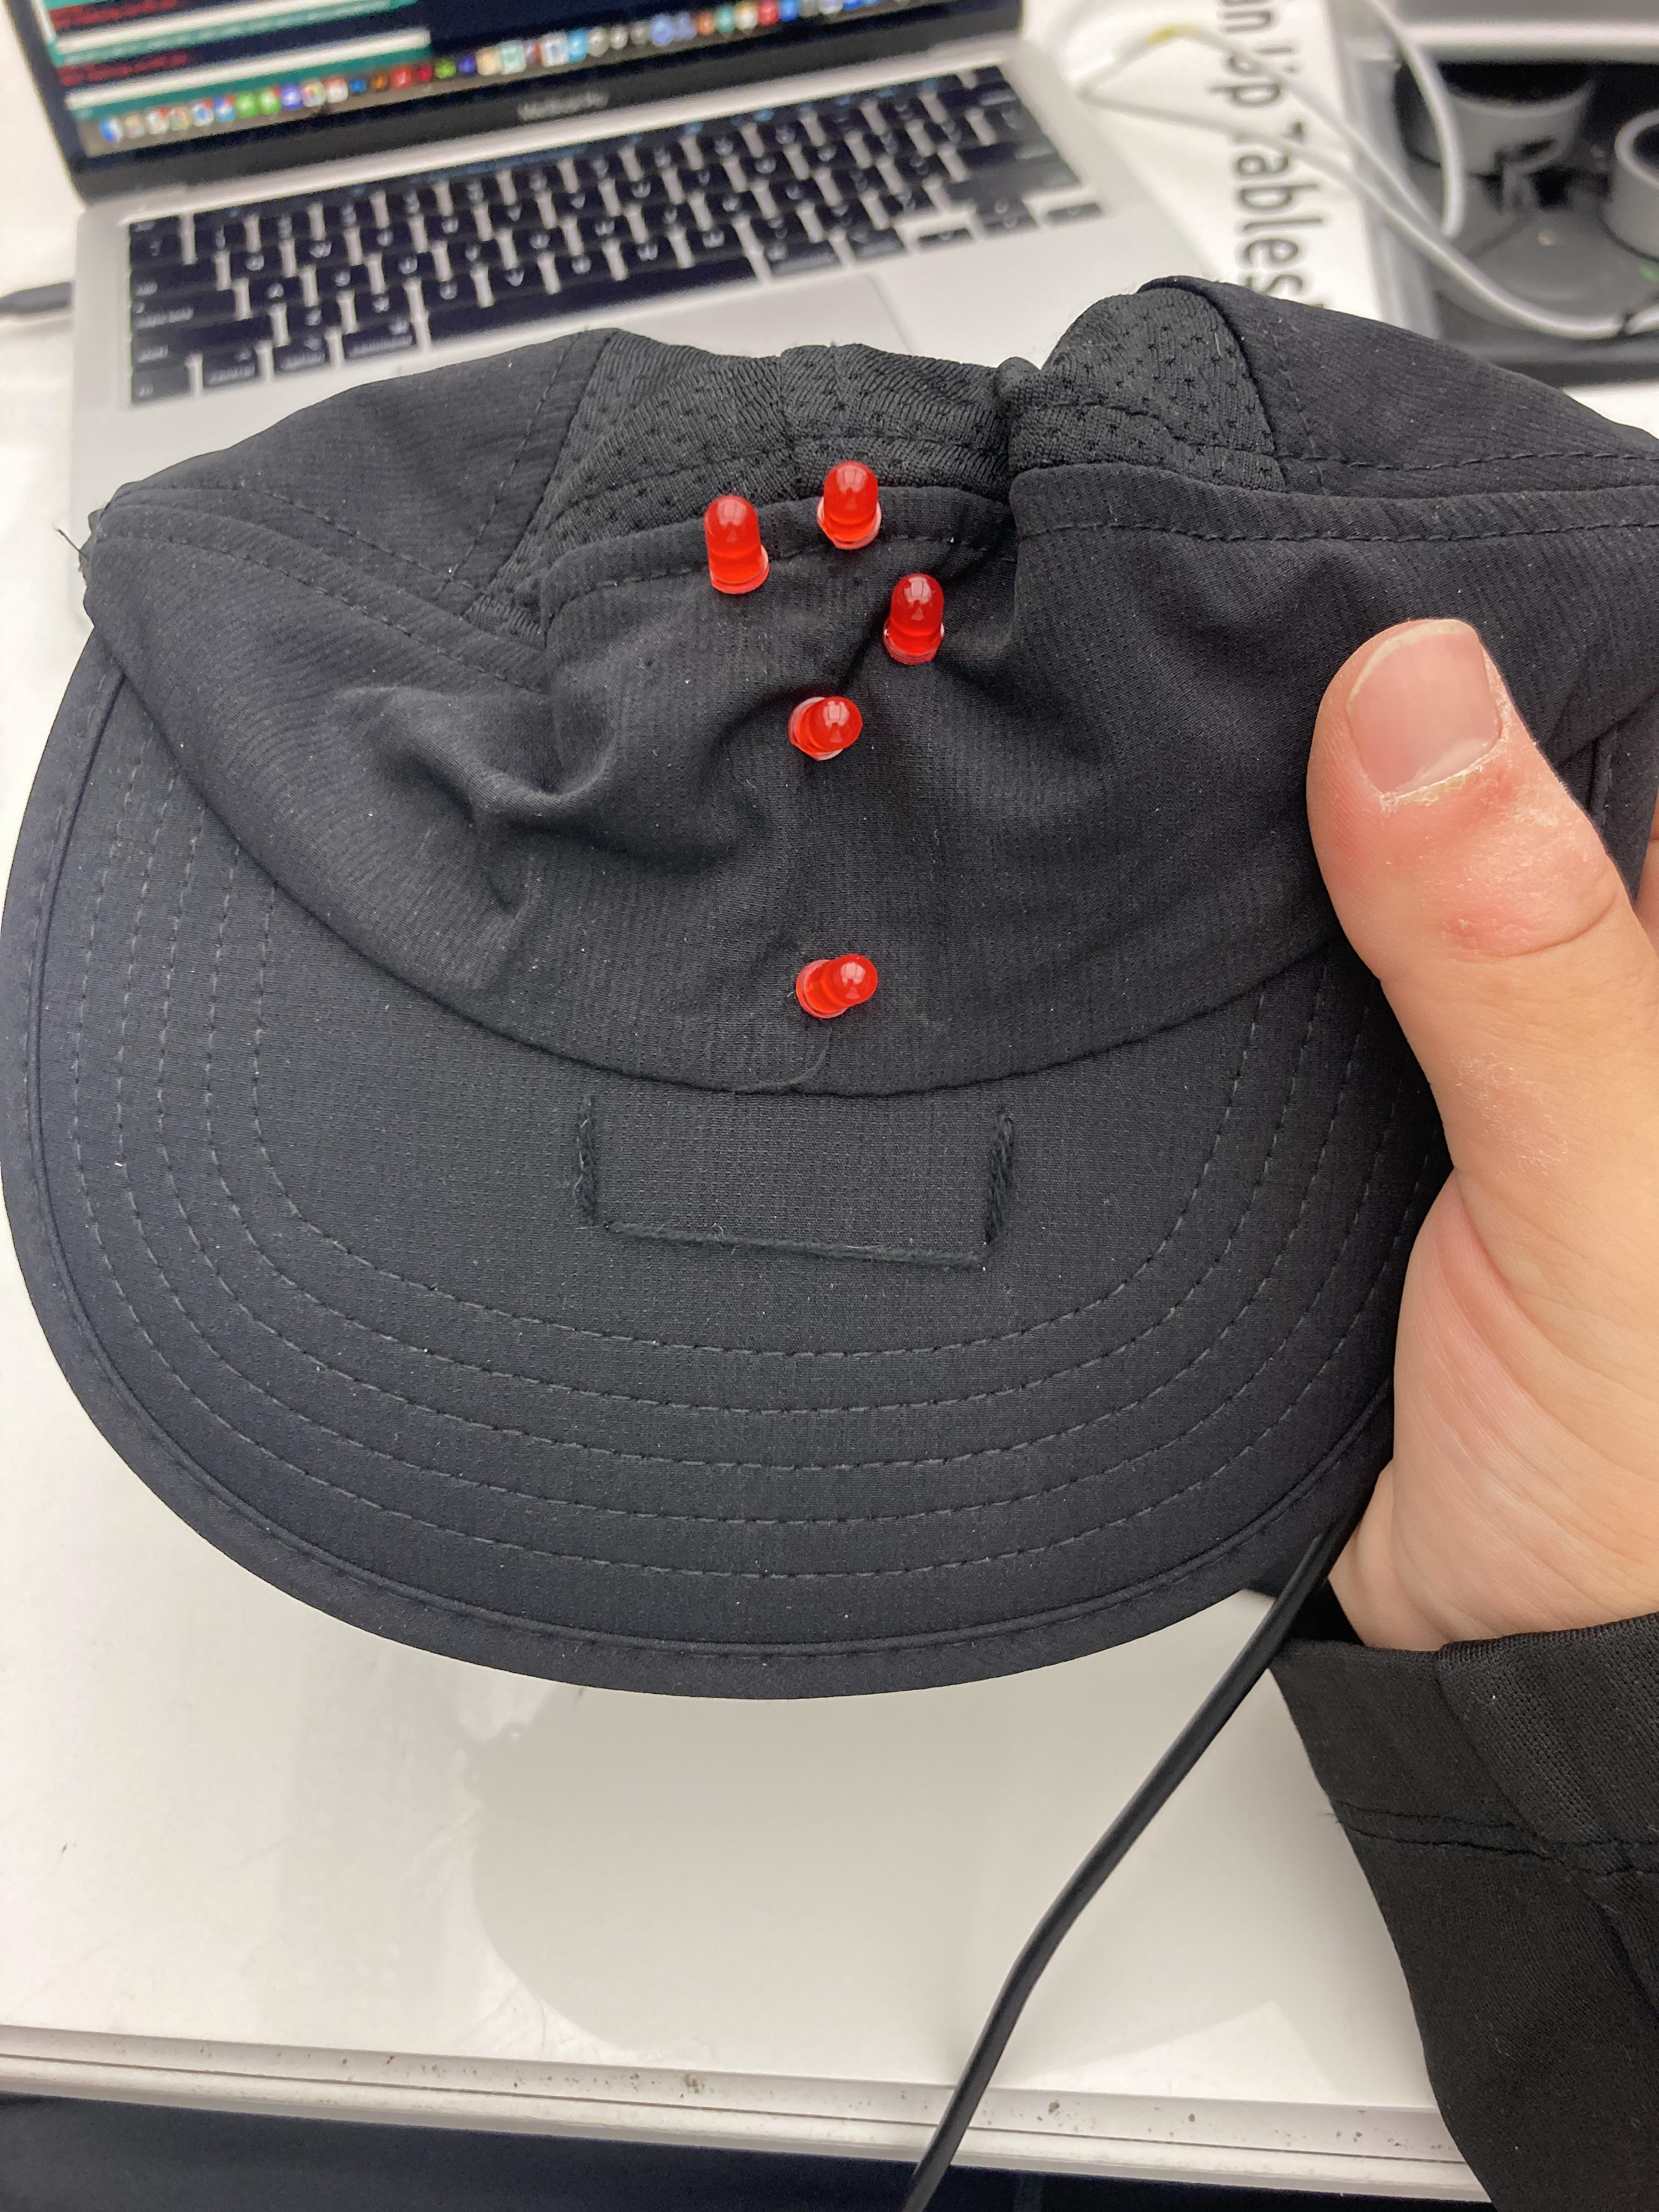
Revised Model
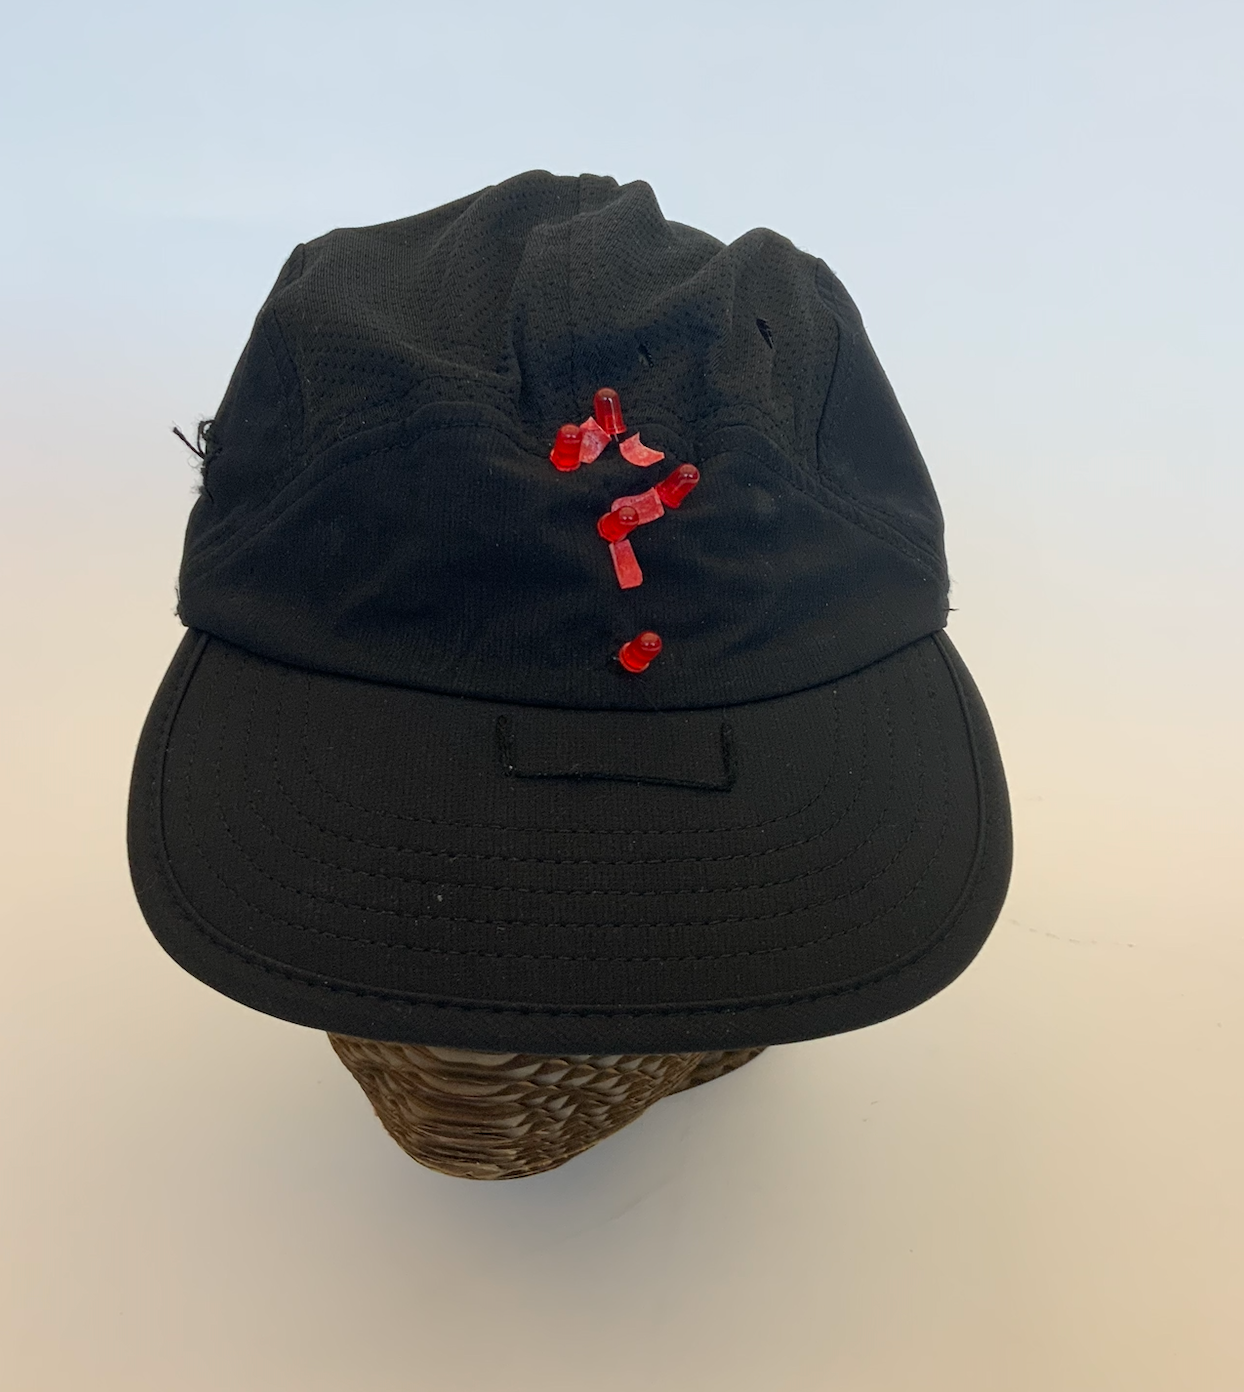
Presentation